

So I finally got fed up with the cracked leather wheel in my car. It was starting to come apart and looking at it every time I drove was killing me.
I won a "driven" black suede steering wheel at a car show raffle ( momo 6 hole pattern ) and feeling / seeing how nice that one was compared to my old one pushed me over the edge.
So, I decided to try my hand at working with leather...what's the worst that can happen?
After talking with the local leather place ( yes there is one right down the street..who knew? )
Leather is fairly expensive and I'm not so keen on throwing money away on a crazy idea...
With some free leather sourced from a very expensive theater recliner that had an armrest damaged by the local wildlife ( indoor cats ) I decided to give it a go.
Here are the results:
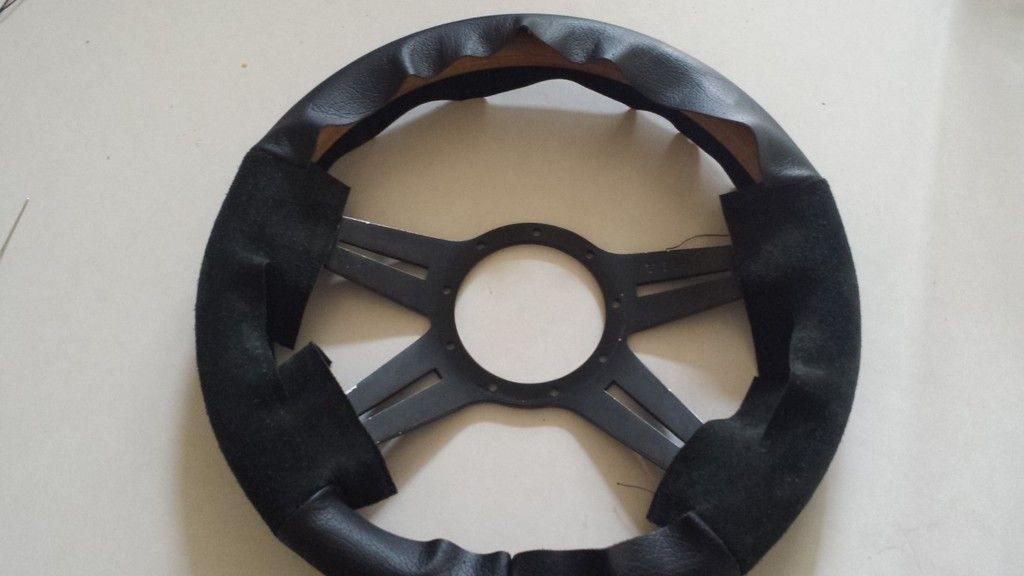
The old cover is on the right and the new cover being test fit on the left ( I didn't really notice how faded the old one was until I got it next to the new stuff. )
Second test fit, wider strips used at the spokes to match the old leather. Strips were sown together to an overall length of 41.25 inches ( outer wheel circumference was something like 45 inches ) leather stretches a lot.
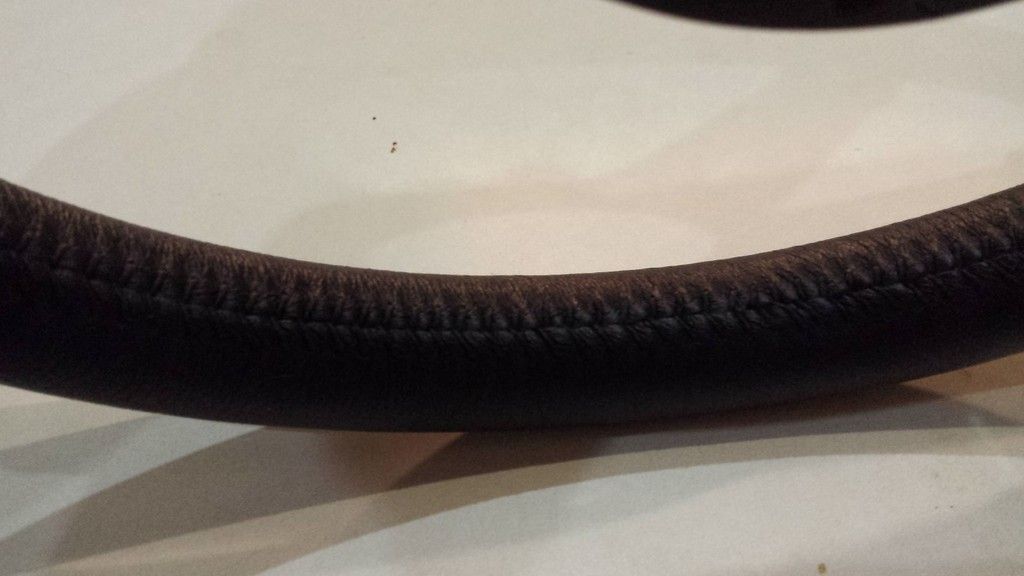
Here is what the stitching looks like on the newly finished wheel. The old stitching appeared to be baseball stitch ( or shoestring pattern ). I used the same technique and it came together quite well.
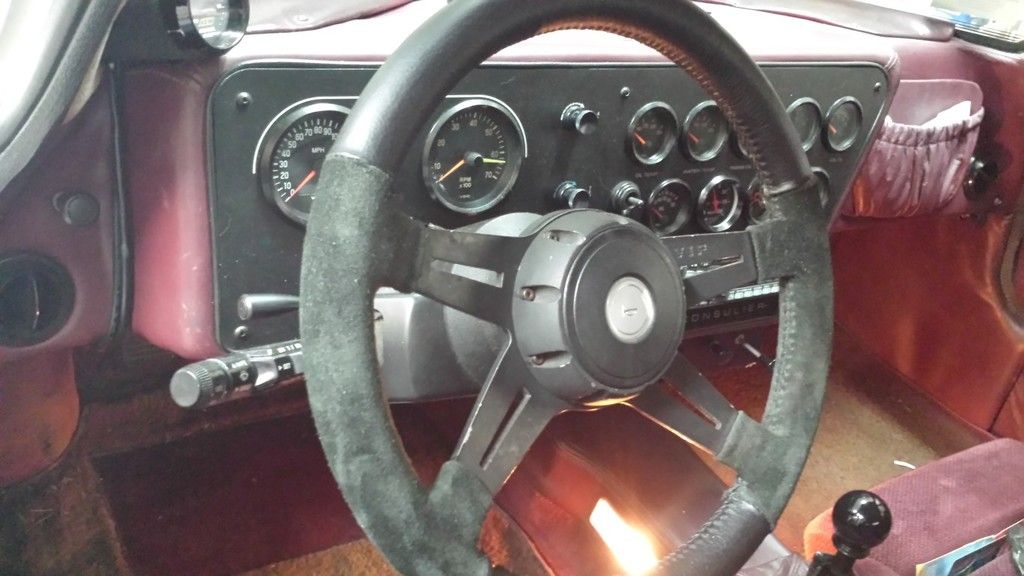
Here is the completed wheel. Keep in mind this is my first attempt at recovering a steering wheel and first time working with leather. I started this project to learn something new.
Suede on the sides are a nice touch and make it super grippy where it's needed the most. The top and bottom are standard leather and it's smooth enough not to be grabbed by my leg and pull on the wheel
I suppose this isn't Consulier specific but here's what I learned along the way:
The old piece is a ROUGH template, it's spent so much time there that it was only good to get me the rough shape and width.
The length is entirely dependent on what leather you use and how much it stretches.
Final stitching ( by hand ) works best with pre-punched holes and the stitch pattern looks best when they are consistent from side to side ( line up the holes on where the cover comes together )
Total cost: ~$15 ( leather working needles and heavy thread ) and 5-6 hrs
What I'd do different next time?
Make some sort of jig to punch the holes, a brad and hammer takes too long.
Not stab myself with the needle 50 times
Maybe add a little red stripe at the top like a racing wheel, maybe not...
New cover looks 10x better than the old one has some added flair, feels super nice and I get to keep the original wheel.


 Reply With Quote