


Welcome to my build thread! I have had a handful of fairly quick turbo dodges over the years, starting with Clifford (my record breaking 1989 Plymouth Voyager 12.26@108.97) then I have my Hoopty (1986 Dodge Omni GLH-Turbo 10.53@129.98 on 12.8 psi of boost) I have used this forum in search for answers several times and have found lots of information about how to move forward with my projects. Most of the time, I have taken ideas from this thread and that thread and made everything work for my particular situation. There havent been many all-inclusive build threads about how to build a fast turbo dodge. It's almost like the people that build fast TD's are holding back secrets that they don't want anyone else to know.
Well, this thread is going to document, with pretty good detail, exactly what I am going to do to make this van fast. I'm not sure how fast it will end up, but I am confident it will at least be deep in the 12's. I will update this thread consistently as I modify this van and you are welcome to voice your opinion on how we can change things to make it faster. I want this thread to be a resource for all of us to use in the future.
I will take pictures of everything I do and explain just how difficult it was and what you would need to do to create essentially the same van if you want. I will take it to the dyno and get some numbers after a certain amount of work gets done. So please, kick back and enjoy the fruits of my/our labor as we take this stock 1990 Dodge Caravan and make it scream!
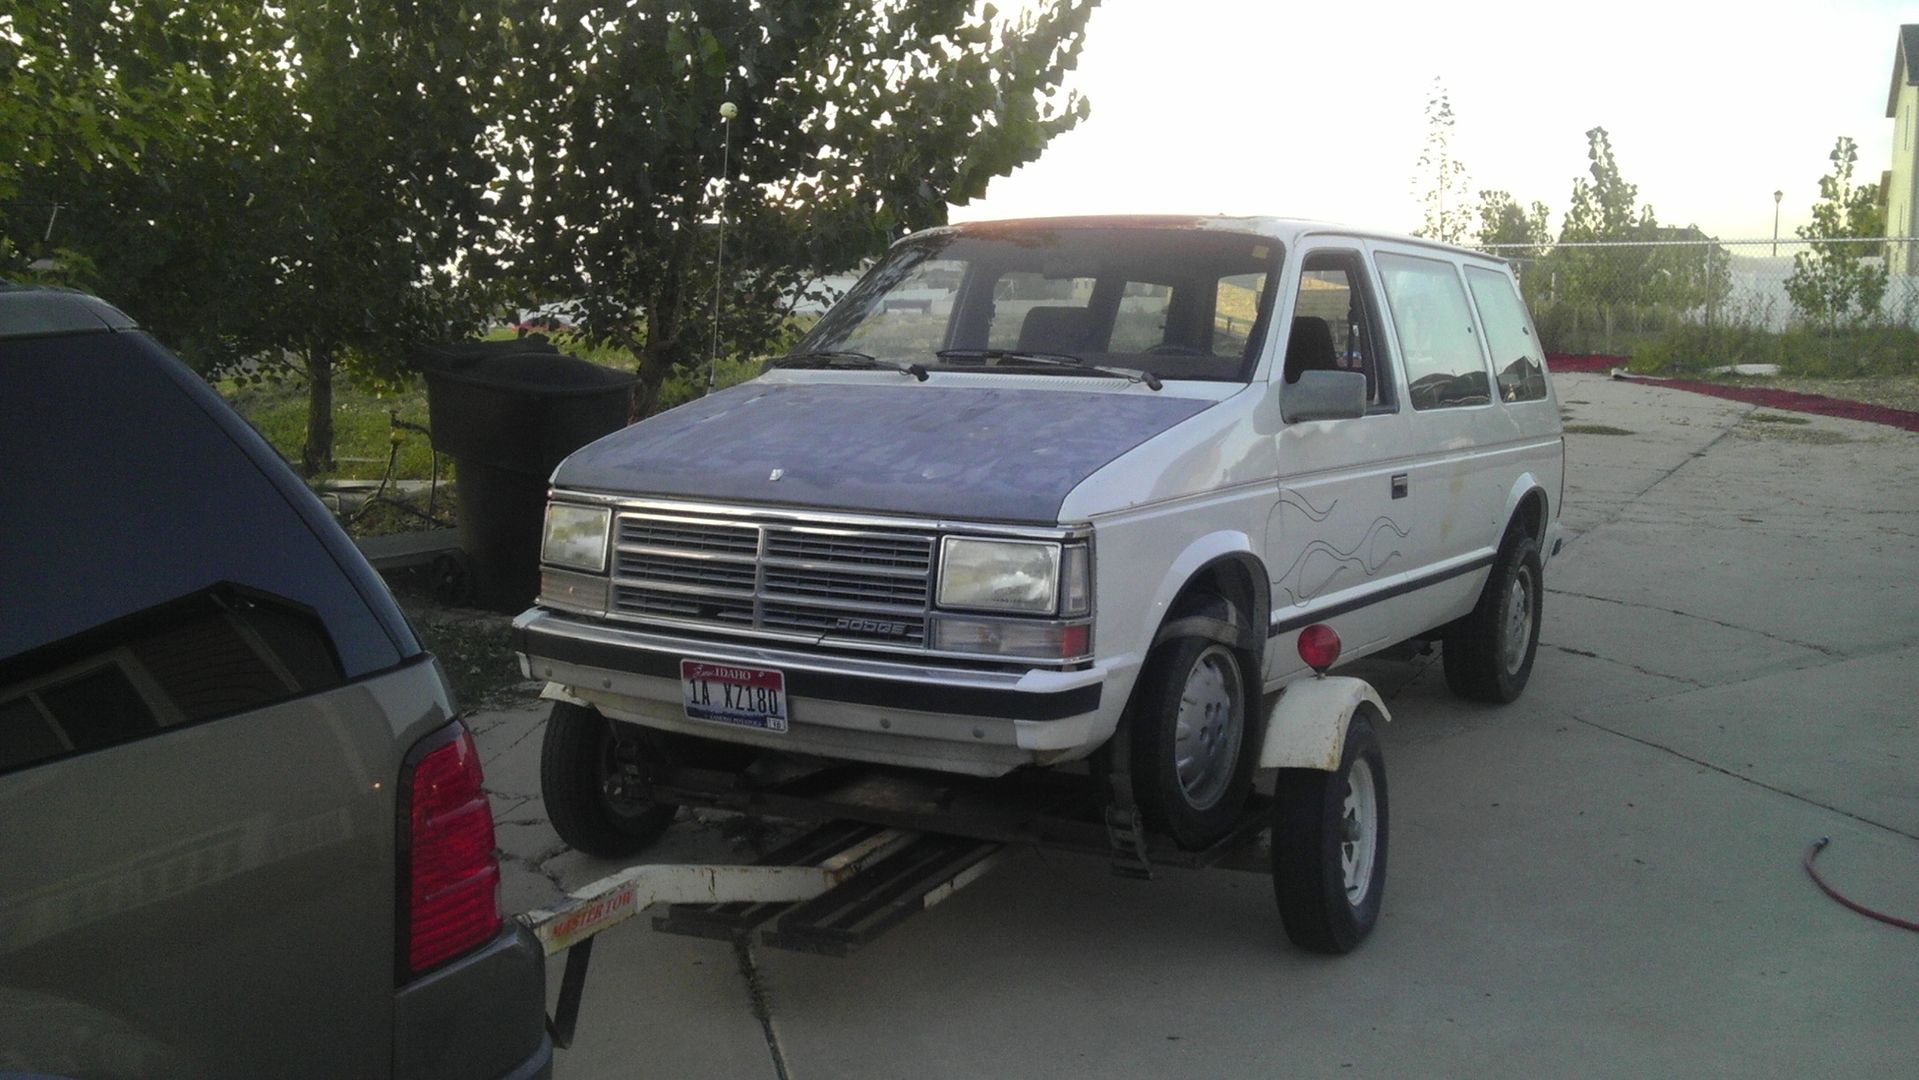
This is what it looked like when I took the trip north to pick it up. it wasn't running due to a broken camshaft. The guy I bought it from claimed it ran 11's at one point (which is a lie) It has 3 inch exhaust with some odd looking muffler. Stock suspension and the interior has the carpet ripped out and currently has only the front and rear most seat installed. To my dismay, I replaced the head in the van only to find out that he bottom end has a rod knock and the turbo seals were blown, so I yanked the motor out and took it to the machine shop to get it fixed up.
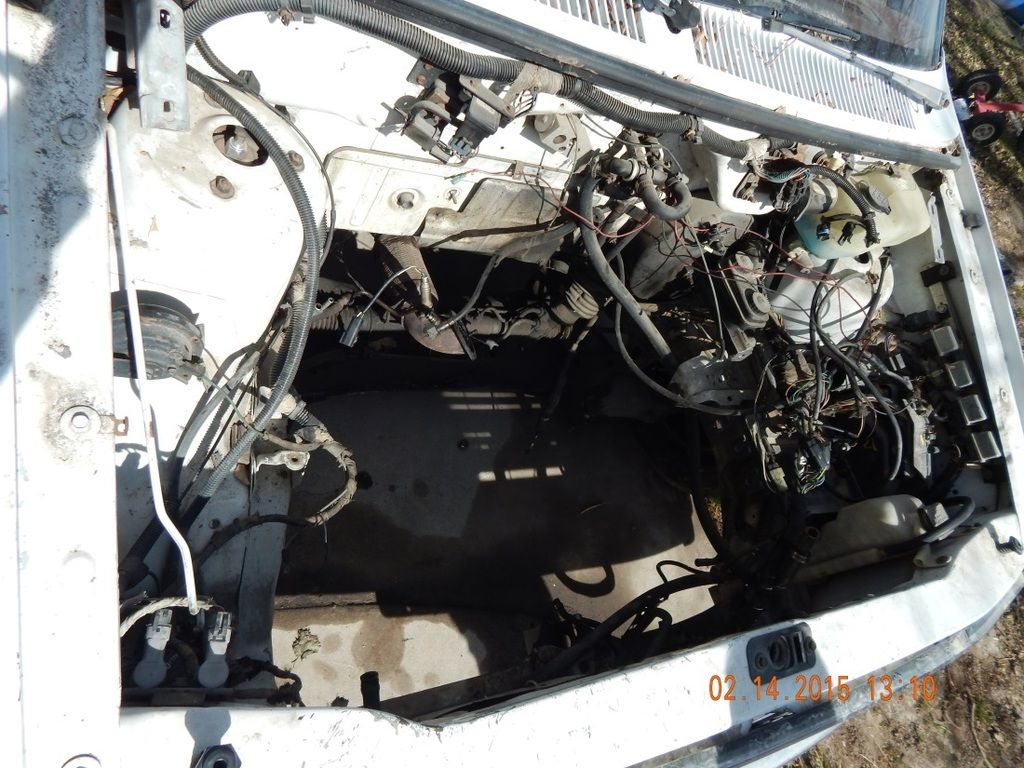
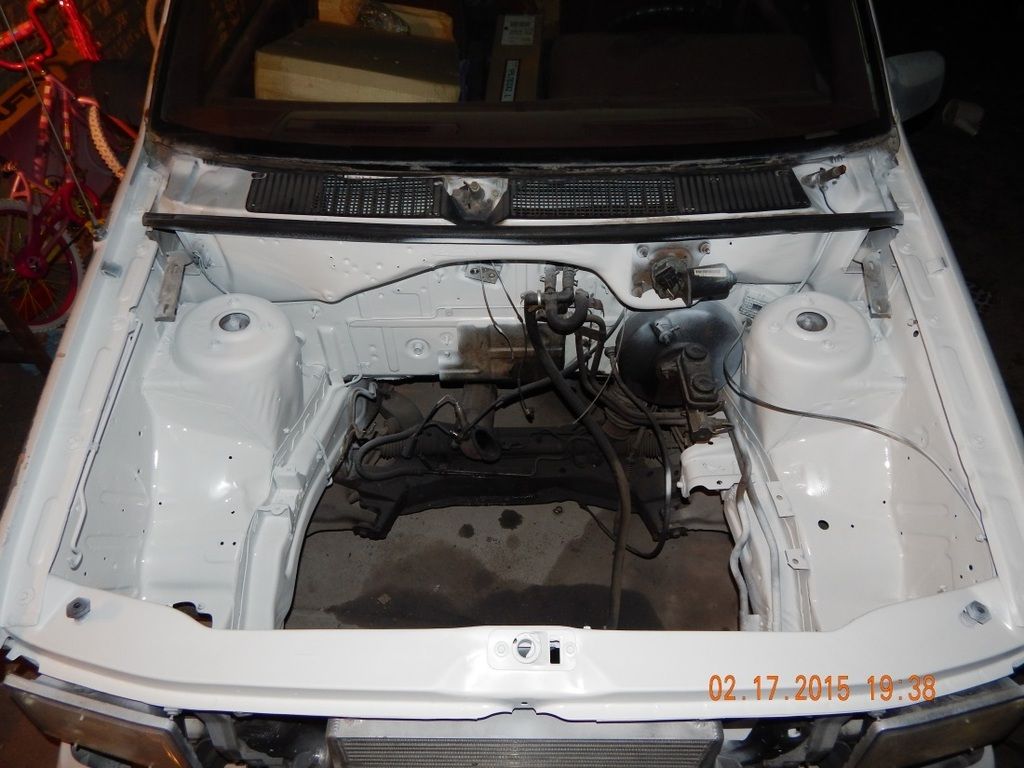
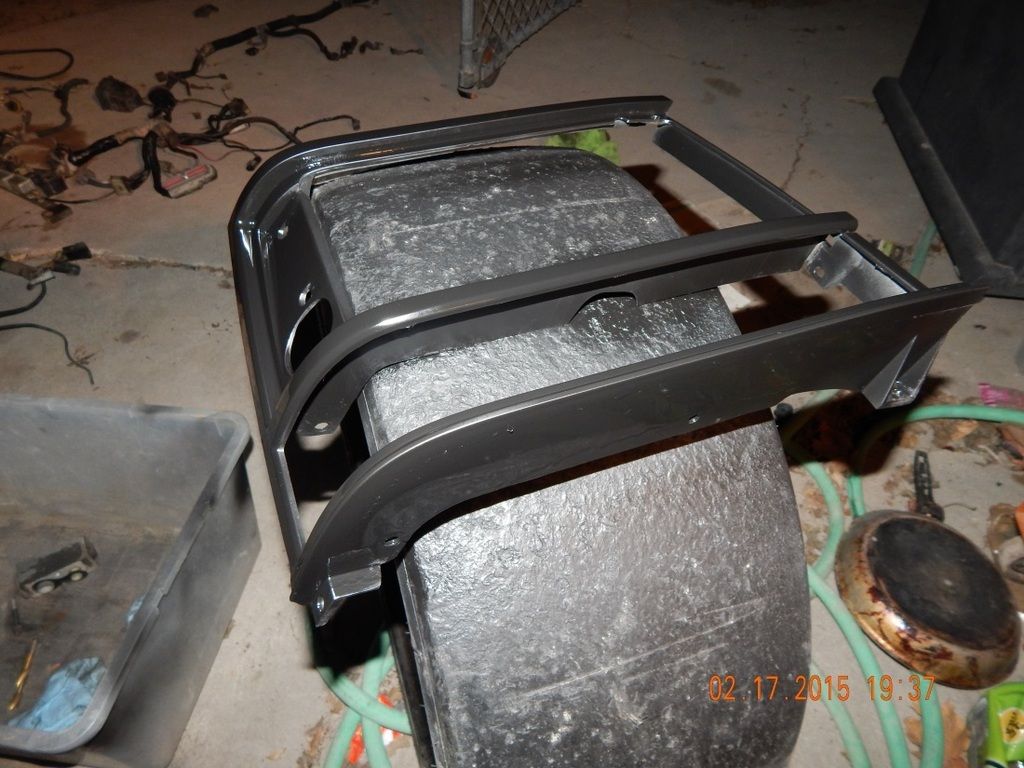
Now, since we are all familiar with these engines and engine bays, you all know how cluttered and filthy they are after sitting for a few years. This one is no different. I wanted to see what we have to deal with before we get started so I assessed the current bay and as you can see in these pictures, it was bad.. SO many aftermarket wires strung about aimlessly.
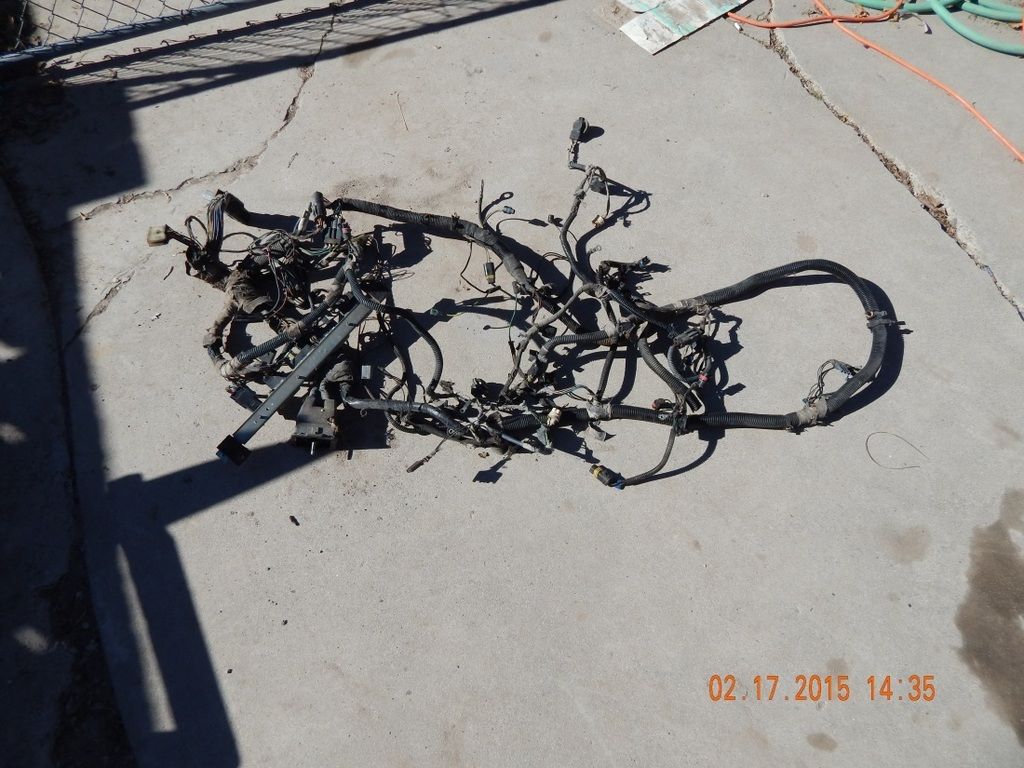
I'm not sure what the previous owner had in mind when he started adding wires to the van, but man, it was bad. So, let's strip all of the wires out shall we?
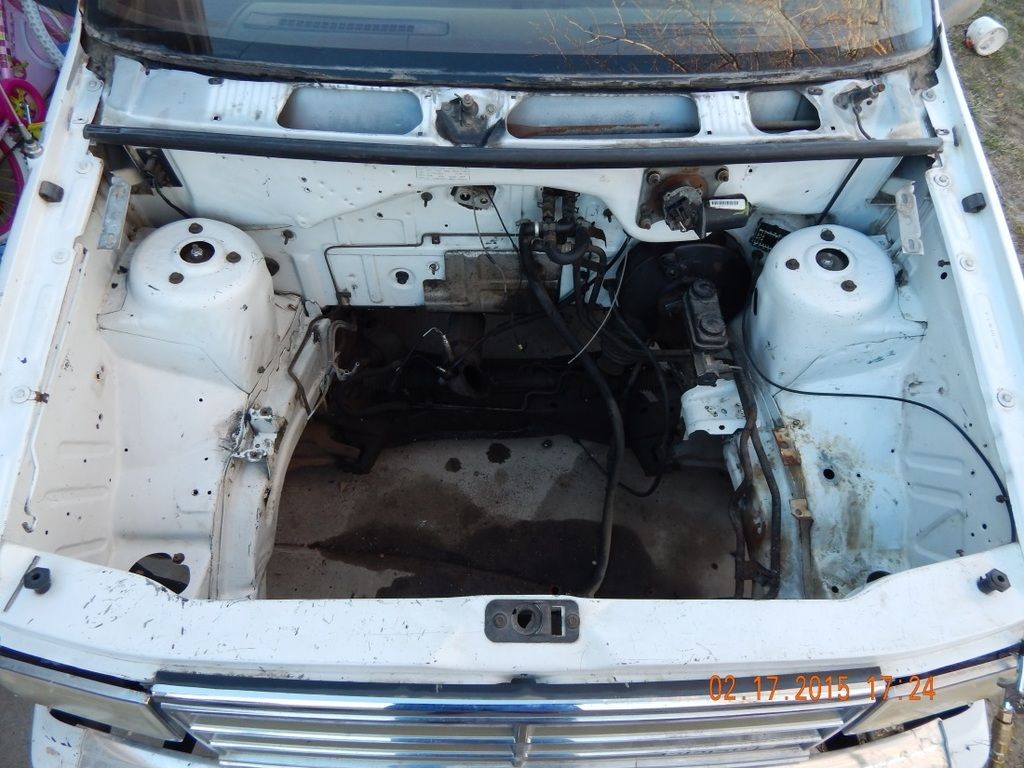
There we go, much better, now we have a clean slate for the very minor wire tuck I have in mind for this project.
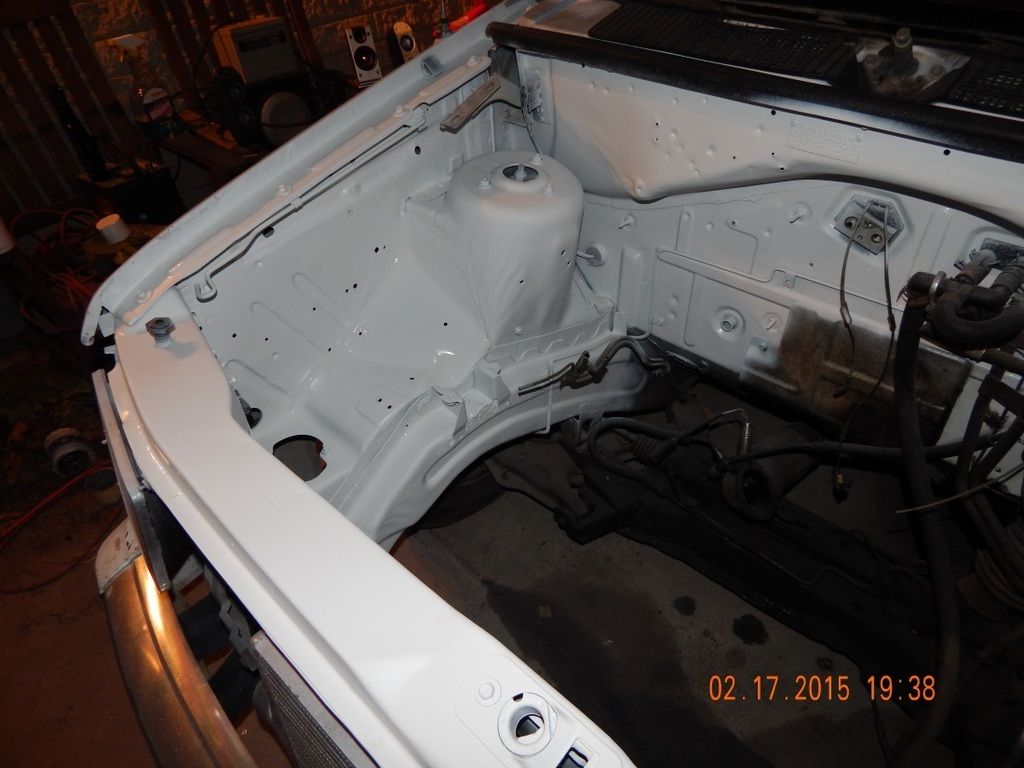
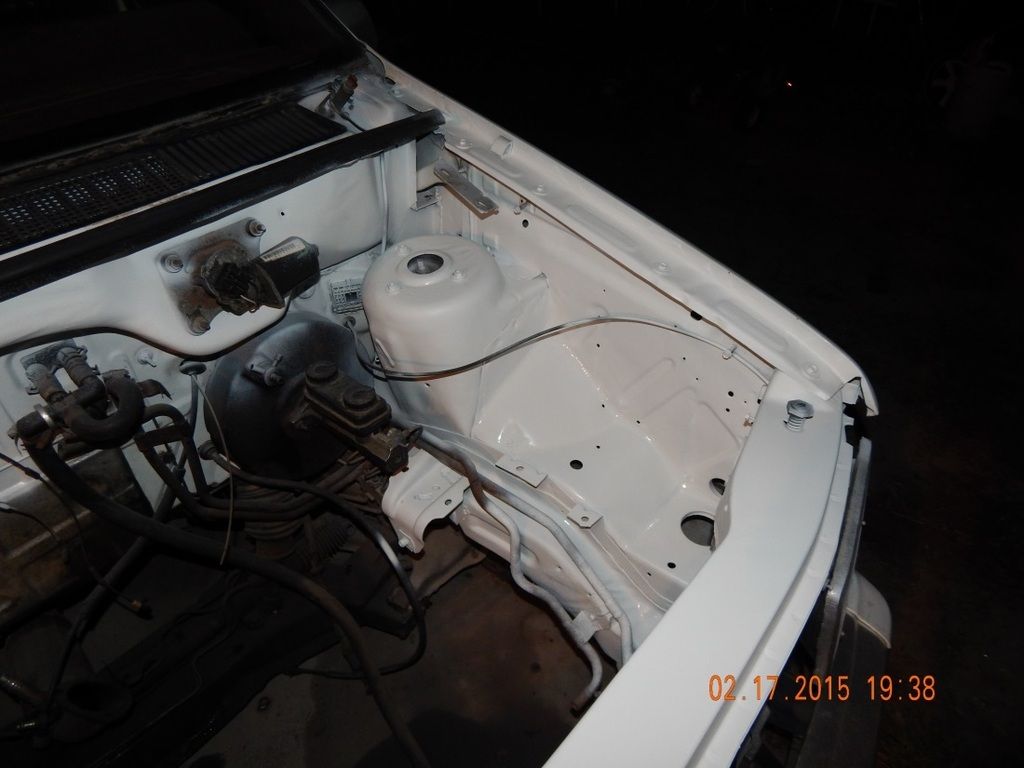
It's amazing how much better the engine bay looks when it's deprived of all of that cluster of wiring that Mopar decided they wanted to cram in there. Now that we have all of those pesky wires out of the way and the bay wiped down, let's throw on a coat of paint. I used flat white Rustoleum and it turned out pretty good, dont you think?
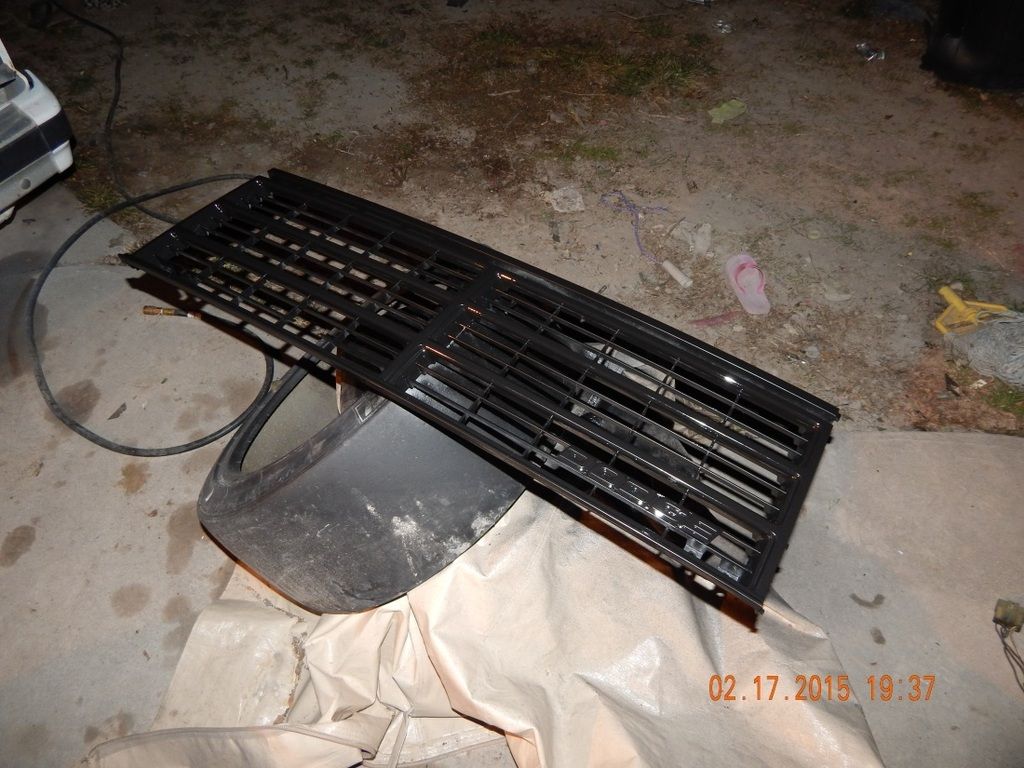
Since the engine bay was cleaned up, I wanted to clean up and paint the grill and headlight bezels too. You can see the progress here.
I'm torn whether or not to black out the bumpers as well, this is something we will address a little later on.
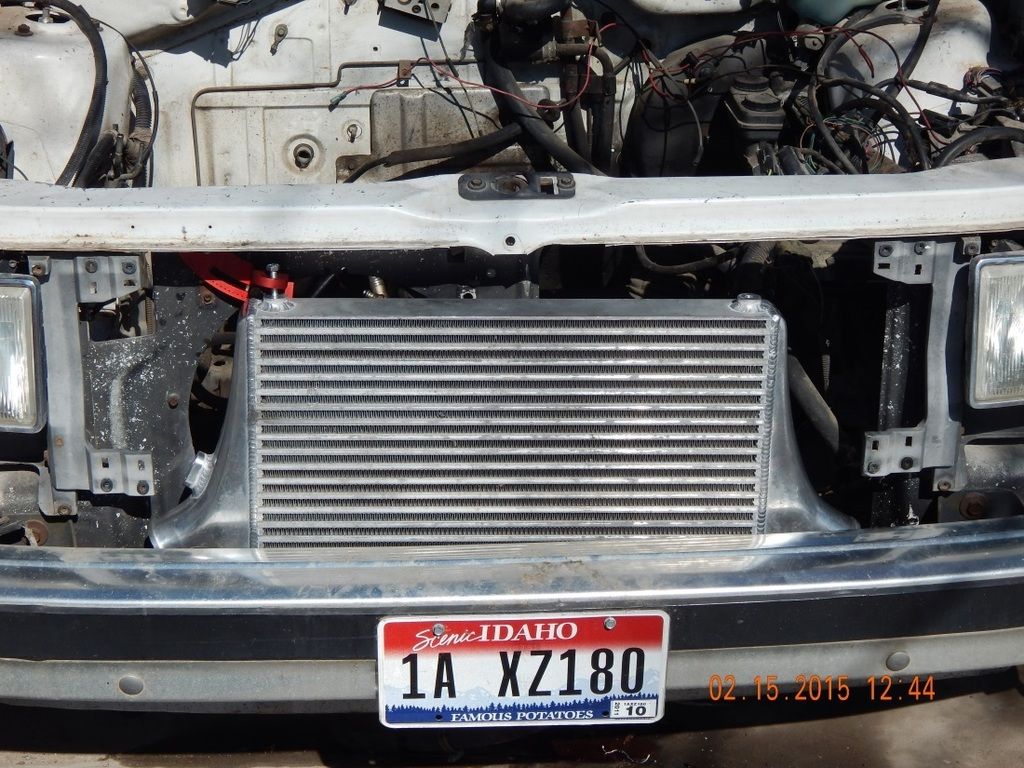
I had an extra intercooler lying around that came off of my Focus ST project and wanted to see if I could make it fit on this van. It fits great! Now I am trying to figure out intercooler piping!
This intercooler has 2 tabs (one of each side) on the bottom of it that were perfect for bolting it down to the factory radiator support. I'm not 100% convinced I want to use this intercooler, I might go another route, but for now, it's mocked up for potential use.
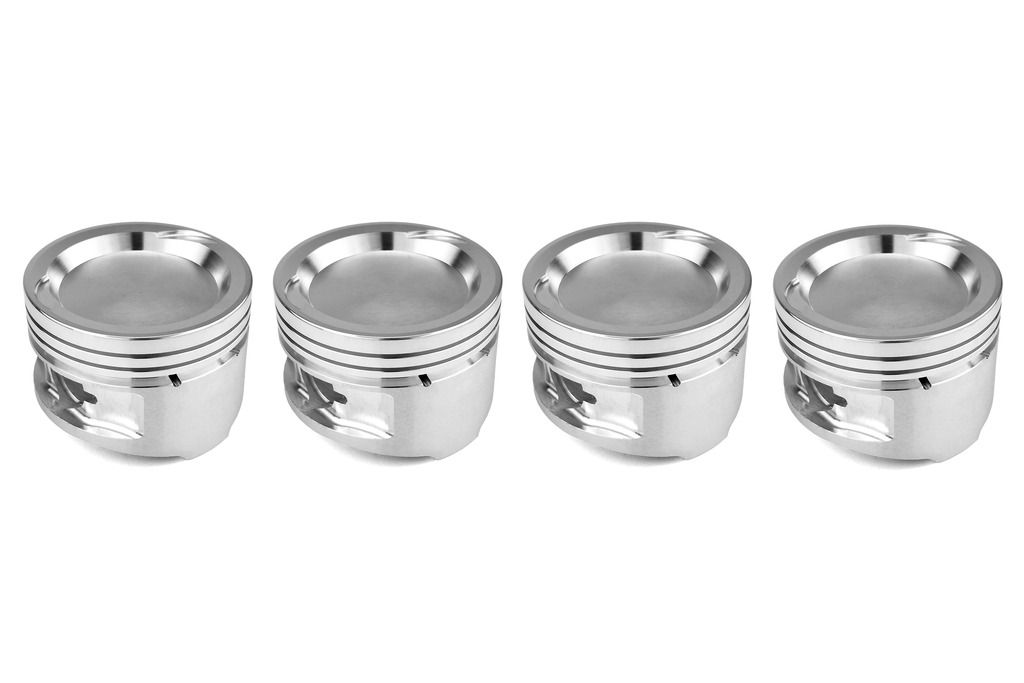
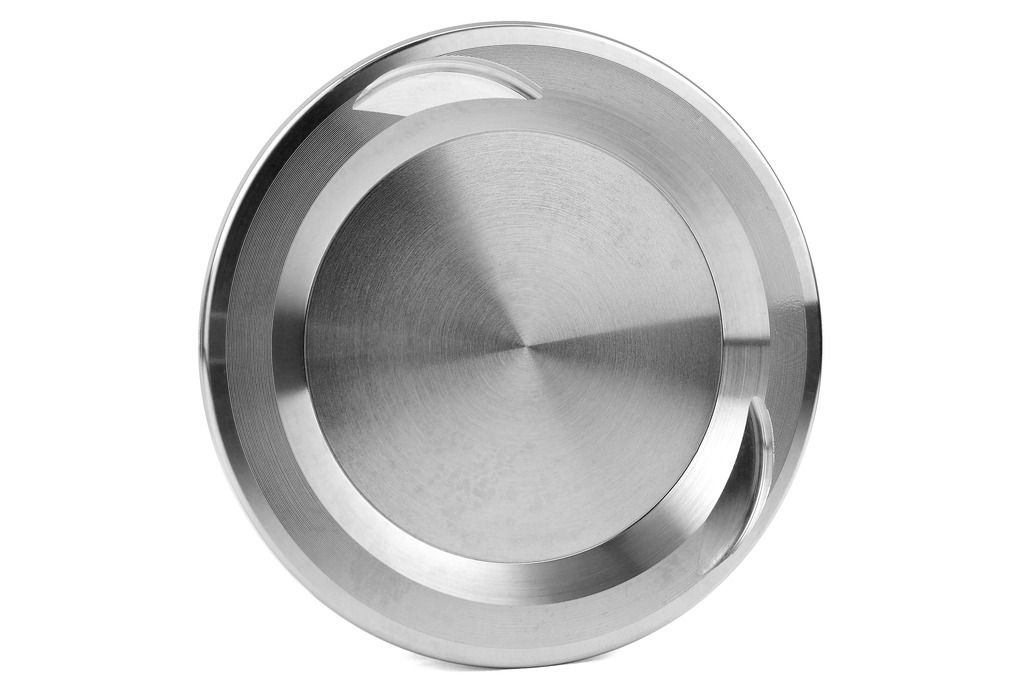
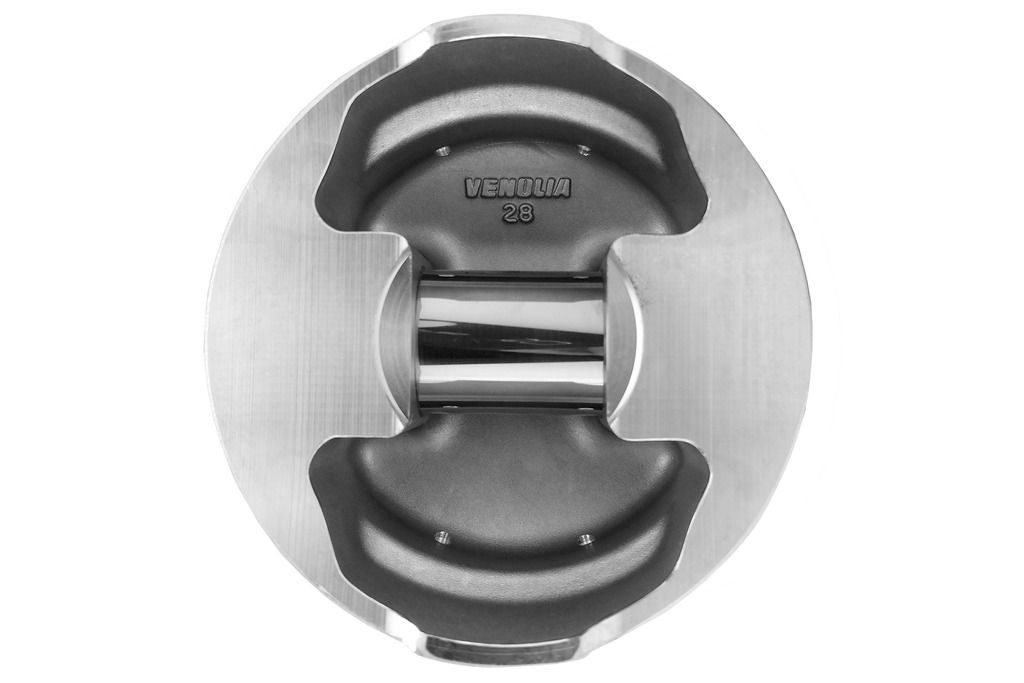
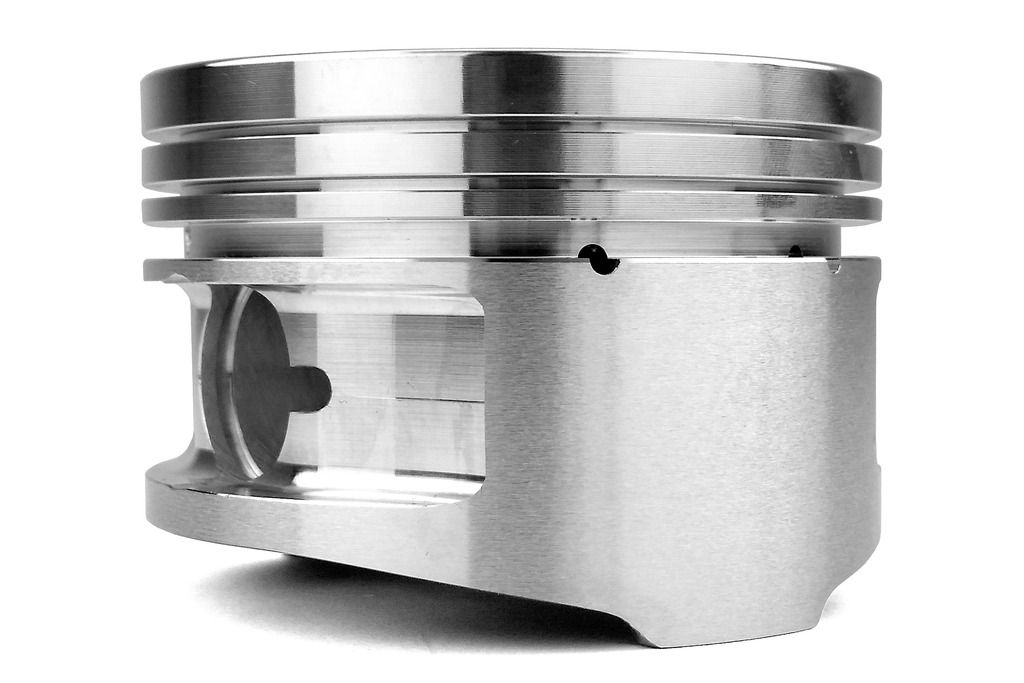
I received my pistons from Cindy at FWD Performance to install in the short block that was sitting at the machine shop waiting for them, now they are being installed. Once I get the short block back,. I'll update with some more information in this thread. Here are some pictures of the pistons before I brought them to the machine shop. (click the images for more information about them, or click HERE)
I have had great luck with Venolia pistons in the past, so I stuck with them this time around. They are .040 over due to the block I had being a bit haggard. Check back frequently for updates, I'll be in here posting anything new that I do to the van.
Hope this helps
Corby

 Reply With Quote

 12.57@104 :O)


 Like innovation
  So I'm in on this thread
 ) But I'll follow your progress


