


This showed up not to long ago. The stock rad wouldn't keep up on the highway anymore and tried overheating on me so had to pony up for this thing. It came well packaged with no issues and fragile written on every side lol.
First things first. Get a good tap and die set and do every hole your gonna use. New hardware is also a plus and makes the install nice. I painted my rad silver and stripped about 5 layers of paint off my ic and sprayed it silver as well. For as many body styles as this thing is designed to fit this didn't go bad at all install wise.
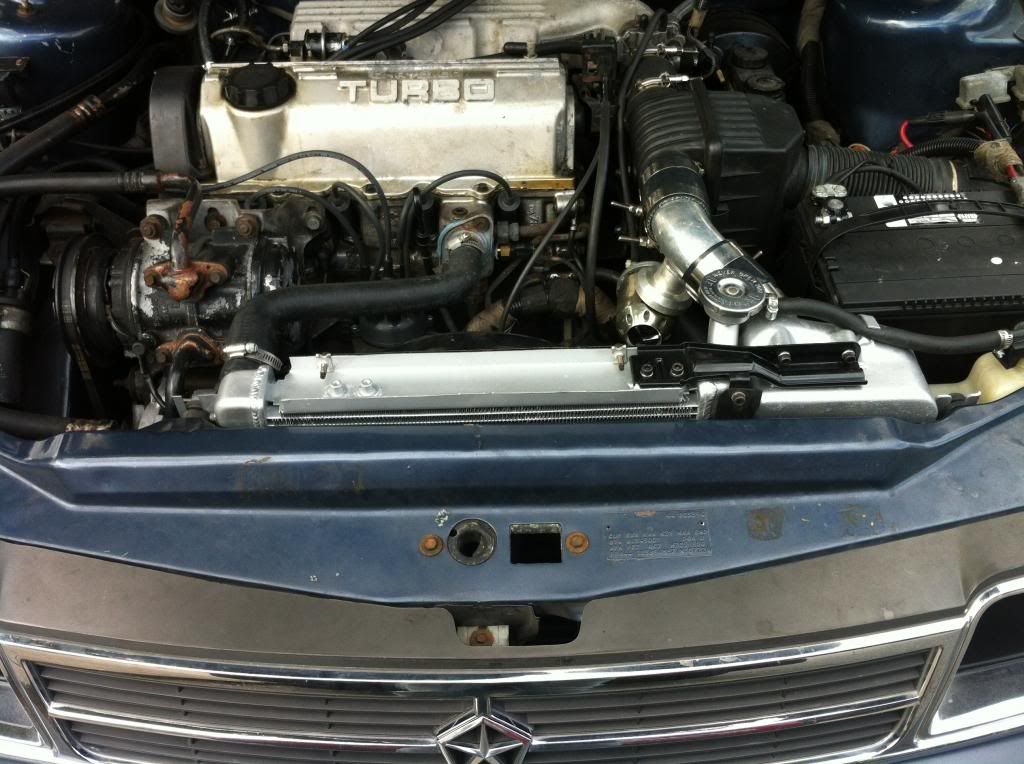
Here is it all bolted together.
i used all my old brackets. I don't like the look of the flatstock and with a little work the stock ones fit great.
ill start with the top intercooler mount. The top mounts welded to the rad were not parallel so I had to put a nut in it and messauge it with a hammer no big deal.
The mount on the bottom will need a new a hole because the spacing is different. You can use the supplied brackets to drill the hole since the spacing on them is correct.
there will need to be some grinding done on the mount to clear and not rub around the weld bead area.
as far as the mounts go measure your holes on the front crossmember before assembleing so you kno where you need to be in my case it was pert near 23 1/2"
Next comes the grinding of the fan shroud. This rad actually seems to be a little shorter width wise so the stock fan shroud needs some attention. A grinder and some paint will do the job.
next is the only part that had me asking myself what were they thinking. It doesn't fit right in any way shape or form. Basically get the torch out heat it up and bend it the whole other way around. If you install the rad with the bracket the way it came from tu my rad set about an inch further away from the rad support from one side to another. Also elongate the slot where it bolts to the rad it sits to High and you can't get the rubber grommet and bolt to work.


 Reply With Quote


