Page 6 of 6 FirstFirst ... 23456
Results 101 to 108 of 108

Thread: Project Log: 1987 GLHS #0103

  1. #101
    Supporting Member Turbo Mopar Contributor supercrackerbox's Avatar
    Join Date
    Dec 2005
    Location
    Firth, Nebraska
    Posts
    5,022

    Re: Project Log: 1987 GLHS #0103

    Since my last update, I've gotten the turbo parts back from the ceramic coaters, but that's all I've gotten done. I've been picking away at it as time allows, but I don't see the car running this summer. This time of year, I'm pretty busy with the yard and garden. But I did change job positions at the plant, which will allow me a lot more time in the shop.

    We've decided to take our little girl to Colorado for our summer vacation this year, so we won't be making it to SDAC. In fact, I don't believe any of the Nebraska crew will be making it this year. But we'll make up for it next year I hope.

  2. #102
    Supporting Member Turbo Mopar Contributor supercrackerbox's Avatar
    Join Date
    Dec 2005
    Location
    Firth, Nebraska
    Posts
    5,022

    Re: Project Log: 1987 GLHS #0103

    Alright, time to reboot this thing again. While I did take nearly a year off, I have been picking at this a bit for the last couple months. Quick update, the shortblock and the ported turbo ended up going into the Charger, so I could steal that car's S60 and forged pistons for this car. So there will be a new engine built which I think will be better suited to the GLHS's goals. But that's down the road a ways. Right now, though, I'm finally getting off my butt and attempting the body work.

  3. #103
    Supporting Member Turbo Mopar Contributor supercrackerbox's Avatar
    Join Date
    Dec 2005
    Location
    Firth, Nebraska
    Posts
    5,022

    Re: Project Log: 1987 GLHS #0103

    Now as I said very early in this thread, there's not a straight panel on this car, save for maybe the roof- although until I get the paint stripped, I can't confirm that. Both doors and fenders will be replaced, so the hardest part will be the quarter panels. This car is very rust free for a Nebraska car, so that still means there has been some patching required. Let's start with that.


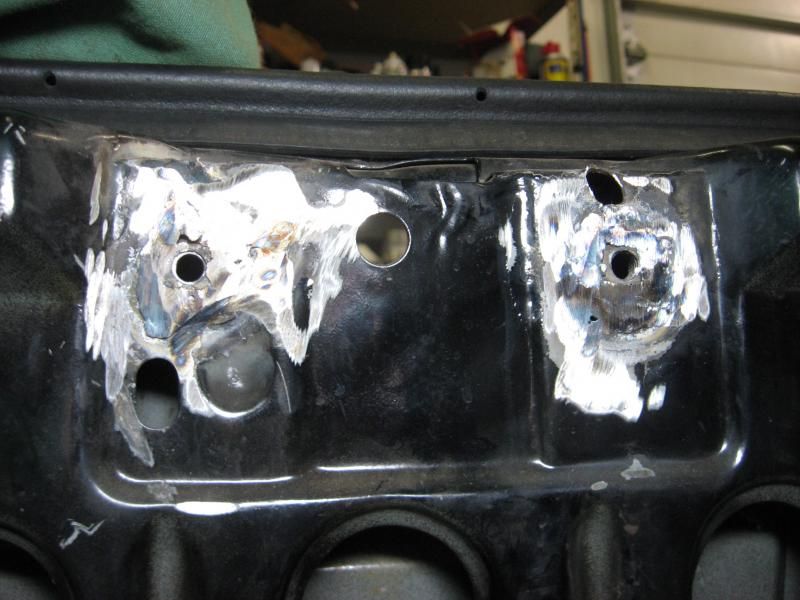
    When I finished stripping everything out of the hatch area, I discovered some very shoddy repairs had happened behind the latching mechanism. More precisely, I could see the grinding marks, so I pulled the latch off to find out why. Best I can tell, at some point the mounting nuts had broken loose from the body, and someone welded them back in, and poorly. There were lots of holes, lots of wire sticks between this panel and the tail panel, and the welds were then dressed with a cutoff wheel and called good. I patched the holes, dressed the welds down, and this will be painted along with the rest of the inner hatch in the next couple weeks.

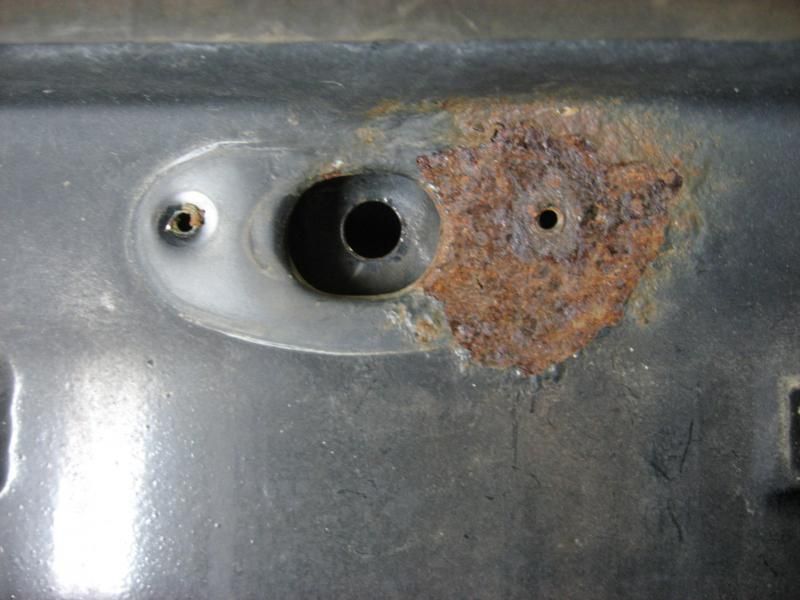
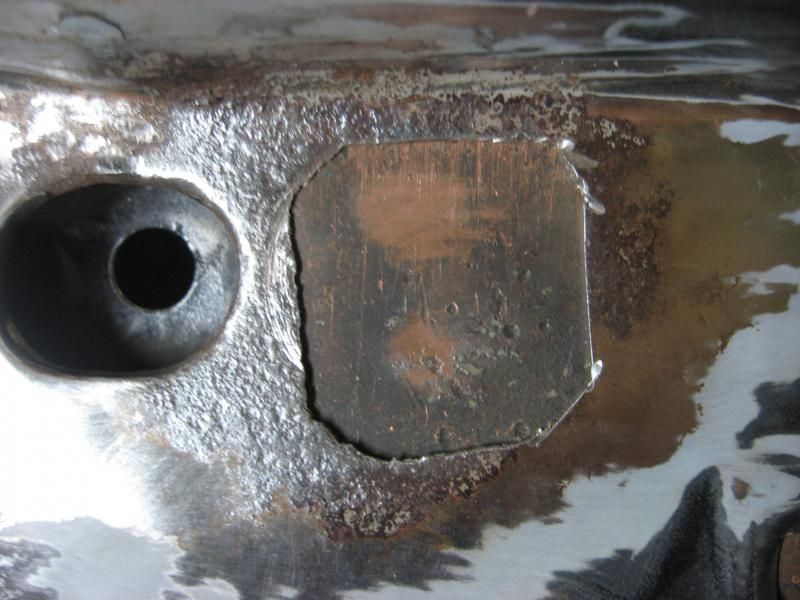
    Now a side effect of this welding job was that they did nothing to protect the paint on the outside tail panel. So years down the road, I have a rust spot to contend with:


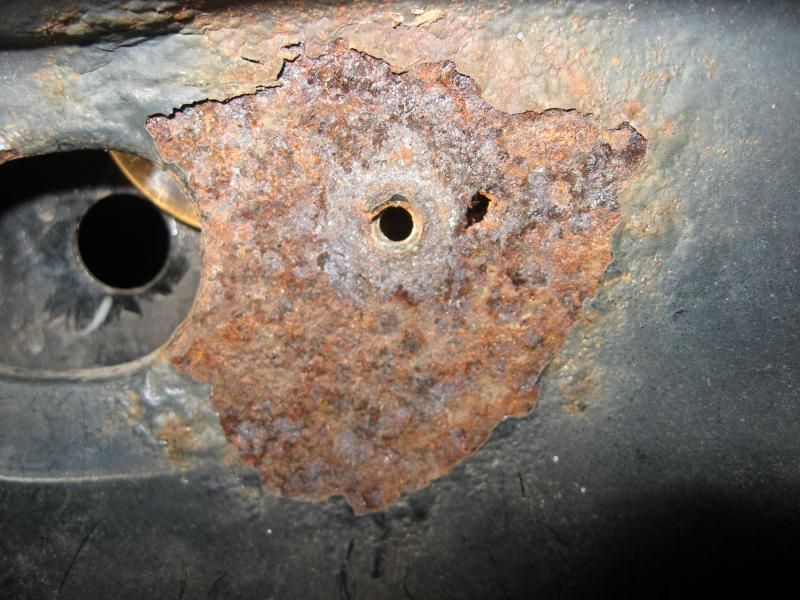
    I determined the limits of the metal that was too far gone to grind clean and treat chemically, and cut the section out. In this picture, I've got a copper plate clamped to the back side of the panel to support the patch, protect the panel behind it, and to act as a heat sink so I can weld and grind faster without warping the panel.


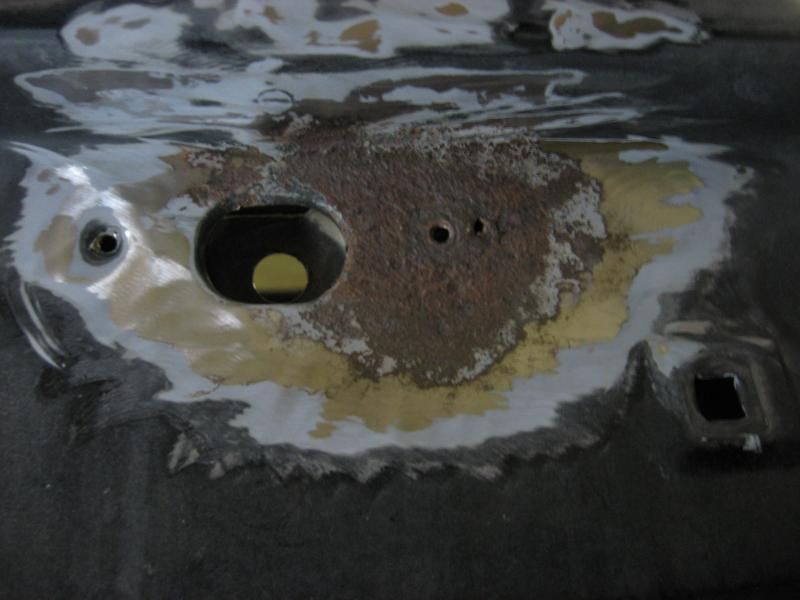
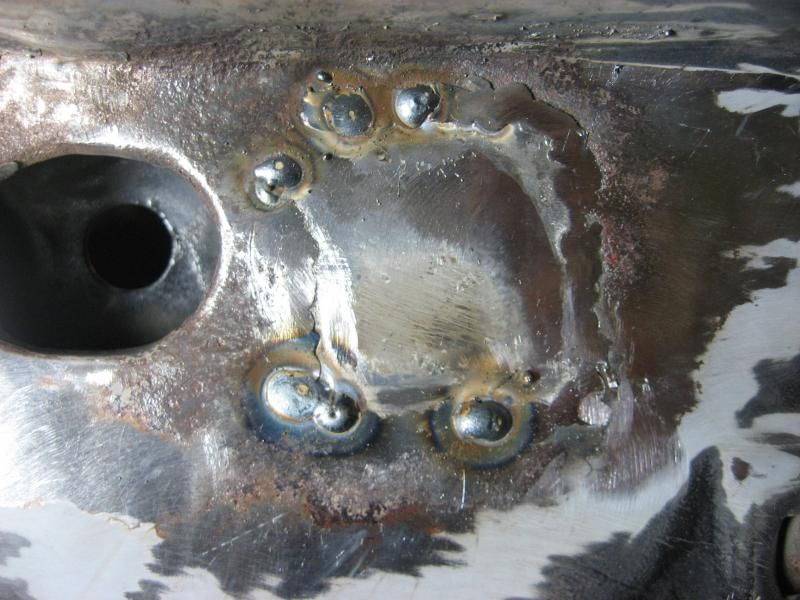
    The first pass is done and dressed, and I've re-welded some pinholes that I missed:


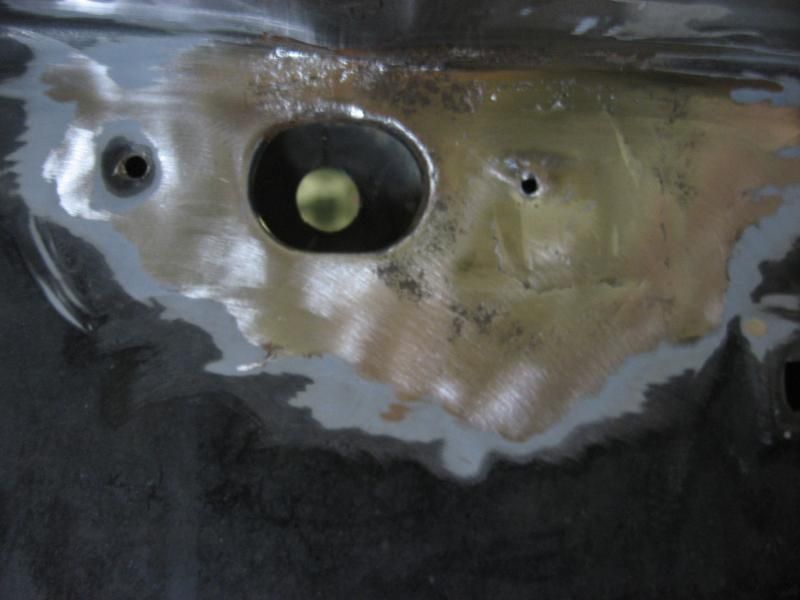
    The welding is finished, and the new bolt hole for the lamp housing has been dimpled and drilled. I've since treated this area with Eastwood's brush-on Rust Converter to chemically treat the remaining rust around this area, along with a handful of other minor spots across the rest of the tail panel and bumper area.


  4. #104
    Supporting Member Turbo Mopar Contributor supercrackerbox's Avatar
    Join Date
    Dec 2005
    Location
    Firth, Nebraska
    Posts
    5,022

    Re: Project Log: 1987 GLHS #0103

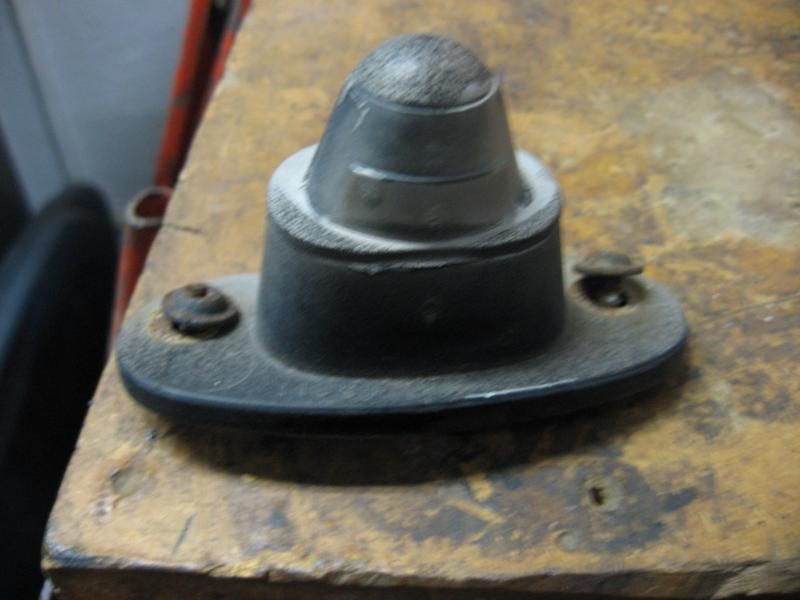
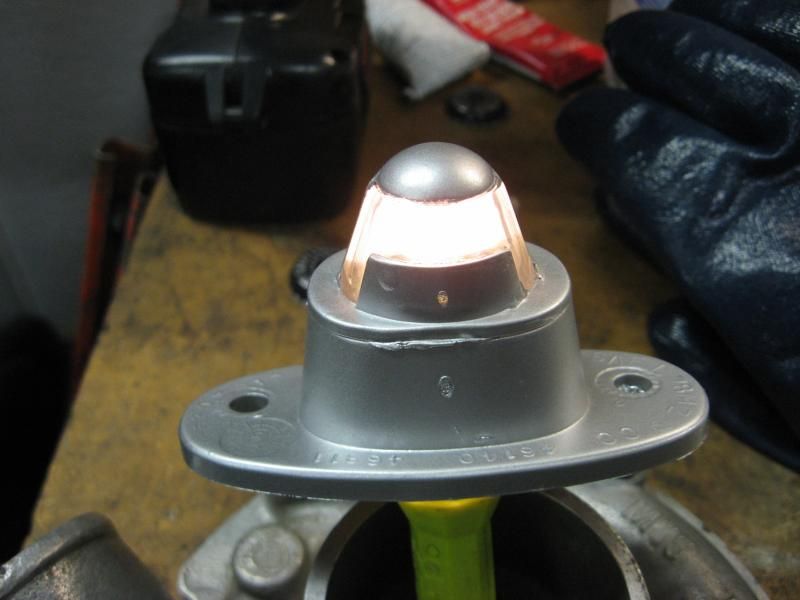
    While I was focusing on this particular area, I also took the time to restore the license plate lamp itself.

    This is how it looked when it came off the car- a very oxidized lens and a lot of overspray from when the previous owners rattle canned the car prior to selling it.


    I simply polished the lens like any other plastic, cleaned it thoroughly, and repainted it.


    It's not quite the correct argent silver that it should be, but it's close enough for a piece that nobody will ever look at anyway.

  5. #105
    Supporting Member Turbo Mopar Contributor supercrackerbox's Avatar
    Join Date
    Dec 2005
    Location
    Firth, Nebraska
    Posts
    5,022

    Re: Project Log: 1987 GLHS #0103

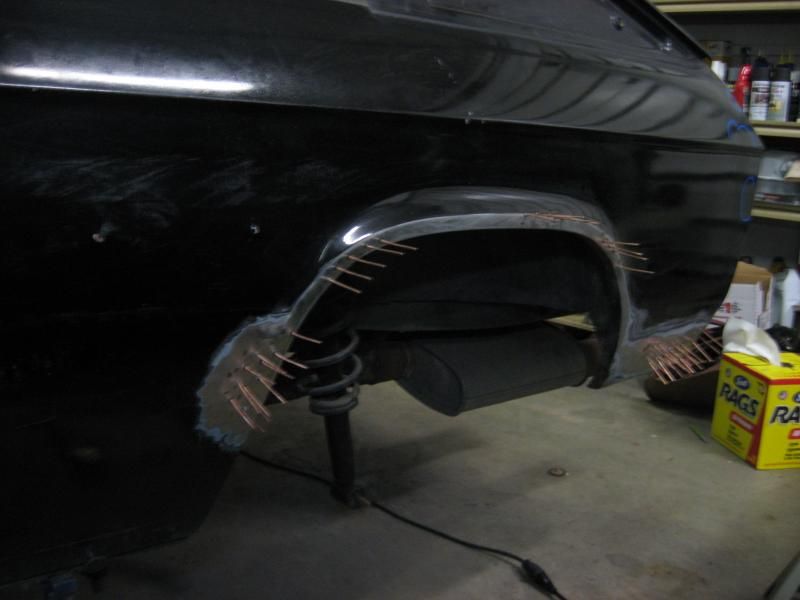
    Now I have a very bad case of ADHD when it comes to this project, so I'll be bouncing all over the place with this thread. A big portion of that is I've never done any real body work before, so I'm doing everything very slowly. I'm doing a little bit at a time, and then walking away for a few days, and coming back to it with a fresh mind. I've actually been pounding away on both quarters for a while, but the left side had more damage by far. Oddly, this is the only picture I have to show for it:


    You really can't see how bad the damage really was, but this is the side of the car that was sideswiped by a careless teenager over a decade ago. While I can actually reach the back side of most of it with the dollies, the pulling pins were needed where I couldn't fully reach, and where the dents were simply too compounded for simple hammer and dolly work. This panel has come a very long way, but I won't know it's done until I can pull the Charger back into the shop and compare them with some profile gauges. The rear lower section of the wheel arch will actually have to be cut off and patched, to about where the pins start. The body plug on the inner panel behind the quarter skin rusted out, which allowed a lot of dirt to build up inside the quarter panel, causing it to rust out. L-bodies aren't exactly known for being weather tight.

    I was able to track down NOS body plugs from the dealership luckily. I'll cover those when I address the underside of the car in the coming months.

    Edit: The very first picture in this thread will give you a good indication of the damage to the car.
    Last edited by supercrackerbox; 11-03-2014 at 01:04 AM.

  6. #106
    turbo addict
    Join Date
    Dec 2011
    Location
    Hemet,CA
    Posts
    1,636

    Re: Project Log: 1987 GLHS #0103

    very nice..wish I knew how to do body work..

  7. #107
    Supporting Member Turbo Mopar Contributor supercrackerbox's Avatar
    Join Date
    Dec 2005
    Location
    Firth, Nebraska
    Posts
    5,022

    Re: Project Log: 1987 GLHS #0103

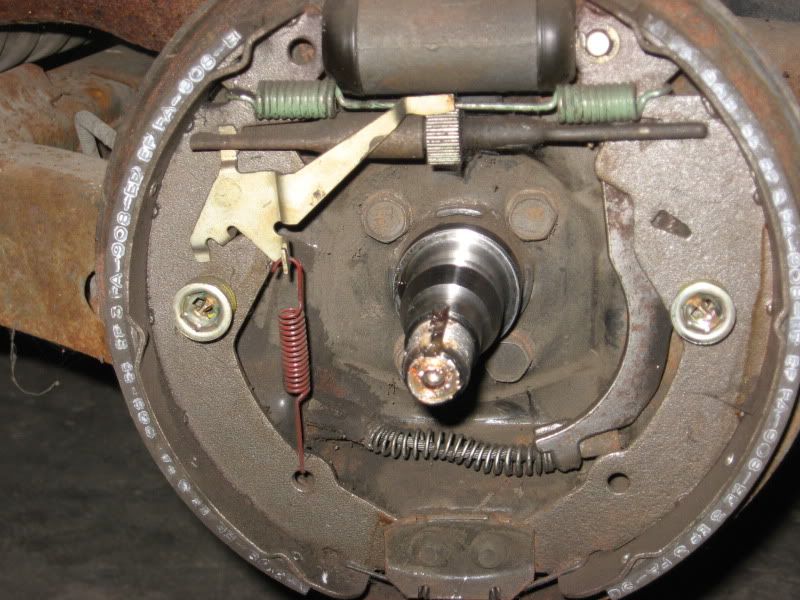
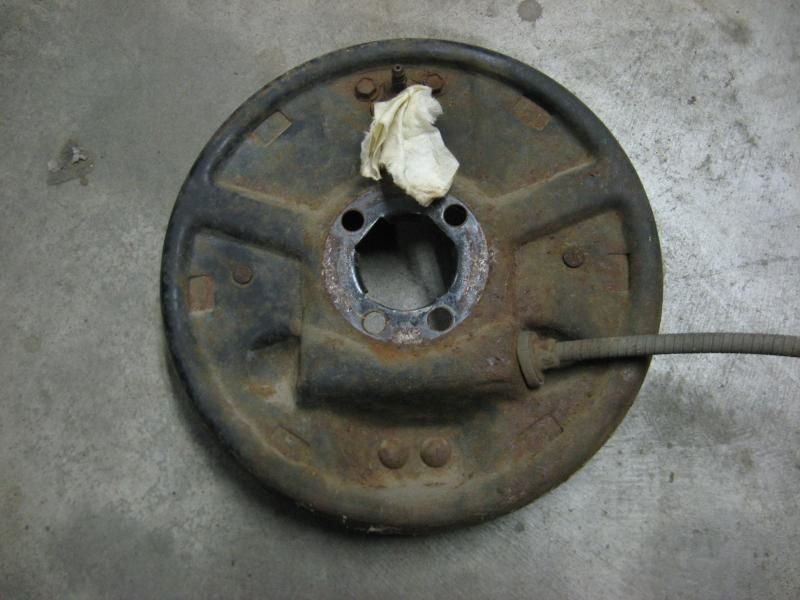
    The last thing I'll cover tonight will be the rear axle area. The rear bumper and axle have been removed and disassembled. The crash bar, impact absorbers, and the rear axle itself will be taken in to be media blasted and powder coated. The brakes and backing plates however, I've decided to tackle myself. Everything brake-wise was actually in excellent condition when I started this project, and I saw no need to replace any of the hardware, bearings, or shoes. So when I stripped them from the axle, I simply reassembled the hubs on the loose spindles and set them aside. I left the shoes, cylinders, and hardware assembled on the backing plates and simply masked them off while I repainted the back sides of the plates.


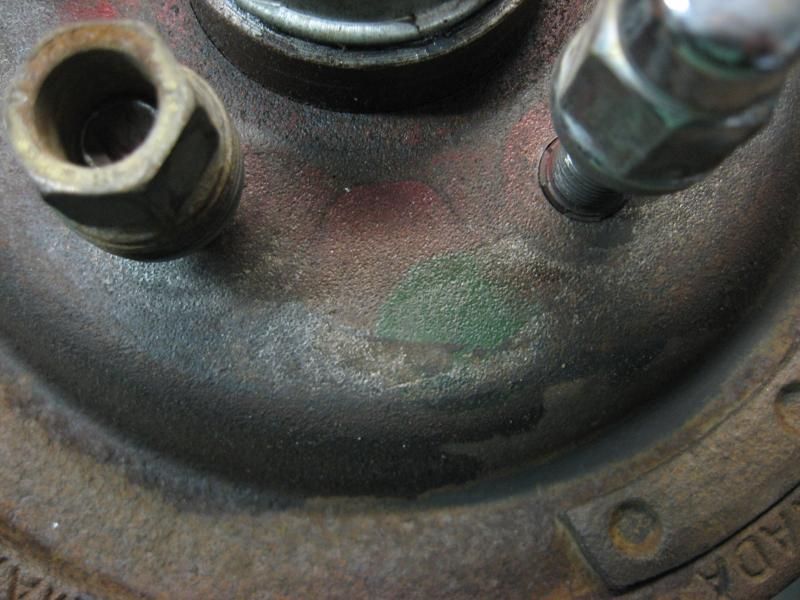
    Now this I find interesting. Many of us are familiar with the red paint that was sprayed on the rear drums of the '86 and '87 L-bodies that were shipped to Whittier. Correct me if I'm wrong, but my assumption is this is simply how the production line identified the cars that were to be held back for the GLHS conversion. What I haven't seen mentioned before are some of the other colors I've found on my car:


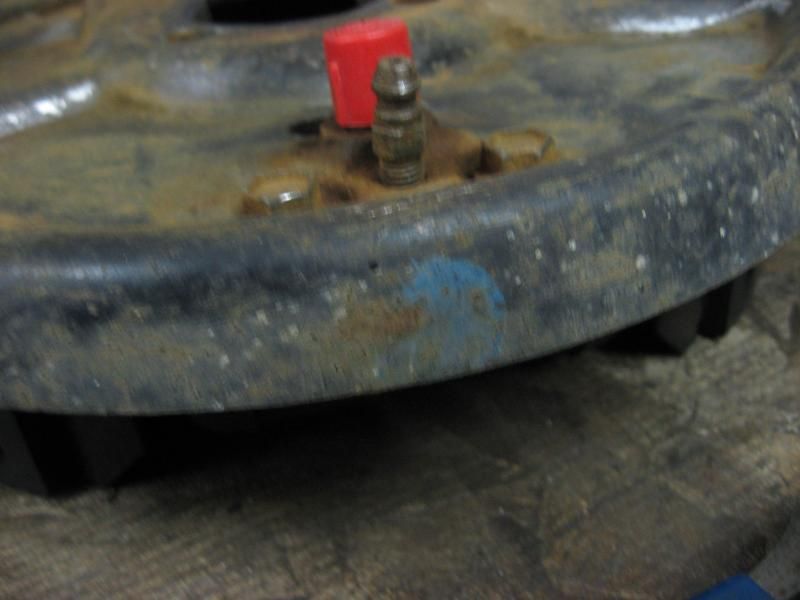
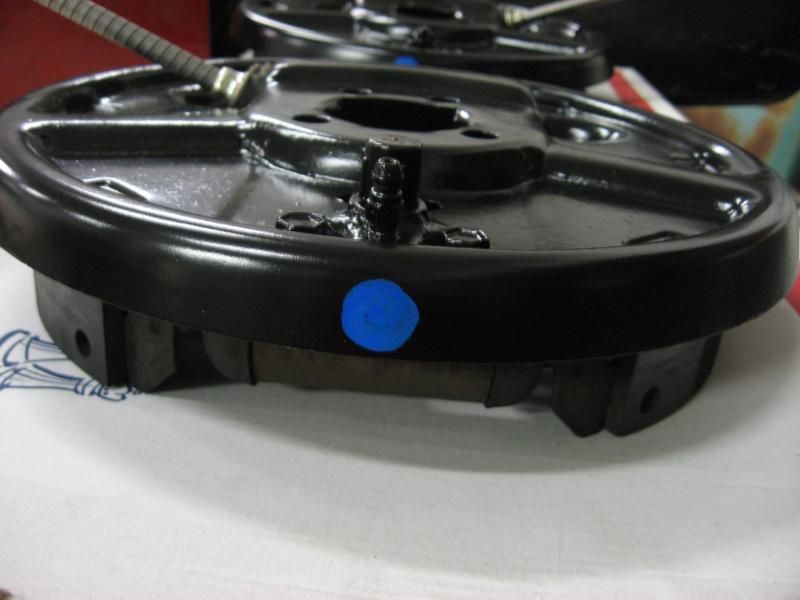
    Both drums have a green dot near the balancing weights, and both backing plates had a blue dot on top above the bleeder screws. Now in the factory where I work, we call these "witness marks", meaning an assembly worker needs to pay attention to a particular detail or process, and mark it with a colored dot to verify that the part passed inspection. While I can only make educated guesses about what these marks verified, I will be replicating them as I find them. I'll be starting a thread in the restoration section to further discuss this topic.

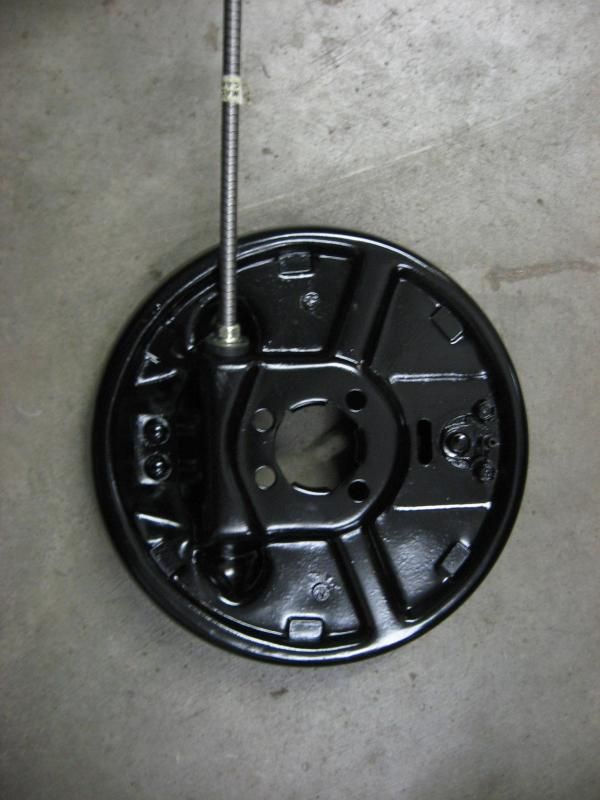
    Backing plates are repainted, and complimented by NOS parking brake cables.


    And the blue dots replicated.


  8. #108
    Supporting Member Turbo Mopar Contributor supercrackerbox's Avatar
    Join Date
    Dec 2005
    Location
    Firth, Nebraska
    Posts
    5,022

    Re: Project Log: 1987 GLHS #0103

    Quote Originally Posted by acannell View Post
    very nice..wish I knew how to do body work..
    I took two quarters of auto pottery at the local technical school about 11 years ago. So while I do have some training, I have very little experience with this much damage, and my metal working skills are very rusty. I'm relearning this as I go. Unfortunately I dropped out before we started painting, so that's when I'm going to have to farm it out to professionals.

Page 6 of 6 FirstFirst ... 23456

Similar Threads

  1. 86 Lancer project log
    By Juggy in forum Project Log
    Replies: 37
    Last Post: 05-31-2011, 08:07 PM
  2. Omni project log
    By 4cefedomni in forum Project Log
    Replies: 11
    Last Post: 07-30-2010, 05:28 AM
  3. 1987 shelby z project log!
    By 1984rampage in forum Project Log
    Replies: 8
    Last Post: 09-20-2009, 05:52 PM

Tags for this Thread

Posting Permissions

  • You may not post new threads
  • You may not post replies
  • You may not post attachments
  • You may not edit your posts
  •