30HZ at 150db makes the panties slide offOriginally Posted by 89FerrariShelby


30HZ at 150db makes the panties slide off
lol, makes the panels slide off the car as well.
i've yet to meet a girl that gets wet for stereo's...i'm all set with that.
=)


Just a heads up, your wasting time with POR-15.
7-8 years ago, the stuff was the best, period. I would have been a spokesperson for the stuff.
Within the last 4-5 years, it sucks. Trust me, I sunk a LOT of money into the product and have a rusty car to show for it. And before anyone starts questioning if I prepped the metal right, etc. YES, I did. I can take pictures of the stuff FLAKING off....bear in mind the car hasn't moved in 3 years and was covered after applying the POR. If you search around the forum you will see many others who back my comments on POR as of late.
Absolute sh!t product, period.
David C. Lucidi/1986 Chrysler Laser XT aka "K.I.T.T"
Authorized TM Decal Vendor:
"SDAC-Club decals": National & many others.
"Turbo-Mopar": All Decals in store.
"Turbos Unleashed": Decals in the TU store.
"Custom and One of a Kind": PM me your specific needs!
"G-BODY TURBO,TURBO Z, SHELBY Z decals": 100% authentic exact reproduction of factory originals, guaranteed to meet concourse level restorations.
The POR is flaking off, or the sheet metal is flaking?
I appreciate the heads up, but this is merely a precaution, not really a "need". the car is currently (and will continue to be) garaged year round, only driven on sunny 60 to 80 degree days.
Obviously i may get caught in the rain 1 or 2 times a year, so i can't say it will never see rain, but it will be as minimal as humanly possible (while still being able to drive it).
I got some stuff off a buddy for free. And its one of about 4 layers going down on the floor (POR, Sound Deadening 1, 2, and 3, and the carpet). So the price is right for me!
thank you though, i'll be sure to keep an eye on my floor and not just assume the stuff is doing its job (my buddy swears by the stuff himself.)
The POR is flaking off. Metal was wire wheeled, rinsed/scrubbed to remove the shavings, then prepped with POR's "Marine clean", rinsed, allowed to dry, then followed my "Metal Ready", rinsed, allowed to dry, and then 2 coats of POR 15. I might also add I deal with coatings for a living, 2 part polyurethane finishes, so I know about proper prep work when it comes to metal. I have pictures of it flaking off, and the exposed metal re-rusting.
I will also add that the repairs to this car went over the span of several years, and me ordering POR several times, so that eliminates the chances of a "bad batch", unless it takes them over 18 months to clear their inventory (I bought it directly from them). And I doubt it takes that long, since they have distributor channels to satisfy.
There are better products than POR, honestly. Years ago, despite the stuff being a PAIN in the a$$ to work with (ie, if you get it on your skin it stays for 7-12 days), it was worth the hassle. The last car I used it on, well let's just say after wasting 4 years chasing rust, I gave up. The tech at POR did say they changed the formula since 2000, but that it had no bearing on durability. Yea, right. I think if I dig up my notes I can even find the date and person O spoke to at POR.
If you use it, I wish you good luck. Many other have tried different products (check POR as a search, and in those threads it usually comes up).
David C. Lucidi/1986 Chrysler Laser XT aka "K.I.T.T"
Authorized TM Decal Vendor:
"SDAC-Club decals": National & many others.
"Turbo-Mopar": All Decals in store.
"Turbos Unleashed": Decals in the TU store.
"Custom and One of a Kind": PM me your specific needs!
"G-BODY TURBO,TURBO Z, SHELBY Z decals": 100% authentic exact reproduction of factory originals, guaranteed to meet concourse level restorations.

i use rust bullet. it works well.
Brian
Holes through the body
I do have a question....I have the power drivers seat, but there are 2 wires that have been under my seat and don't appear to be connecting to anything. Anyone have any ideas on what these are for?

seatbelt annoyer?
HUH?
So, I can probably get away with taping them up and leaving them under the carpet?
I'm not sure what they connect to.

He means its for the annoying little red light on the dash to say your seat belt isnt on.

They connect to the seat belts.
Ahhh
The bulb must be fried, i don't think i get that light....
ok, buried it is...!
just wanna see what the fuss is all about...
Updates are coming this weekend. I have the POR down, putting down the sound deadener this week.
The part i'm actually proud of should start coming together over the next month or so, but i'll have preliminary pictures up probably next week.
so what are you making?
would you be able to make a few of them and sell them and all we would have to do is put it in and cover it with carpet
i don't want to take a month to fab something up but I'm real interested in doing this
About 2 years ago i created a steel frame (that i cover with carpeted MDF) that raises the floor from the rear seat wells to the back hatch up to the level of the bottom of the speaker covers for the back.
I removed my spare tire and put a sub box in the back pointing up at the hatch. it's removable for track days too.
The box also has a forward facing hatch door that opens up for storage of the t-tops when removed and closes to conceal them, and/or the inside of the box (makes t-top exchange much quicker, no popping the hatch).
I never took any pics (i may have one somewhere, i'll look this weekend), but i'm currently re-doing the covering of the box, with some additions and things to make it better.
In the meantime i'm adding sound deadening to the whole car in an effort to reduce the effort needed to converse when its running (the current resonance makes yelling a necessity).
Since i have 0 (maybe 1...and if so, not a direct one) pictures as evidence, i figured i'd post up the progress and end result so i can prove that i did it myself (many people thought i had the other one made).
Having done it before, i could probably do it again quicker, but i don't know as it would have any real benefit. If you see the end result and still like/want it, i'd consider it for anyone who asked, but i don't know as i'd actually put it out there on my own. Its more of a labor of love.
Updates?
Sorry guys. Its been tough to get to this as apparently all 3 of the cars I own are deciding to crap out at the same time! Wouldn't be a big deal, but I commute 70 miles each way to work.
The daytona had a leaky heater hose, which led to snapping the relay, which led to rerouting the coolant, which led to more issues!
In any case. Since my Murano is losing the front wheel, i had to scramble to get the drivers seat (at least) back into the car. I didn't get a chance to take pics of the "contraption" but i will try to get those up tonight/tomorrow morning.
For now, the "main cabin" is back together sans passenger seat.
Sound Deadening down. 2 Layers of B-Quiet Ultimate and One layer of B-Quiet V-Comp. Car is much quieter inside (even with the exposed metal all over the back half!)
[IMG][/IMG]
[IMG][/IMG]
[IMG][/IMG]
New Carpet laid over.
[IMG][/IMG]
Unfortunately it was being a real pain in the --- to get in the car, and i was under time constraints. So until i get a chance to really not need the car i was forced to put the original carpet back in (easier/quicker to reinstall).
[IMG][/IMG]
I'll try and get more pics tonight/tomorrow. Next up is the sound deadening for the rear of the car, i just need to mark off all the holes i need to keep open (trying to have as little of a headache as possible).
Anybody know of a good filler for the plastic panels? I have a gash or two i'd like to fill in and paint while they're out of the car, but i'm not real sure where to begin.
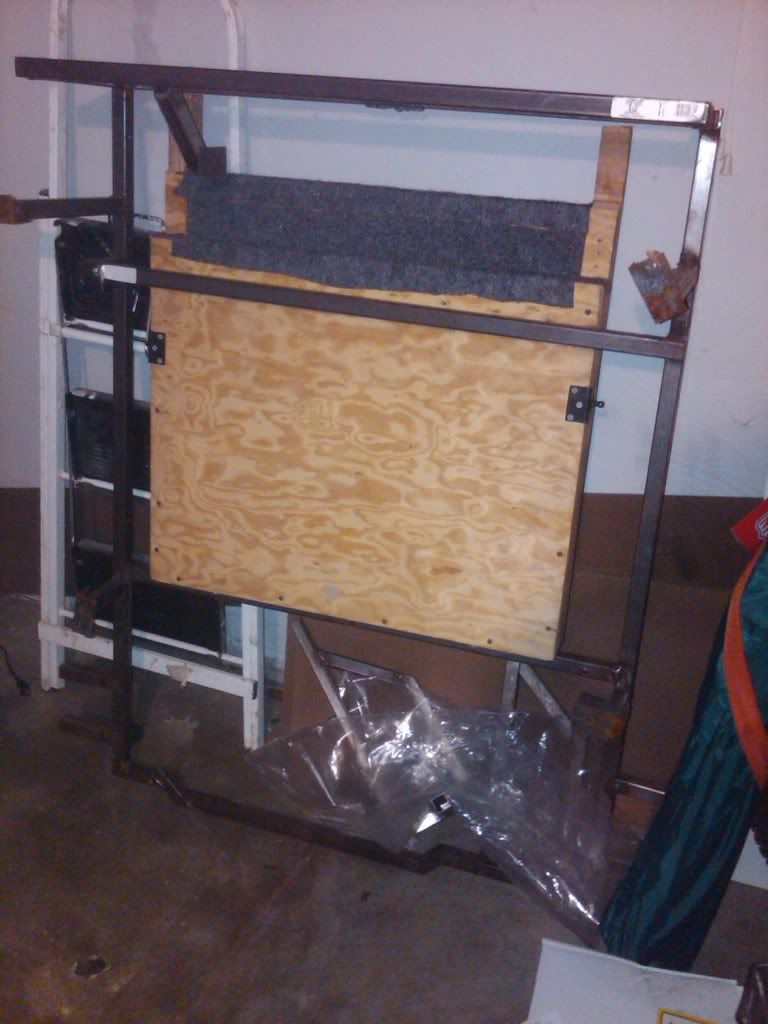
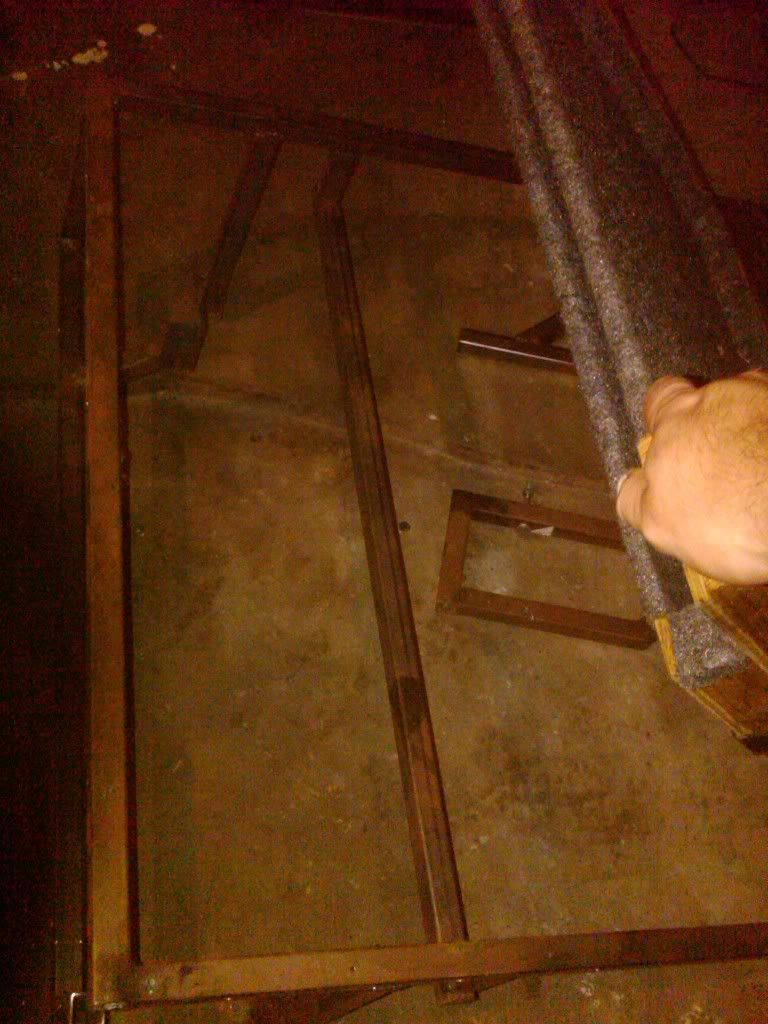
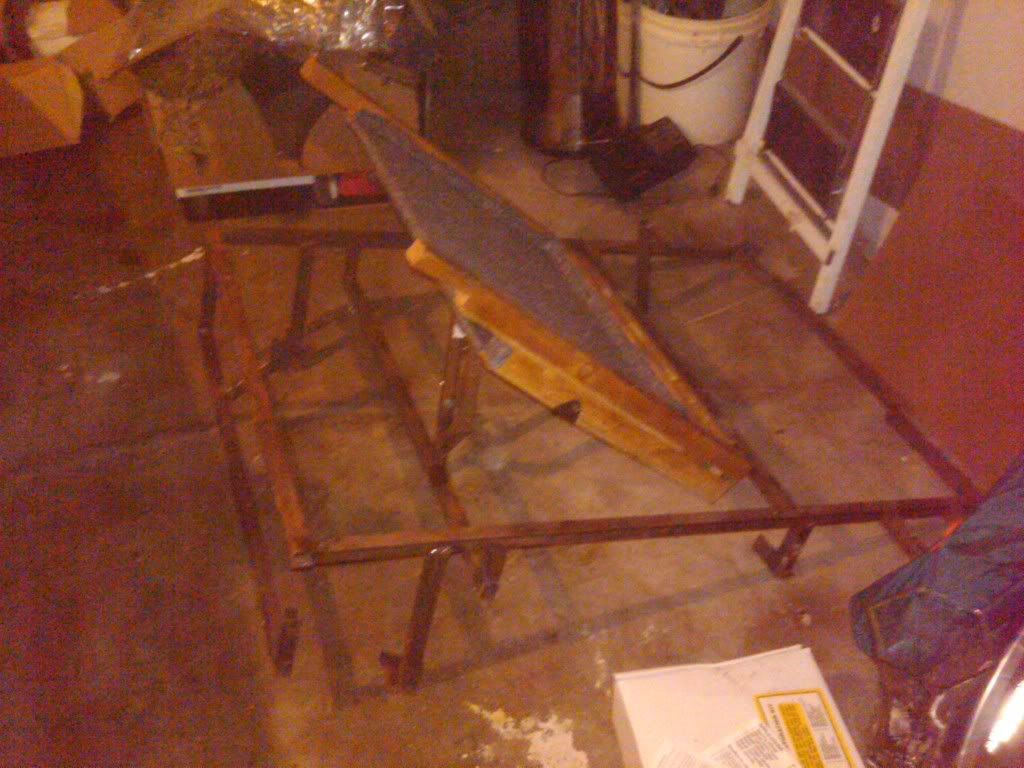
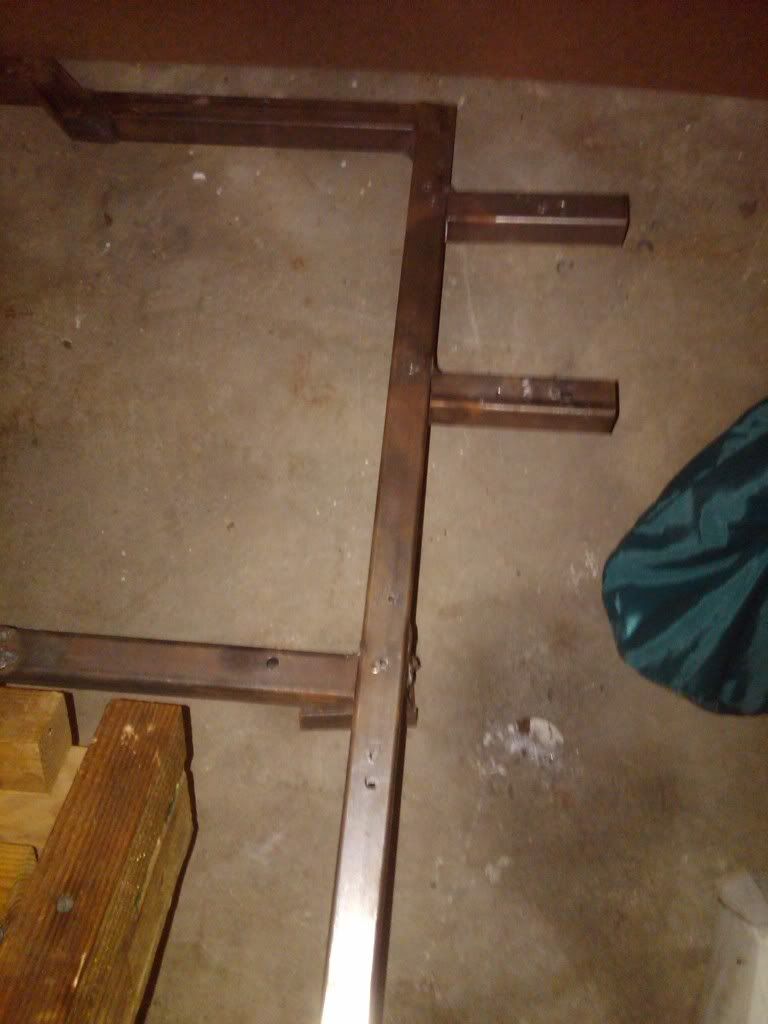
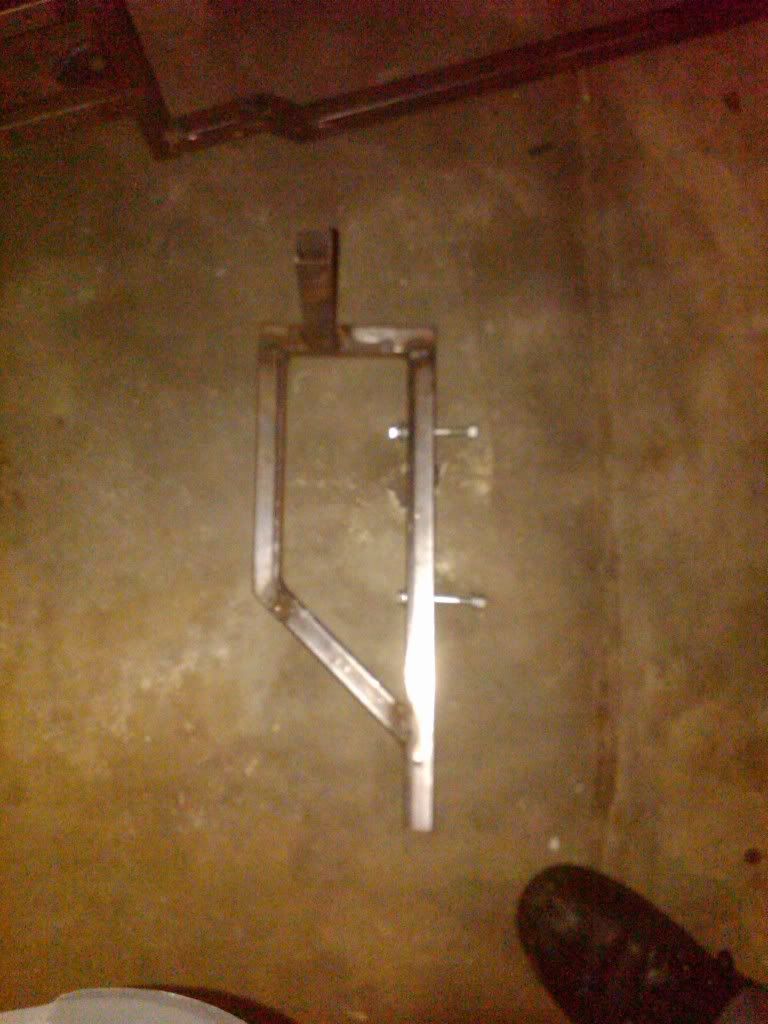
OK, so here's 1/2 of what i'm trying to show you.
This is just the frame. The enclosure is being redone, and it isn't currently in the car, but i figured i'd show you guys the basic concept.
So
The bottom of the frame:
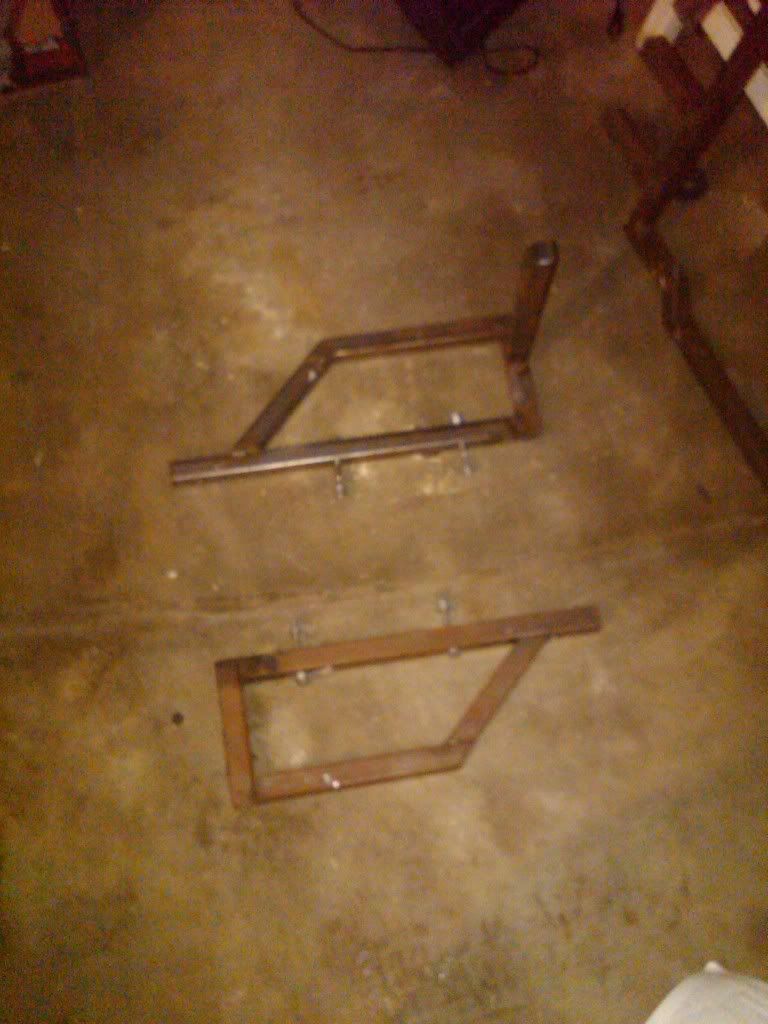
Top of the Frame with the drawer down:
Top of the frame with the Drawer Up:
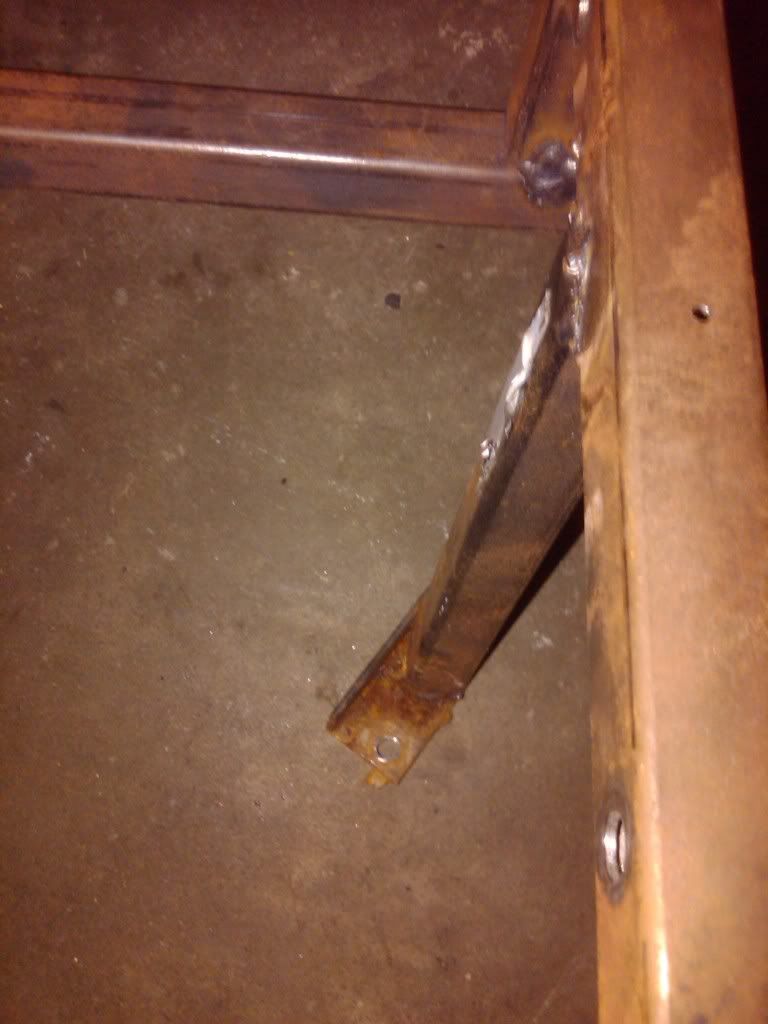
Stop guard to prevent the t-tops from sliding under the frame and getting scratched when opening:
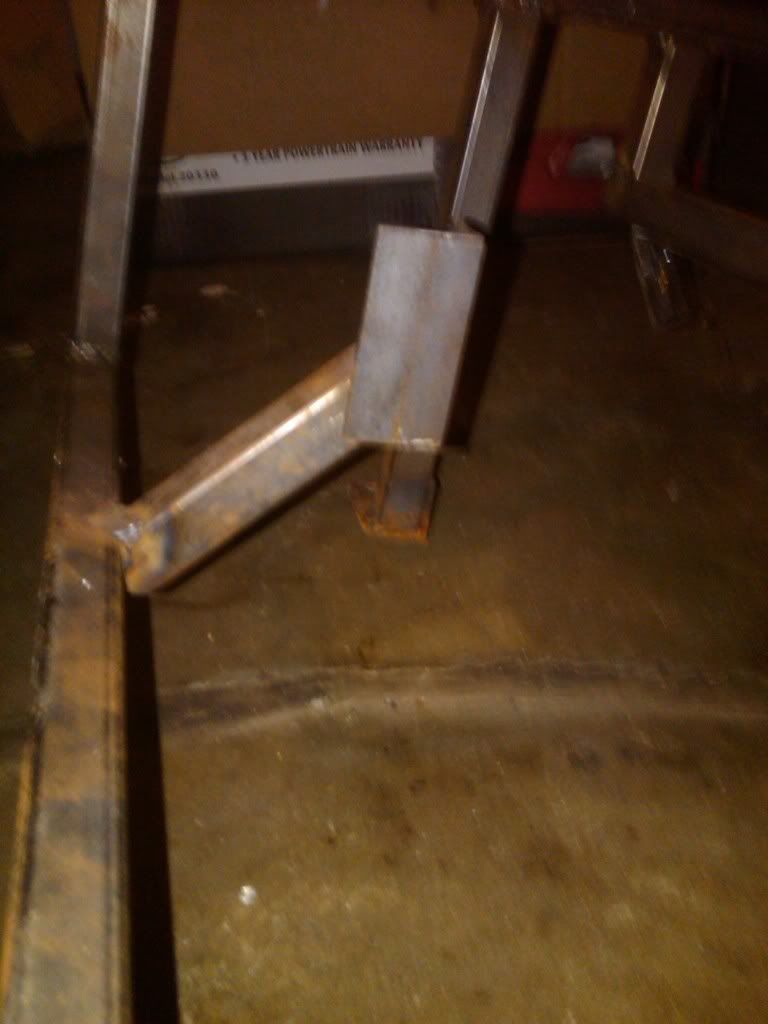
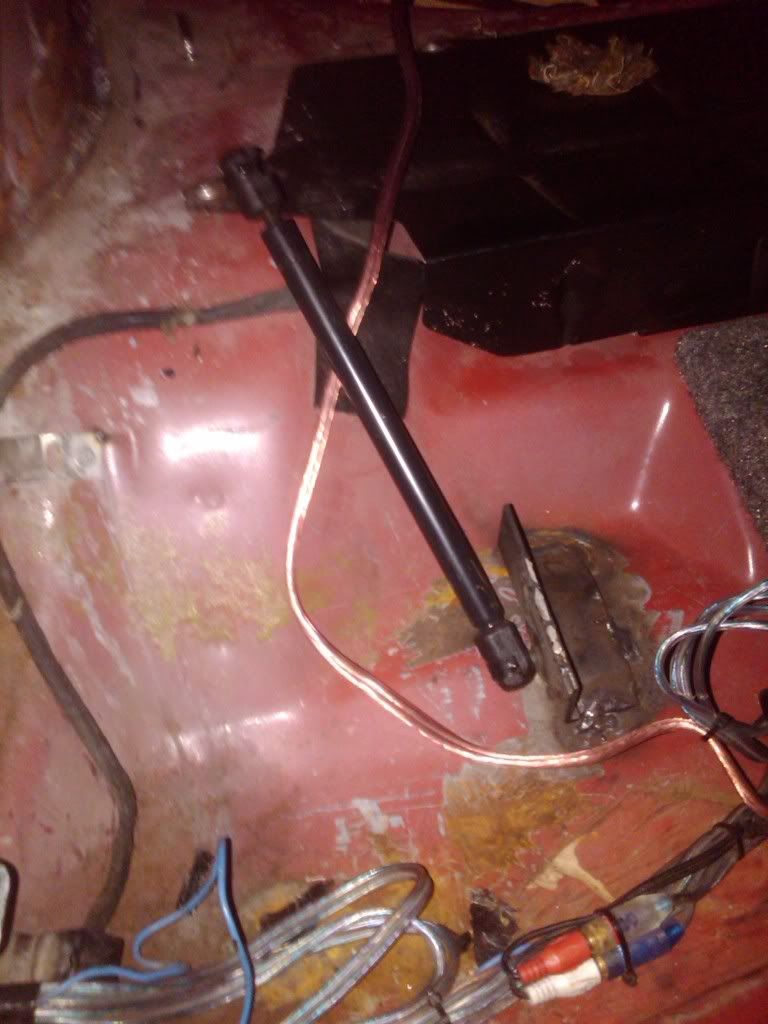
Gas Shcok for opening Drawer:
Foot Pedal for anchoring to floor:
"Wings" on the back for securing the covering:
And as you may (or may not) be aware, the width of the car at the rear seat wells is wider than the rear hatch area. So in order to encompass the space securely i had to build detachable "wings" for the front:
I'm thinking this weekend i'll be able to get the sound deadening down and put the cage back in the car. I'll take pics as progress happens.
New cover will probably be a while, but i'll try and keep updating.
Neat idea. It looks REALLY heavy though. I suppose for a cruiser/show car it is awesome.
I still want to see it done, so keep updating!
 Posting Permissions

 Reply With Quote