Page 2 of 50 FirstFirst 12345612 ... LastLast
Results 21 to 40 of 985

Thread: 93 2.4l DOHC Shadow

  1. #21
    Supporting Member Turbo Mopar Contributor
    Join Date
    Feb 2006
    Location
    Edmonton AB
    Posts
    2,082

    Re: 93 2.4l DOHC Shadow

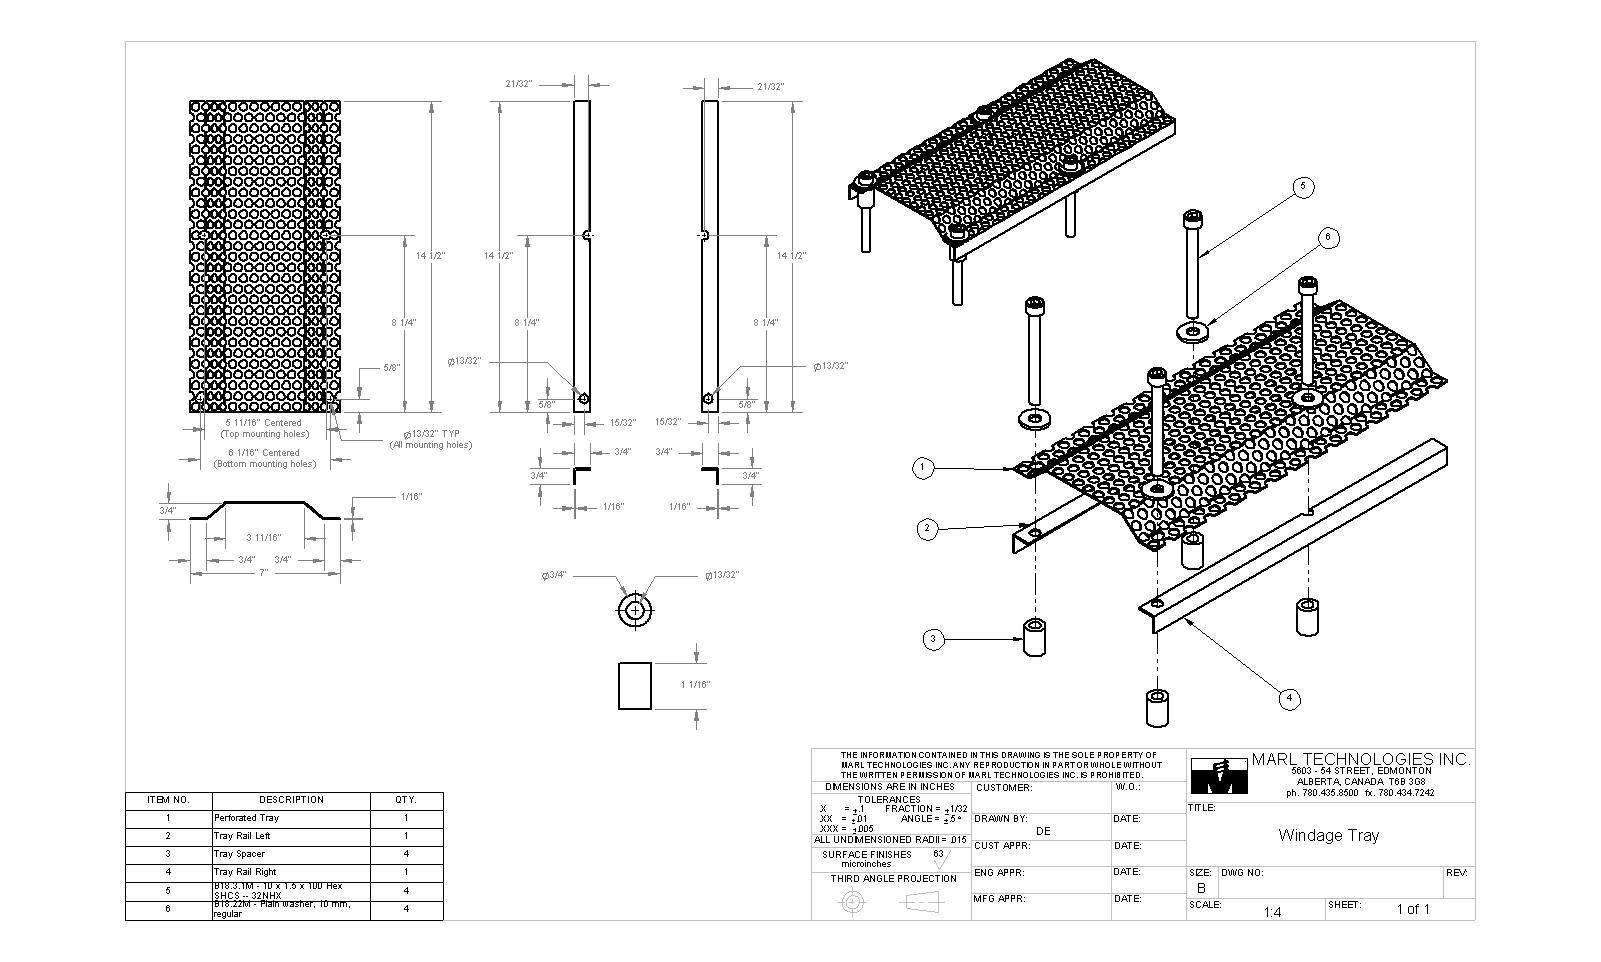
    I received a request for dimensions on the windage tray I built so I made a model of it to get a drawing out.

    ***DISCLAIMER***This fit on my vehicle but in no way do I assure it will work on anything else. Use at your own risk. Please don't try to sue me if it doesn't work since I haven't even started my engine yet***DISCLAMER***

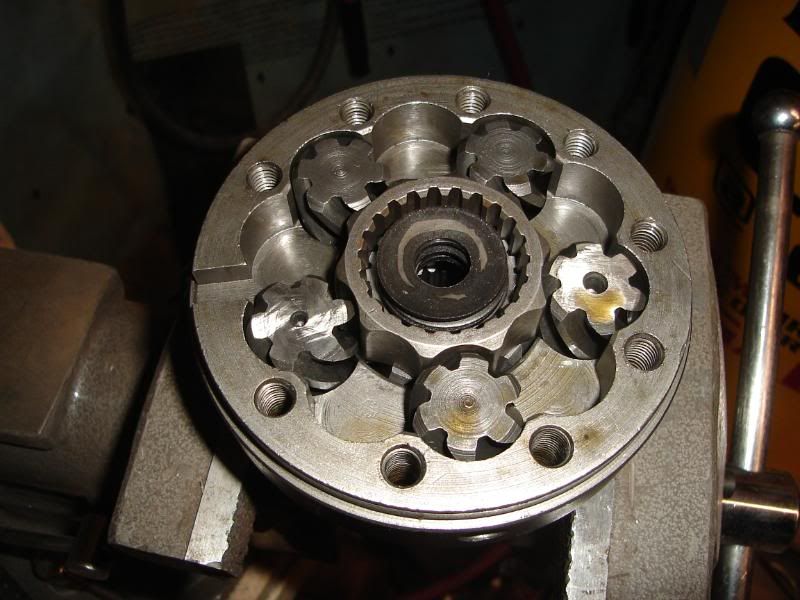
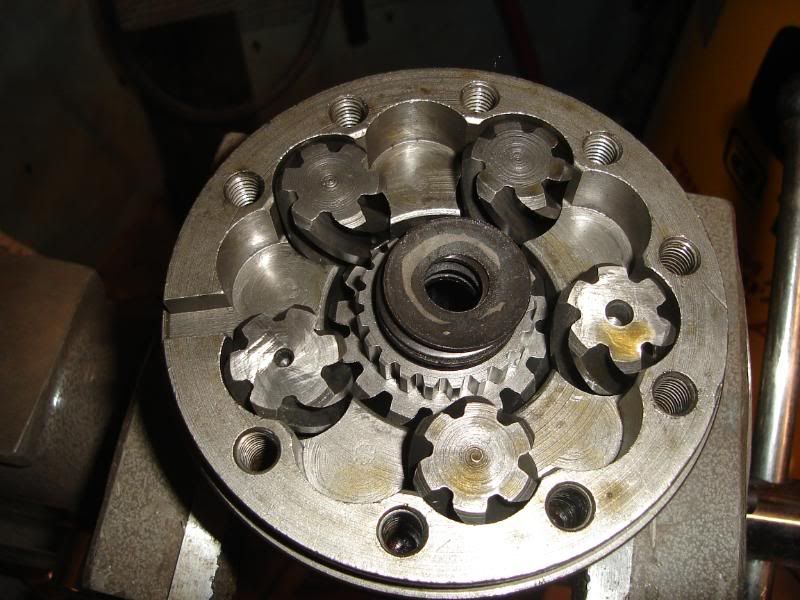
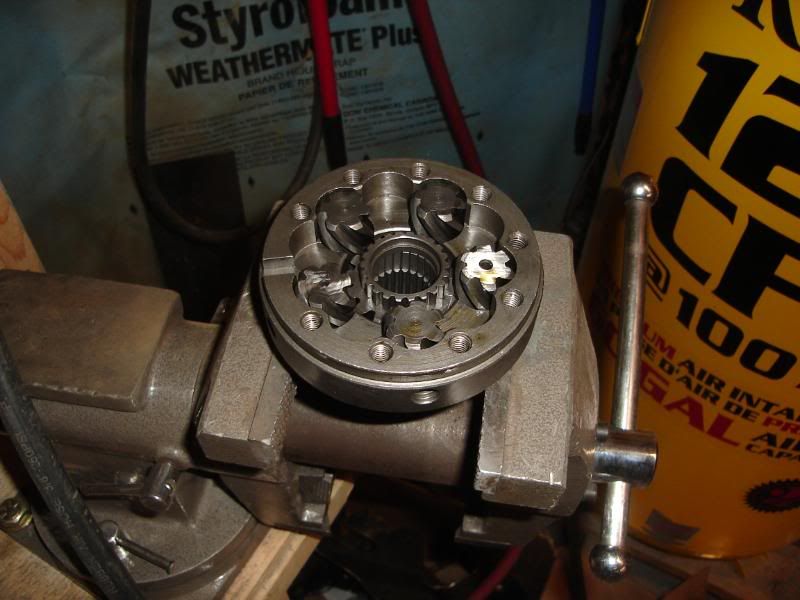
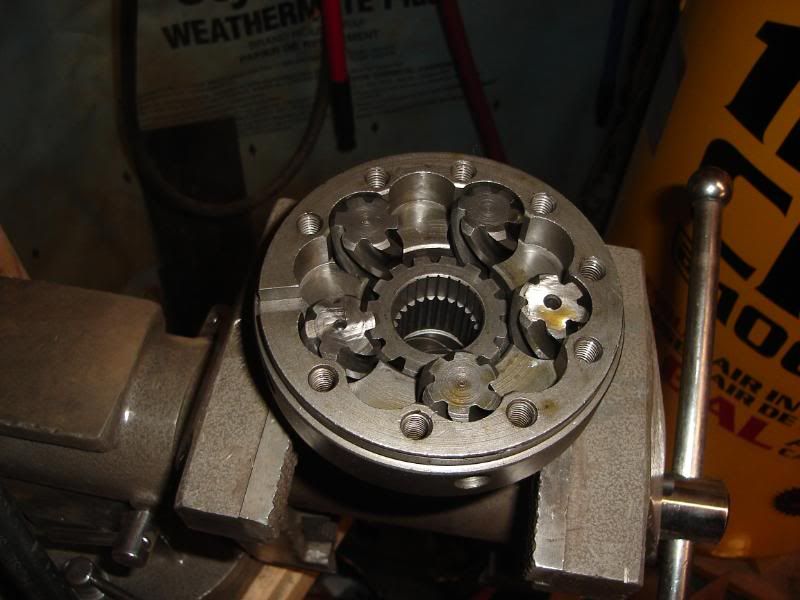
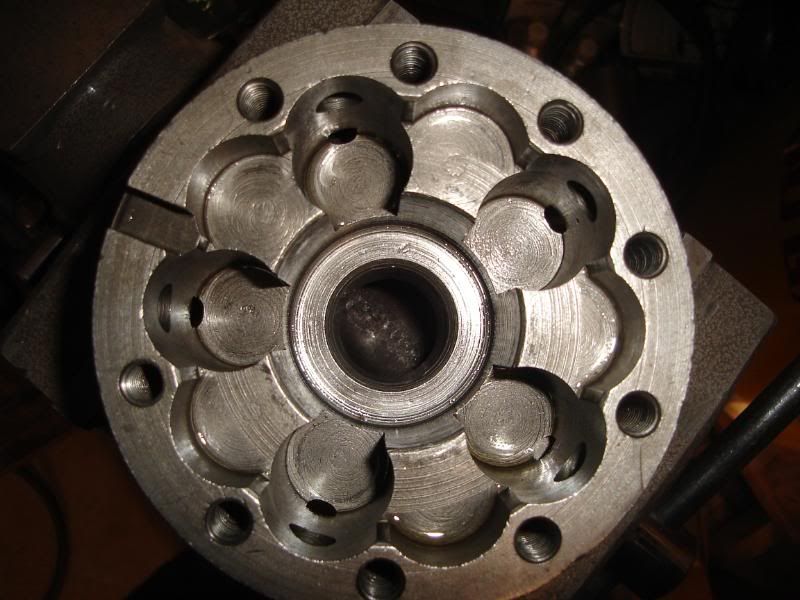
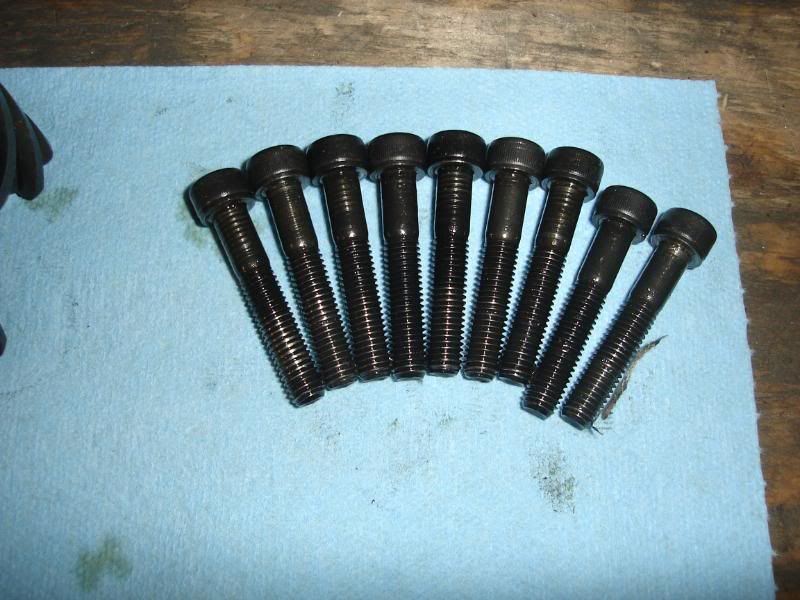
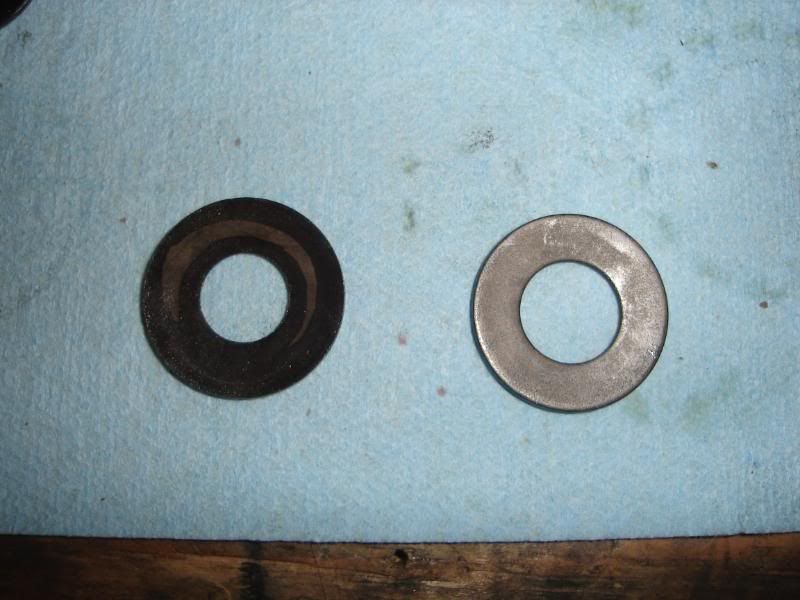
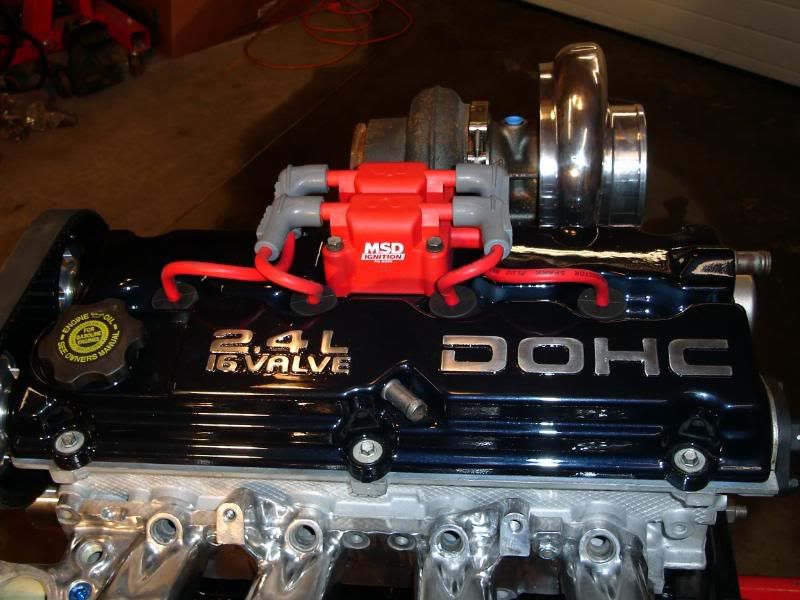
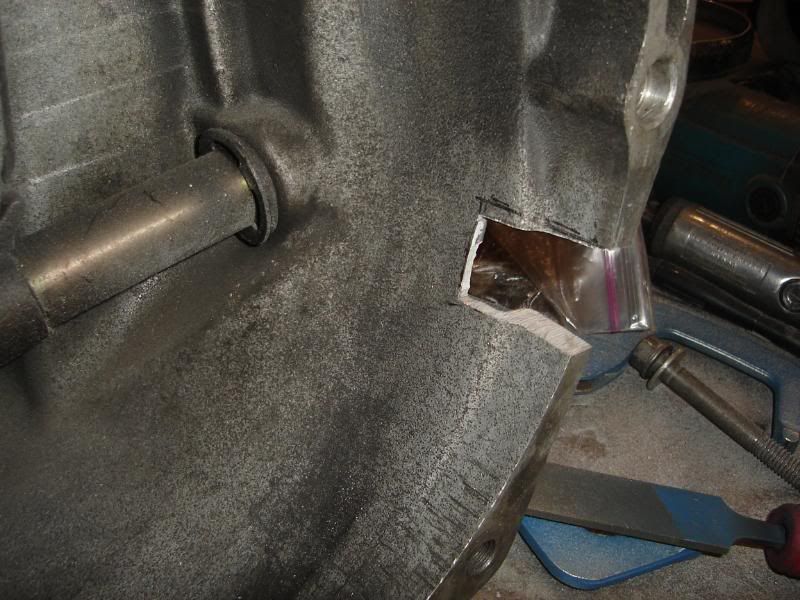
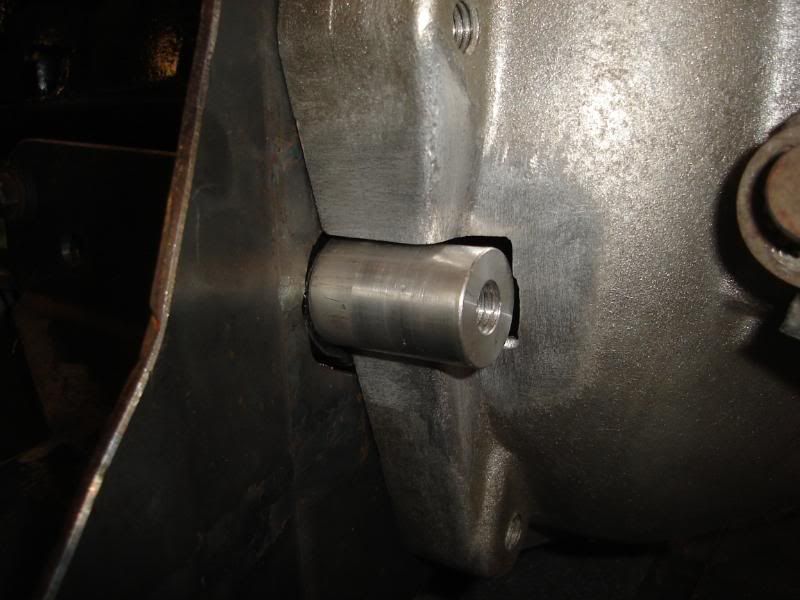
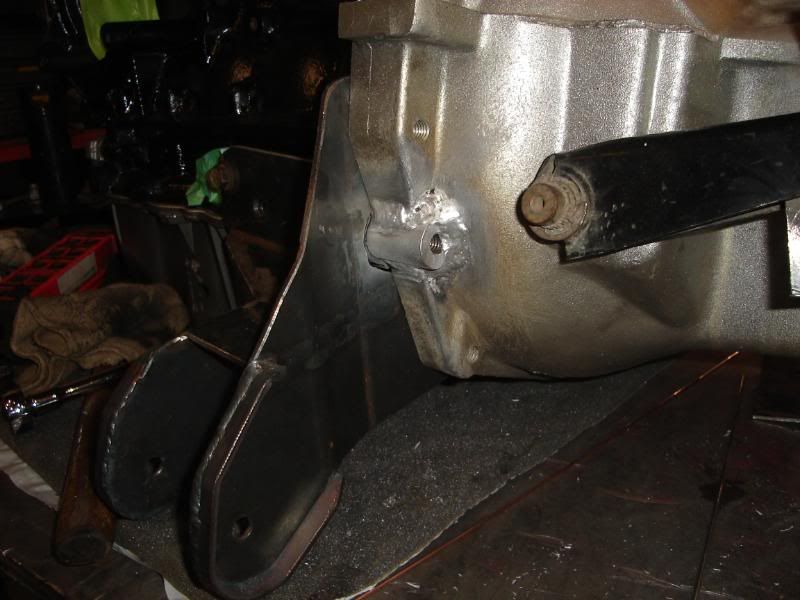
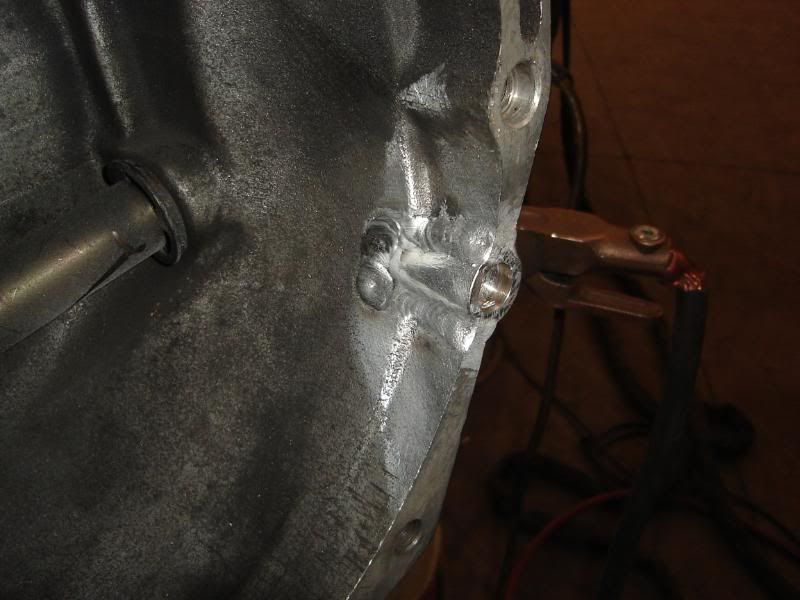
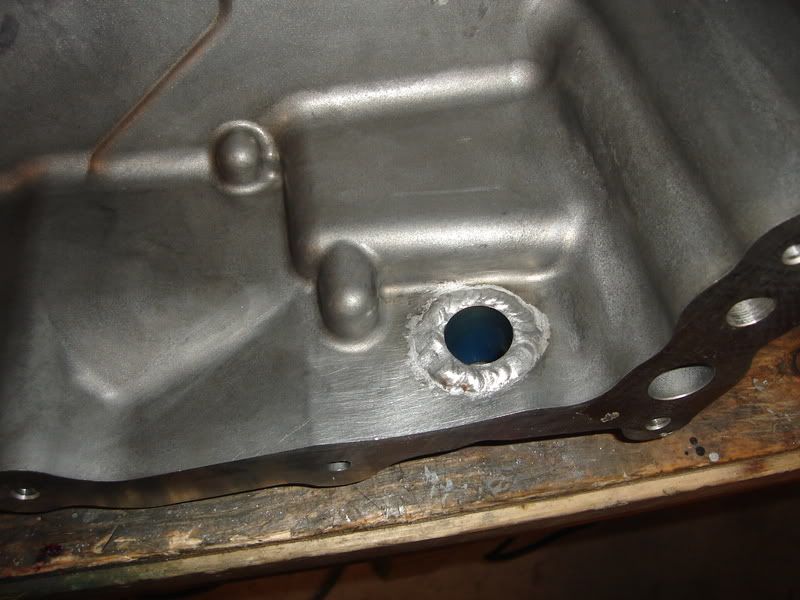
    The only thing I forgot to add was I used sheet with 3/8" perforations. This is just a drawing of what I made for my engine which is a 2.4 from a stratus so be sure to take it with a grain of salt as you should with anything you get from the Internet. Make sure you take some rough dimensions of your engine or even make a cutout from card board to make sure it won't interfere with anything. Also notice that the front and rear mounting holes are not the same distance apart. The rear ones are closer together. I used 10x1.5x100mm socket head cap screws that screwed into the holes that the balance shafts used. I also needed to clearance the perforated sheet to clear the washers which isn't represented on the drawing. When flattened out the perforated sheet measures 14.5"x7.546" so that should give you a rough idea of what size you would need.


    Here is a picture of the drawing but you can also go here ( http://www.mediafire.com/?fgncxr3ym2d ) to download a zipped e-file. Just unzip it and run the executable and it will let you look at the whole drawing as well as each individual piece by hitting the next button in the tool bar. You can also rotate and zoom in on the piece using the respective buttons in the toolbar. Hit home to take you back to the drawing. Hope this helps some one out.


    ***EDIT*** I forgot to mention that the perforated sheet is welded to the 2 L brackets. Please don't try to just bolt it all togther. I would think that is obvious but just incase. If you decide to just bolt it then please see the disclaimer above.***EDIT***


    DJ

  2. #22
    Supporting Member Turbo Mopar Contributor
    Join Date
    Feb 2006
    Location
    Edmonton AB
    Posts
    2,082

    Re: 93 2.4l DOHC Shadow

    Things are still slow but it looks like the remote starters are letting up and I should have some more serious time available to put into things.

    All the glass is in now with the rears tinted (except for the very back which I will get done once it is driving.) I have started putting some of the interior back in which included installing the tranny cables since it was originally an auto. I bought new carpet since my cat decided to piss on my old one while it was in the basement > . Good excuse to get new stuff though. It was only $125 to my door and it was custom molded with all the jute padding too. I am pretty happy with it for the price.

    The intake is almost all polished and I welded in a piece for the vacuum bungs and throttle cable mount. I should have the WGA bracket, WGA arm, oil filter spacer, exhaust brace and intake brace finished in the next couple weeks. All that is left after that is to build the turbo drain and the engine is ready to go in ;D Some times it feels like the day will never come. On the tranny side I need to change out the FD and install the OBX. I also need to figure out the "missing bolt" on the trans and what I am going to do with it. So if I am lucky I may have an engine in the car by the end of the month.

    Currently I am looking at some 17" rims but am not sure what to get yet. Here are 4 choices I have kind of narrowed it down to. Sorry they're a little dark. It's hard to get a good pic on a north facing driveway in the middle of winter.

    Enkei RS7 Bronze (These might be a little lighter in real life)


    Enkei RS7 Gunmetal


    Enkei Evo 5 Hyper Black


    5Zigen FN01R-C Bronze (I think these are a little darker in real life)


    Currently I am leaning towards the Evo 5s. I like the polished lip (go figure 
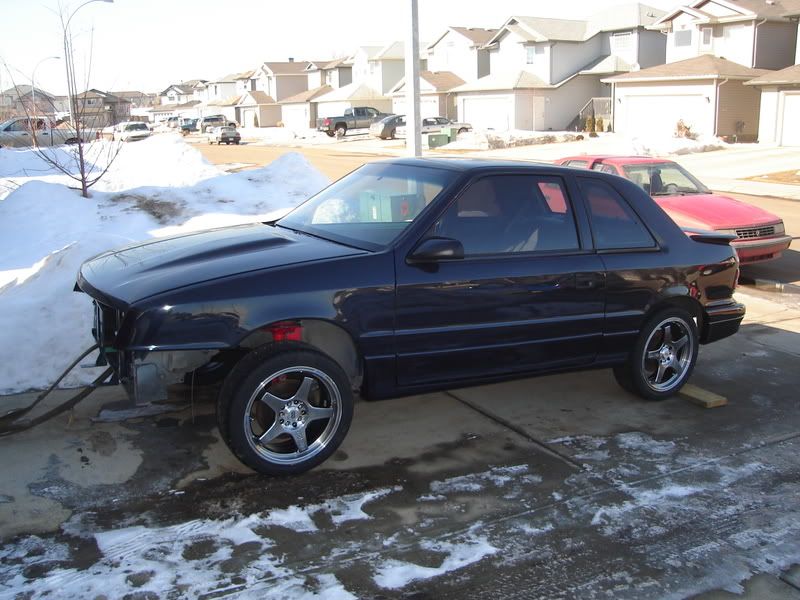
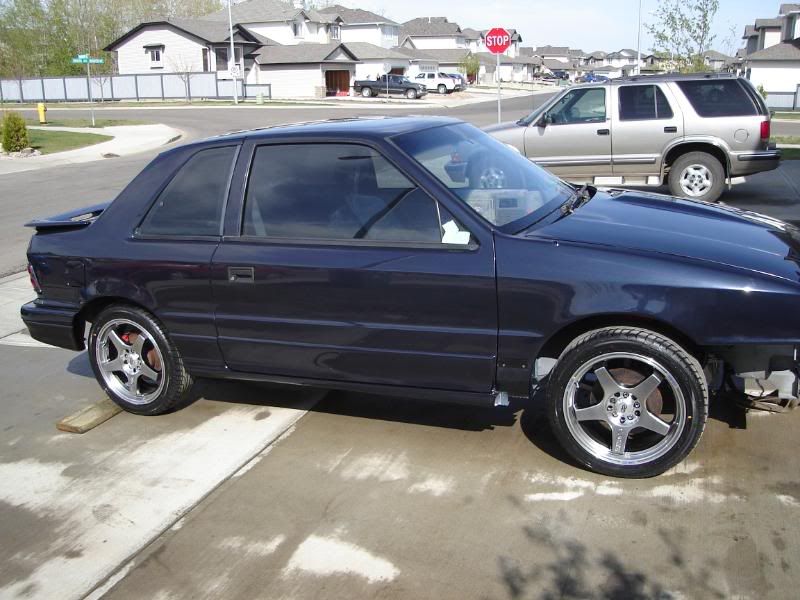
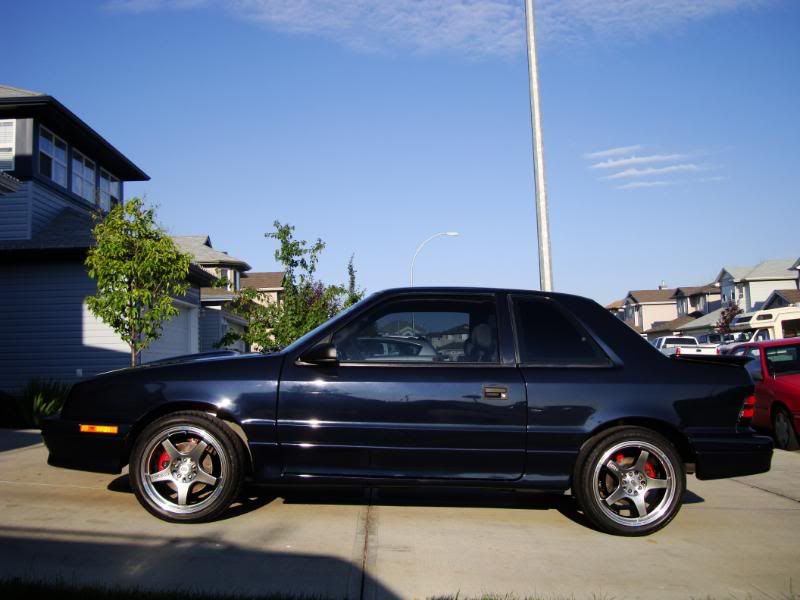
) and I think the boxier style looks better with the Shadow body. I would like to go some where and see what the colors look like in real life though. Any one have any opinions??

    DJ

  3. #23
    Supporting Member Turbo Mopar Contributor
    Join Date
    Feb 2006
    Location
    Edmonton AB
    Posts
    2,082

    Re: 93 2.4l DOHC Shadow

    After much debating I purchased an OBX figuring I could do alot of fixing for the extra $750 a Quaiffe would cost me. I got TU to send it to a client in San Diego and was able to pick it up at the beginning of February when I was down there. Best way ever to avoid duties and customs. I also purchased the "upgraded" (they really aren't upgraded at all just replacement) bolts and upgraded washers (I believe these are in fact better quality). Here is the break down of the OBX for those interested.

    The diff itself in it's poorly machined glory


    After removing 9 allan head cap screws the ring gear side of the housing can be removed and this is what you get.


    Passenger's side splined gear and worm gears removed


    Passenger's side splined belville washer retainer removed


    Belville retainer retainer (wasn't sure quite what to call it) removed


    Belville washers removed


    How the belville washers should be stacked


    Driver's side splined belville washer retainer removed


    Driver's side splined axle gear and worm gears removed


    All the internal parts


    Close up of the bolts. The ones with the flattened "shiny" threads were the ones that were over torqued. The OBX bolts are 12.9 8mmX1.25 bolts 45 mm long and can be replaced with 50mm bolts. I say it isn't an upgrade really because what you replace them with will also be 12.9 bolts. The extra thread will give threads a bit less force per thread I guess but still not really an upgrade. Only a replacement for over torqued bolts.


    Here is the OBX belville on the left and new washer on the right. Notice the discoloration in the OBX washer. Could mean an inconsistency in the metal which is a bit disconcerning........may also just be wear though it hasn't been used yet.


    While it was all apart I test fit the axle gears on the axles and everything slid on perfectly so I began reassembling it with the new washers and bolts. To line up the washers I used a deep socket (7/16 I believe) to hold them in place which worked great. I would recommend keeping it there until everything is torqued up to keep them from shifting.


    Once it was together again I test fit the axles and the pass went in perfect but the drivers was a different story. Apart it came again and after a bit of fooling and looking I found that the spline in the driver's axle gear was broached off axis so when the belvilles put pressure on it causing the gear to be flat against the housing the spline bore would be crooked. Here are some pics of what I found.


    I was prepared for pretty much everything I had heard about OBX but hadn't heard about a spline being broached improperly until this one and of course after when I started searching for solutions. There were no real solutions to be found on the web, only people who found it after they cratered their trannies. I'm not quite sure why a big red flag wasn't raised for these people when they had to use a hammer to get their axles in ???

    I found that the axle would slip into the gear if there were no pressure on the gear but as soon as pressure was applied it would bind. Helical LSD have some inherent sloppiness to them which I think turned into my saving grace. I came to the conclusion that if I machined the gear face perpendicular to the spline bore that when pressure is applied everything will still be straight except the gear itself which will be a bit crooked. But with all the slop that is built into this type of diff there is still plenty of clearance on all the worm gears surrounding the axle gear so I don't think it will be a problem. I talked to Chris at TU about warranty and he said it was done through OBX (so don't expect him to warranty your diff if you bought one from him) so I emailed OBX with of course no response. No surprise there. So next week I will go ahead and reface the gear and hopefully it will all work out. I'll keep you updated.

    DJ

  4. #24
    Supporting Member Turbo Mopar Contributor
    Join Date
    Feb 2006
    Location
    Edmonton AB
    Posts
    2,082

    Re: 93 2.4l DOHC Shadow

    Finished a few more things. Engine isn't real far from going in which I definitely can't wait to see. I got the WGA bracket done and extended the actuator arm to reach. I made it from stainless to keep it strong and used the bolt holes from the EGR. I plugged the EGR an aluminum NPT plug.


    I also built a 1/8" spacer for the oil filter and used an extra gasket so I could use a larger filter from a 5.0l mustang. I have to thank SpeedEuphoria for that idea since I probably would have just left it. This should give it alot more flow than the supposed restrictive SRT4 filter.


    Today I finished polishing the intake so I decided to have a little photo shoot with the engine. I am very happy with how it is looking and how everything is turning out. Like I said I can't wait to get it in the car and see what the whole package will look like.


    Till next time

    DJ

  5. #25
    Supporting Member Turbo Mopar Contributor
    Join Date
    Feb 2006
    Location
    Edmonton AB
    Posts
    2,082

    Re: 93 2.4l DOHC Shadow

    I finally finished off the front mount last night. I made it so the hole on the engine mated to a hole on the tranny making sure every ting is as secure as possible. For those who don't know I am using an A568 from a 1990 TD and all but one of the mounting holes from the newer 2.4l engine will line up. Many people just skip this hole and catch the holes on the tranny with their engine mount. I didn't like that and wanted to make sure the engine was attached securely at all points. As always here's some pics to tell the tale.

    First I made the boss for the bolt to go through my front mount and welded that in.


    Then I made a boss to weld into the transmission with a recess for the locating dowel.


    I marked the tranny and cut a hole for the boss


    And then welded it in.


    And that's how she sits. Sorry for the sloppy welds on the outside. Sometimes cast can get a little dirty

    Hope that helps someone in the future.

    Also did up these pieces to mount my leveler to. Since every one knows there never seems to be any good convenient bolt holes to mount one too these plates really did the trick.


    DJ

  6. #26
    Supporting Member Turbo Mopar Contributor
    Join Date
    Feb 2006
    Location
    Edmonton AB
    Posts
    2,082

    Re: 93 2.4l DOHC Shadow

    With the help of one of our machinists I was able to get my OBX gear machined and it seems to have fixed the problem. I pretty happy about this since it means I no longer have a $500 paper weight. With the gear faces now perpendicular to the crooked spline the axle slides in and out with ease when there is pressure on the gear which it didn't even come close to doing before. I still need to bolt it all together and try it again but I'm pretty confident it will be good. Like always, here's some pics of what I did.

    First the gear was placed in some soft jaws with an axle stub in it.


    Then we dialed in the stub so it was running true. It was hard to take up the play in the splines so we were able to get the stub within .010" of running true. Every time you tapped the gear it changed how the stub sat in the splines a bit so we figured it was a close as we were going to get.


    Then we machined off about .016" to get the face true.


    Here is the finished gear, not much to look at but it fits way better than the original form. Hope this helps someone in the future.


    DJ

  7. #27
    Supporting Member Turbo Mopar Contributor
    Join Date
    Feb 2006
    Location
    Edmonton AB
    Posts
    2,082

    Re: 93 2.4l DOHC Shadow

    As I go along in this build I've been trying to fill in some of the information holes I have found on the internet while researching and trying to figure out what was involved in some procedures. Changing the final drive was one of those areas. Cliff Ramsells site kind of tells you what you need but doesn't give any real info on what is involved in disassembling an intermediate shaft or what things look like as it comes apart. So here is my pictorial of the disassembly.

    For the final drive change you need the diff (just the ring gear if you are putting in an LSD) and intermediate shaft from the new final drive trans as well as the intermediate shaft gear set from the trans you are using. I'm calling it the intermediate shaft since that is always what I have heard it called. Some one can correct me if I am using the wrong name. Here it is out of the transmission.


    Here is a pic of the 3 "special" tools I used. Nothing really special and possibly not completely proper but buying expensive specialized transmission tools isn't always an option. They are the bearing splitter, 2 bolt puller and external snap ring pliers.


    First remove the snap ring on top of the bearing.


    This is how I removed the top bearing. I may have been better to use a puller on the gear below the bearing and pulled both at once but this was my first time and I didn't have my FSM with me at the time so I used a bearing splitter and a puller. It worked fine for me but probably puts a bit more stress on the bearing. The top bearing has approximately a 2 7/8" dia. so I used a 3" splitter. I did have to cut some new bolts out of 1/2" ready rod so it would open wide enough but it worked pretty good.


    Once the top bearing is off 4th gear will slide off exposing a snap ring on top of the 3-4 synchro.


    After removing the snap ring the synchro will come off. On one shaft I was able to pull it off by had and on the other I had to GENTLY tap it to come off. I was the only real gear that gave me any trouble. The FSM suggests using a puller but I don't have a three jaw and found I was able to get away without one just fine. If you can get the sychro off as a single unit that is the best but good luck on the 3-4. If/when it comes apart it goes together like this. You can see the steel retainer ring that puts pressure on the three dogs. (don't know if that is the correct term but it's what I'm using) There is a similar ring on the bottom. Then the brass pieces fit in with the dogs in the slots and the outer gear slides over with the dogs going in the three larger gaps.


    The gear underneath the 3-4 synchro will slide off exposing a split thrust washer. Just remove the outer solid ring and the two split pieces will come off. Then there is a small anti spin pin that should easily pull out with some needle nose pliers.


    One more snap ring and the 1-2 synchro will slide off. This one is much easier to keep together so you don't have to mess with reassembly.


    This is the last piece and you should have these parts on your bench. The complete gear set..


    And the shaft with the final drive...


    Once you do the same to the other intermediate shaft you will have a bench that looks like this.


    Now take the gear set from the trans you will be using (in my case an A568) and put them onto the new final drive shaft in the reverse order (for me an A523 3.77 FD). As always I hope that sheds some light for some one.

    As a little side note I also got my rims and tires in. I went with the 17" Enkei Evo 5 rims with 215/45ZR17 Falken FK-452 tires. I think they look great on the car and really suit it. Now to get some weight in the front to drop that sucker. I should have the trans together this week which means I can now count on one hand the things left to do before the engine can go in.


    DJ

  8. #28
    Supporting Member Turbo Mopar Contributor
    Join Date
    Feb 2006
    Location
    Edmonton AB
    Posts
    2,082

    Re: 93 2.4l DOHC Shadow

    Well I've actually been up to some work lately. I finished all the braces, the oil drain and everything else I needed to get the engine in the car. On that note guess what I did today!?!?!? That's right, after 1 year and three weeks I finally got the engine in it's final resting place. Here's some pics and some right up as always.

    For the oil drain I wasn't sure what size to use but I figured Holset put a 3/4" hole in the turbo for a reason so I made sure there was no restriction smaller than 3/4" in my drain. Unfortunately that meant I had to go with -16 which my gut told me was over kill but I guess it's better to be on the safe side. Of course right when I got it done MachIIIRayzer posted on TD.com that the minimum size recomended by holset is 1/2". O well, you win some you lose some but I will know for sure if my turbo starts smoking it isn't because the drain is too small. For the oil pan I took a -16 aluminum fitting and welded it in. This enabled me to get it as high as possible in the pan. It also helped with the tight clearance in that area when you are trying to fit a -16 fitting in.


    The outside isn't welded completely around but I figured I would hit it where I could for some extra stregth.


    For the turbo side I took a few -16 90s we had kicking around work and made a piece to snake around the header. It was definately a tight fit but it worked. I kind of screwed myself with the turbo placement on this one so I was just happy to get something workable out of the drain. It was a big reason for me leaving it right to the end since I didn't quite know how to tackle it.


    All in all it turned out good and at least it looks sexy 8)


    For the intake and especially the exhaust I was uncomfortable with how much weight was hanging out on them so I made some braces with some rod ends and threaded pieces and then fabbed up some brackets to attatch them to the block.


    I also had to line up the cams and get the timing belt on properly so I made this sophisticated tool to help keep the holes on top of the cams lined up.


    Once that was all done it was ready to drop in the car. For a clutch I chose a Turbos Unleashed 4 puck ceramic with the yellow pressure plate. The difference on the plate is there is an extra band welded inside to change the pivot point of the springs so it applies more force to the clutch disc with the same amount of foot pressure. I meant to take a picture of it before it went on but I forgot. :cry: So all you get is one of the outside.


    Once the tranny was on we dropped it into the car which went pretty smoothly. I'm a little disapointed that I forgot to take the classic pic of the engine hanging over the car. I'm hoping Scott will come back and help me remove it again so I can get the pick. What do ya say Scott??? :wink: Here's what I have though. One right after we put it in and one with some thing bolted on for a feeling of what it is going to look like.


    Overall an exciting day. It definately feels like it is getting closer to completion with every step. Hopefully I can here her purr by May long weekend. Here's hoping.
    Special thanks to Scott (ssheen from turbo-2.com) who was at my place by 10AM and Jarrod (SOLID from srt4oa.com) who stopped by and added a very helpful third set of hands.

    DJ

  9. #29
    Supporting Member Turbo Mopar Contributor
    Join Date
    Feb 2006
    Location
    Edmonton AB
    Posts
    2,082

    Re: 93 2.4l DOHC Shadow

    Tonight I got started on the electrical but I forgot to post my fuel mods so I'll do that first.

    A guy at work who is a genius with bending tubing helped me bend up some 3/8" stainless hard lines to go from the engine back to the tank. All right, he didn't really help me as much as he did it for me. Sometimes it's nice having someone who can do the job the first try and in about a tenth the time . I can say I bent the fuel pump lines though. Mating up to a 255 lph Walbro, I made those 3/8" as well since it seemed pointless to me not to. The hard lines worked great and only cost me $40 instead of a couple hundred to run braided. With a bit on minor tweeking on the car they fit like a glove and should last forever. All the ends are 37deg JIC so they will fit with all the automotive AN fittings.


    Rumor has it that welding stuff gets hot. Not quite sure what else I could have done about this but luckily they didn't short out.


    For the wiring I started with the factory harness and removed essentially everything except the lighting and the few other wires that still applied. I'm excited to make up a clean harness with minimal branches. I always hated how ugly the factory one was. I also think this one is my biggest weight saving mod. The pile of left over wire is crazy, albeit I will be adding the megasquirt wires in but there won't be near that many.

    Here's the factory harness before I started.


    And after tonight. (Hint: The right side is the keep pile ) Sorry for the fog. My wife was spray painting some tables. You don't really notice it until you try to take a picture. lol.


    Now to start laying out the MS wiring and getting that in. I don't expect it will be too difficult especially with my past experience.

    DJ

  10. #30
    Supporting Member Turbo Mopar Contributor
    Join Date
    Feb 2006
    Location
    Edmonton AB
    Posts
    2,082

    Re: 93 2.4l DOHC Shadow

    Finally got the under hood wiring done. It takes so long when you do it a couple hours at a time. The planning alone took quite a while but in the end it is worth it for a clean job. Here's some pics for no better reason than to make myself feel like I am making progress.

    Step 1: lots of planning and recording. Record every color, plug pin, fuse and relay and you will thank yourself in the end. Pay close attention to your planning and you should get it right the first time.


    I found a *cough* Ford *cough* fuse box that had almost the perfect number of fuse and relay spots with just a few spare which is always good. I was quite happy to do away with the fusable links. This is fed straight from the battery with a 4ga wire. The hardest part of the whole piece was getting the Ford logo sanded off the cover.


    880cc injector wiring and some alternator wiring.


    One complete main harness to the whole engine is how I like it.


    I used Deutsch connectors for the engine and inside the body to make the engine harness still removable like it was from factory. I will also be adding another plug for the harness going to the back of the engine but 1 plug is not in yet. Then I will remake the bracket to house both conectors at 90 deg to each other. I am also going to use hard line and quick connectors for the vaccuum lines so the engine will be easily removed with 2 connectors and some quick connects.


    Of course all this will be loomed. I just wanted a few pics before it was covered up. And since pride comes before a fall I will most likely loom it before it gets tested. After all whats trouble shooting if you can see all the wires??

    I know I have griped at others in the past for using scotch locks and butt connectors under the hood and I realize that in some cases that is because they don't know how to solder. So I took a pic of the steps to do a good solder job and seal it up well. In this picture you will see bare wires at the top twisted together end to end to get a clean joint. Sometimes when the wires are coming from the same direction it is cleaner to twist them side by side but I'm definately not a fan of the ol twist tie and folded over routine. Once the wires are twisted together get your soldering iron nice and hot and place it on the wire. Technically you are supposed to wait until the wire is hot enough to start melting the solder but I find that if you wait a bit then give it a little dab the solder will start to melt into the wire and help the heat transfer making the procedure quicker. After this first dab then only touch the solder to the wire and wait until it is hot enough to start drawing the solder in. You want a joint that looks like the second wire where the solder takes the form of the wire and there are no blobs just sitting on top. After that you want to seal the joint. A tight wrap of tape is fine but for ultimate sealing use some heat shrink (which needs to be slipped on the wire before the soldering is done) and shrink that on the joint. Then tape over the heat shrink and you will have a really good seal. Just make sure the heat shrink is the proper size so it seals all the way around the wire. If you are using just tape then let the wire cool first so the tape doesn't melt and thin out. Then give a tight (but not too tight) wrap of tape and the joint will be good for years. I have done absolutely thousands apon thousands of under hood connections this way without a single failure due to corrosion.


    Hope that helps some one out.

    DJ

  11. #31
    Supporting Member Turbo Mopar Contributor
    Join Date
    Feb 2006
    Location
    Edmonton AB
    Posts
    2,082

    Re: 93 2.4l DOHC Shadow

    Quote Originally Posted by SpeedEuphoria
    Lookin good as usual!

    What model is that fuse box from? I need something to clean mine up a little.
    LMK
    Mine is from a pre 96 Grand Marquis/Crown Vic though I found a pic of a 2008 with the same box in the same location so probalby anything about 93 and up would have it. Here is a pic of a 94 and you can see it on the front of the passanger fender. (left side in the picture) Take the three nuts off from inside the wheel well and you have a box and mount. Super easy to get.


  12. #32
    Supporting Member Turbo Mopar Contributor
    Join Date
    Feb 2006
    Location
    Edmonton AB
    Posts
    2,082

    Re: 93 2.4l DOHC Shadow

    Well it's been a while since I have added any updates but not because I haven't been working on it. I have been taking care of all the little details like getting the dash in, interior pieces, running fuel and oil lines, making the throttle cable bracket and such which really aren't that interesting. Last night though I finished tacking up the exhaust which is a little bigger of an event so here's some more pics. The exhaust consists of 4" from the Holset going to a Badlanz HPE electric cutout and then reducing to 3" and going through 2 Magnaflow straight through 3" mufflers. I had 1 on my last Shadow and it was getting a littel droney so hopefully the second one will help things out some more but still should make any more restriction. I also always hated how the mufflers hung so low so I notched out the bumper and brought the pipe straight back from the tight spot around the rear spring instead of dropping it so the muffler would clear the bumper. I think it looks pretty clean and the tip just pokes out fromt he bumper cover.

    4" coming off the turbo


    The electronic dump just behind the K member


    The first 3" Magnaflow right about where the cat goes


    Rear muffler


    I also got a chance to wash the car finally after the long dusty winter so I took a snap outside. I know it doesn't look much different but I think this is the first good shot of the paint color.


    Things are getting pretty close so I really getting excited to fire it up. I would expect in the next few weeks I should be able to turn the key for the first time

    DJ

  13. #33
    Supporting Member Turbo Mopar Contributor
    Join Date
    Feb 2006
    Location
    Edmonton AB
    Posts
    2,082

    Re: 93 2.4l DOHC Shadow

    Well, this part of the project kinda sucks since it is all the little left over crap that takes forever but really isn't very interesting. But since you asked I finished the welding on the exhaust and wrapped the upper portion since it gets a little close to things under the hood. I also got all the brake lines made, brakes installed, e-braked adjusted so it actually works, and most everything under the car finalized.


    Things are getting closer though. Hopefully this week I will have all the wiring finalized and loomed. Then I need to add a couple things to the Megasquirt, make a water neck so the upper rad hose clears the intake properly without rubbing, finalize a placement for the power steering reservior and route the lines, make a gauge panel that doesn't look hacker, and do all the final aluminum polishing and sealing. Then it's vroom time 8) ........FINALLY.

    DJ

  14. #34
    Supporting Member Turbo Mopar Contributor
    Join Date
    Feb 2006
    Location
    Edmonton AB
    Posts
    2,082

    Re: 93 2.4l DOHC Shadow

    Last night was a good night. I finally got the engine completely assembled for hopefully the last time before I start it. I got sent to Europe for 3 weeks at the end of June so I am pretty much a month behind where I wanted to be but you kinda gotta take those trips when you can. Since I got back (a week ago) I've finished polishing all the parts, sealed them with some zoop seal, finished cleaning up the wiring, and finished the assembly short of the intake brace and vacc lines from the intake to the vacc manifold. I only hit one sag...........which unfortunately is a major snag. I miss calculated where the axle would be and my oil drain fitting ended up very very close to it when it was off the ground..........uncomfortably close. Well now that it is on the ground it is just slightly touching the drain which makes it even more uncomfortably close. I think I can fix it by dropping the pan and sinking the fitting in deeper to give the extra clearance needed. It will still be close but it shouldn't hit with the suspension movement or some axle vibration. I think I can sink it in close to 1/2" which should put me out of harms way. If that doesn't work I'll have to go to a smaller size (which I have since found out would have been fine to start with ). That would suck since I would have to buy new line, fittings and refabricate the piece on the turbo which wasn't terribly easy the first time. O well, I'll get er figured. Here's some pics as always.

    I wasn't real happy with my polishing wheel on the bench grinder. It didn't have enough power and the grinder made it hard to work around with some parts. So I figured I would build something better and this is what I came up with. It mounts to my bench, has a 1750 RPM 3hp motor, SS 1" shaft, and holds threee wheels. The motor is lower so I don't have to work around it and it folds up so I can hang it on the wall when I am not using it. I would say in the parts I had left to polish it saved me a good 6 to 8 hrs. Well worth it IMHO


    But just because the polisher works better doesn't mean it is any cleaner. It's a dirty job but somebody's got to do it. And I even tried wearing a dust mask this time. Alot of good that did.


    Some completed engine pics. Sorry for all the dust and the some what blurry pics. For some reason the camera was having some issues focussing in the garage. I need to get it out and give it another clean again. Plus take some better pics in the sun.


    Aeromotive 1:1 FPR. This feeds the Lorenzo fuel rail with 880cc Delphi injectors from a Walbro 255l HP pump going through 3/8 SS hard line and then to -6 braided. The -4 line goes to a guage isolator wich hooks to an autometer fuel pressure gauge inside the cab.


    And finally the ooops. Just a tad too close there.


    If you read this SpeedEuphoria.......how close is your axle to the oil drain. You put yours in the same spot right? I may shoot you a PM on this as well.

    DJ

  15. #35
    Supporting Member Turbo Mopar Contributor
    Join Date
    Feb 2006
    Location
    Edmonton AB
    Posts
    2,082

    Re: 93 2.4l DOHC Shadow

    Well, got the oil drain fixed. I mean pffft.........how much room does a guy really need? I have about 3/8" now which is still pretty tight but if my axle deflects that much I think I have more things to worry about. I ended up getting a new fitting and turning it down to fit further in the pan and then I shave the end of the nut off so it would come in closer. I ended up with a few less threads than I was expecting but it tightens up fine and it isn't a pressure line anyway.


    I also updated the pics on my last post since I didn't like how blurry they were and things look a little neater now.

    DJ

  16. #36
    Supporting Member Turbo Mopar Contributor
    Join Date
    Feb 2006
    Location
    Edmonton AB
    Posts
    2,082

    Re: 93 2.4l DOHC Shadow

    This week I finished up the Mega Squirt. It is a V3.0 mith a MSII chip. I also added a Peak & Hold board ( http://www.jbperf.com/ ), inputs for table switching and launch control as well as outputs for fan control, boost control and PWM idle control. I also added a switch for a manual fan override. I finished the center gauge cluster, mounted the tach and the wideband display. I figured since I was going with an external tach (my only ricer mod......it was a hard choice) and water temp I would use those spots for the wideband to keep from useless redundancy. It all turned out well except I might make another cluster in the future. I'm not completely happy with the fit (though you can't tell in the pics). I also need to fit the EGT and water temp into the pillar pod and get those up which should be easy. Some how I also accidently made the car brand new b/c somwhere I lost 165000 km :? . Now the best part of it all is this morning I put oil in it and cranked it for the first time and I know have oil pressure . Next step is putting some fuel in, checking for leaks, check that the injectors are firing and not staying on and then try to start it. A bit of a scary thought but I'm getting a little sick of it being in the garage. Pics as always.


    MSII


    WB gauge in cluster


    Center gauge cluster


    Hopefully the next report will be that it is running.

    DJ

  17. #37
    Supporting Member Turbo Mopar Contributor
    Join Date
    Feb 2006
    Location
    Edmonton AB
    Posts
    2,082

    Re: 93 2.4l DOHC Shadow

    It's alive!!! Worked out a few bugs and then we were able to get it started last night and almost idling on it's own. I couldn't run it too long though since there was no coolant but I'll start making the water neck tonight and then with some more tuning I should be able to get it on the street pretty soon. Thanks to Scott (ssheen on turbo-2.com and a bunch of other turbo dodge forums) for the extra hands and bringing the fire extinguisher

    DJ

  18. #38
    Supporting Member Turbo Mopar Contributor
    Join Date
    Feb 2006
    Location
    Edmonton AB
    Posts
    2,082

    Re: 93 2.4l DOHC Shadow

    well, she's pretty close to done. I would start driving it but I was honest with my insurance company so I wouldn't get screwed down the road and has so far been taking them over a week to get me a quote. Apparently since I have added a turbo and bigger wheels it means I will now drive lilke an idiot and get into lots of accidents and speed where ever I go. With that being the case they had to sign me up for high risk so it is taking stupidly long just to get a quote. I sure hope it gets here this week so I can start driving.


    Here is a quick walk around video. Nothing fancy but moving pictures non the less. It obviously sounds alot deaper since this was taken with my still camera and the mike doesn't pick up the nice low fequencies. The engine doesn't sound that clanky at all. Funny part is probably the quietest part of the video is staring right down the tail pipe LOL. It's not real loud and it has a real nice deap tone to it.


    DJ

  19. #39
    Supporting Member Turbo Mopar Contributor
    Join Date
    Feb 2006
    Location
    Edmonton AB
    Posts
    2,082

    Re: 93 2.4l DOHC Shadow

    Well, I finally got insurance and she's on the road . Being honest with insurance companies sucks but I guess if something does happen I will be thankful. Anyway, Thrusday was her maiden voyage and today I guess could be called the grand public unveiling. My church has a car show every year so I took it out to that today. It got a really good response, especially from the people that used to own one. Randy (Turbo Rampage on most forums) came out too so it was nice talking with him and his dad. I've also begun tuning a bit and so far I am loving the Megasquirt. Tuning realtime is the only way to go IMHO. Here's a couple pics from today.


    DJ

  20. #40
    Supporting Member Turbo Mopar Contributor
    Join Date
    Feb 2006
    Location
    Edmonton AB
    Posts
    2,082

    Re: 93 2.4l DOHC Shadow

    Yes, I put it away at the end of October. Things get a little chilly with no heater, not to mention trying to keep the windshield clear :smile:

    It's hard to give any educated comments on the intake especially since it is a complete new system. What I can say is the car feels really strong on the top end. I've taken it to 6500 @15psi so far and there was no sign of a drop in torque at all. Seat of the pants sign that is. Before I ported the wastegate hole on the Holset I would get this wierd case where it would spool to about ~15psi and then around 5500 RPM it would get a second spool and go uncontrolably. All I can figure is around that RPM there would be a significant enough change in the flow that it would be enough to spool the turbo more. The higher RPM would make sence with a short runner intake and exhaust. Once I ported the WG hole to be able to keep things steady it was better. I still wasn't happy with the MS boost control abilities so I purchased an AVCR which I didn't get till the middle of October. That gave me about 2 weeks to fool with it and get some steady boost in all the gears but by that time traction was getting limited with the cooler weather.

    When March hits I will be looking for a window in the weather to get it back to my garage to start the spring list. I need to re-align the transmission since I feel I missed the mark by enough of a hair to take out the input shaft bearings in just over 2000 km. I didn't really think about lining it up the first time since I assumed the bolts would do that. I was wrong. That means I will also need to check the main bearings to see how they are doing.

    I will also be building some chromoly control arms soon which I will install in the spring along with lengthened king pins and possibly some bump steer adjustments to make up for the drop. The drop will come from a couple Ground Control coil over kits I picked up new for $100 each :good: One thing I didn't like was how high the car rides. I think with another inch of drop it should look much better, and the coil overs will give me much more option when it comes to spring rates. Unfortunately without the car I couldn't calculate the actual rates I wanted to I got a combo of 450lb, 380lb, and 250lb springs that I will try in differeny combinations.

    Oh, and of course I will also tune in more boost and get it on the dyno and out to the track to get some somewhat more scientific speculations on the performace of the intake and the rest of the system.

    Can't have a post without pics so heres the AVCR which I will inset into the dash in the spring for a cleaner look. I'm not a real fan of it sitting out like that but it got the job done for the 2 weeks I used it.


    The full "----pit"


    My BRAND NEW!! $100 Ground Control kits.....possibly the best score of the year. The first is for a prelude, and the other is for a focus.


    Once I start the control arms I will post some progress.

    DJ

Page 2 of 50 FirstFirst 12345612 ... LastLast

Similar Threads

  1. Engine 2.4L DOHC Turbo Valve Cover
    By DC Turismo in forum Parts Wanted
    Replies: 1
    Last Post: 05-18-2009, 04:43 PM
  2. 2.4L DOHC Head for sale
    By ShelbyLancer455 in forum Parts For Sale
    Replies: 2
    Last Post: 09-15-2007, 04:54 PM
  3. SHADOW PART OUT w/ PICS
    By tryte in forum Parts For Sale
    Replies: 10
    Last Post: 08-01-2007, 03:06 PM
  4. 2.4L DOHC head injector size??
    By Clay in forum Electrical & Fuel System
    Replies: 5
    Last Post: 08-30-2006, 05:54 PM
  5. Pics of my 2.4l Shadow SRT4 Project!
    By Darkapollo in forum 2.0L/2.4L 16V Engine Swaps!
    Replies: 32
    Last Post: 07-25-2006, 01:44 PM

Tags for this Thread

Posting Permissions

  • You may not post new threads
  • You may not post replies
  • You may not post attachments
  • You may not edit your posts
  •