spend every dime on decent shocks, springs, struts and tires.hmm what could I do with the extra $859.


spend every dime on decent shocks, springs, struts and tires.hmm what could I do with the extra $859.
Buy a snowblower so you can dig it out in time for the event?Originally Posted by GLHNSLHT2


1986 Chrysler Lebaron 2 dr. R.I.P. 2.2 T1 log intake, modified to intercool Best 1/8th 9.03@77mph / Best 1/4 14.16@93.55mph Running on E85:nod:[SIGPIC][/SIGPIC] '93 Spirit 2.5 TBI 5 Spd(sold), '85 Ramcharger, 360 4brl, NP435 4 Spd. The new ride; '90 Sundance 2.5 T1/5 spd. FMIC(from Ford Probe) new Mitsu; Best 1/8th 8.96@79.16 / Best 1/4 14.06@101.27


hehe, The Yorker has been out, it's the Tona that's still stuck in the shop. I can't get the gates open to get my buddies bobcat down there to even plow if I wanted to. There's still over a foot of frozen snow and ice behind the gates and I'm not spending 4hrs to try and dig it out. It can stay there till the snow melts.

Thanks man, let me know what you find out (at your convenience)!
[FONT="Arial Black"]Paul[/FONT] [B][SIZE="1"]US ARMY INFANTRY VETERAN[/B] 1995 Dodge Stealth R/T White DOHC 5 speed 1994 Dodge Stealth R/T Red DOHC 5 speed 1992 Dodge Daytona IROC, Blue TI 5 speed (2) 1992 Dodge Daytona IROC, Red TI auto 1991 Dodge Spirit R/T, Red (project) 1989 Shelby CSX-VNT #382 1989 Dodge Shadow ES, White TI auto 1987 Daytona Shelby Z, White TII 1987 Chrysler T&C wagon, Tan TII auto 1985 Dodge Lancer ES, Bronze TI auto 1982 Wife, White[/SIZE] [SIGPIC][/SIGPIC]
This is VERY sound advice for competing in the Challenge. BTW, I really enjoyed meeting Pat down at Gainesville last year. I'll be down with the Colt this year and Matt is bring the Talon back with a bigger turbo.
-Les

Hopefully you can get those trim parts off for Paul. I also have a Voyager LX and they have some unique trim pieces that can be hard to find. I think the Caravan ES had some of the plastic trim but not the shiny trim. Even the rear tinted windows are different with ghost stripes in them. Best of luck in the 09 Challenge. Hopefully you can sell some Voyager parts and win the Challenge without spending any money!! Only in a Turbo Mopar.
Thanks
Randy
There is no logical reason to call an Engine a motor.
Randy Hicks
86 GLHS60
86 GLHS 373 : SOLD, but never forgotten
89 Turbo Minivan
83 Turbo Rampage : SOLD
Edmonton,Alberta,Canada
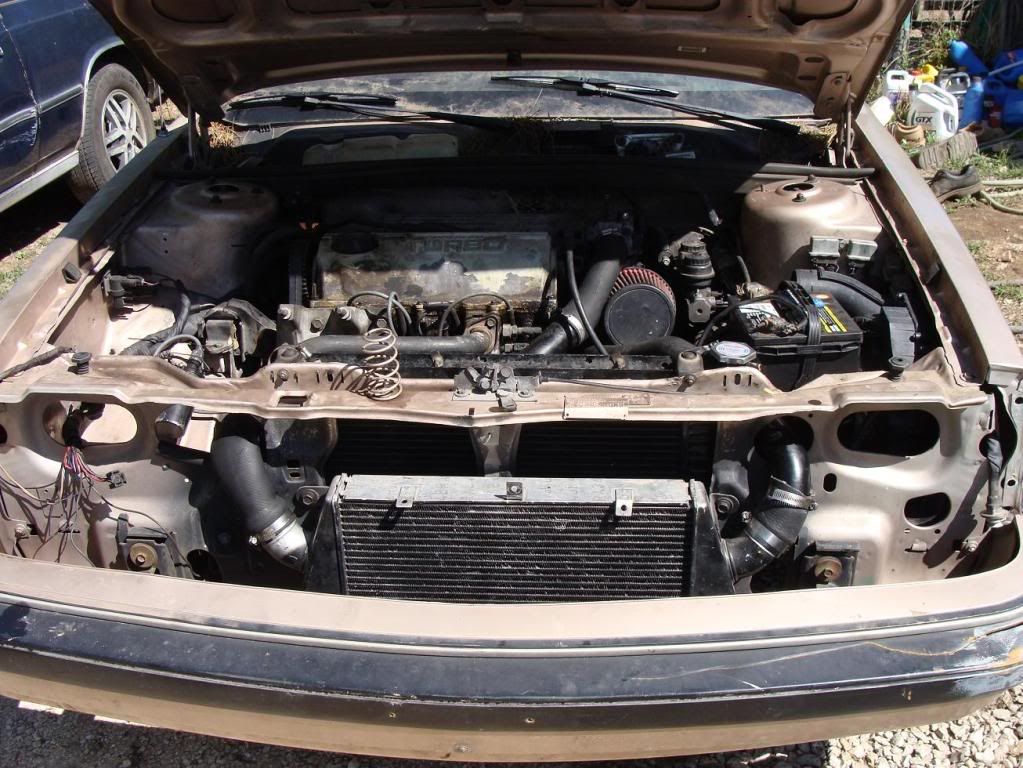
Over the last two weekends, Mason and I moved the radiator, mounted the intercooler, filled the cooling system, checked the cam and ignition timing, took out the nasty temporary 413, put in the 520, and took a test drive.
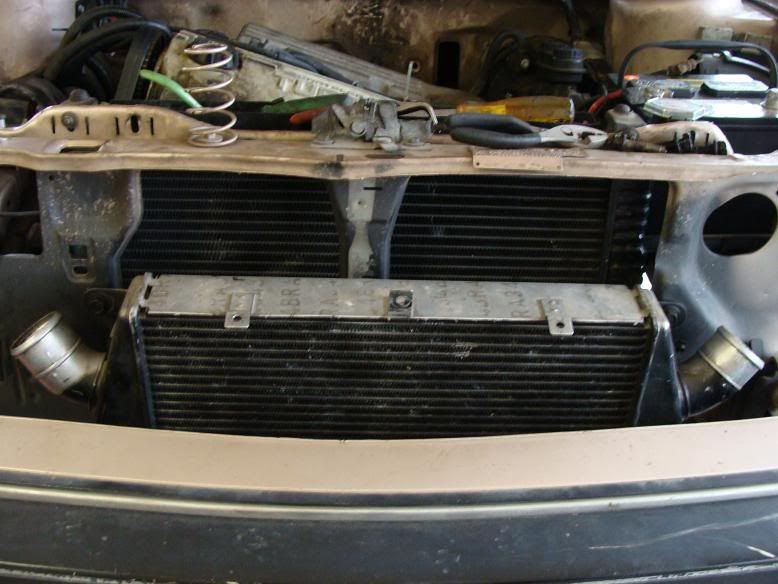
Fits like a glove!! I swear, mounting this intercooler in this car was just ridiculously easy! You can see i enlarged the opening on the left. The one to the right will probly get the treatment sometime soon.
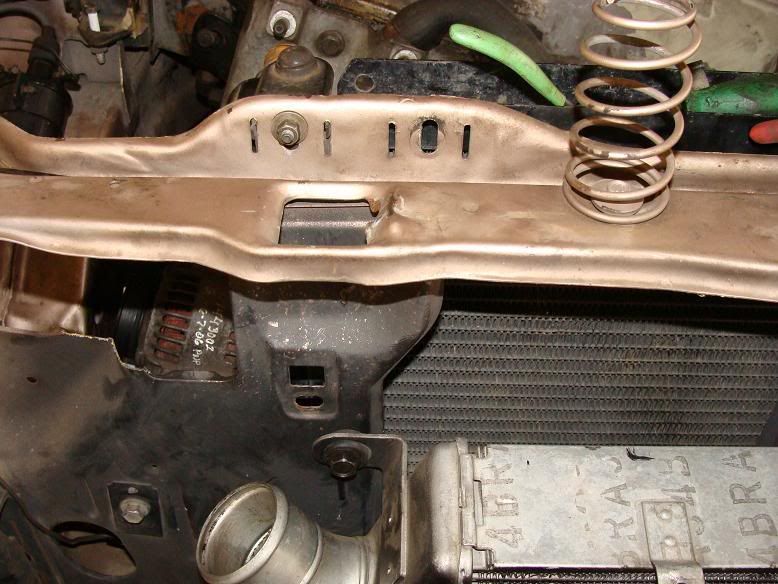
We moved the radiator a few inches to the passenger side to make room for intercooler plumbing on the driver side. Luckily, there was a pre-existing set of upper and lower mount points on the passenger side.
The top mount on the driver's side consisted of bending some metal with pliers and drilling a single hole.
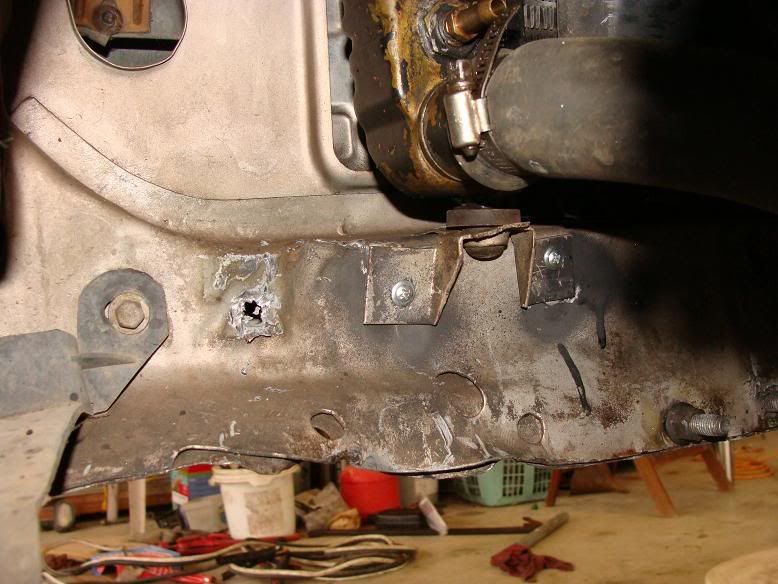
The lower mount we simply knocked off with an air chisel and moved over two inches and secured with some self-tapping sheetmetal screws.
We upgraded to one piece axles after the previous axles became two-piecers during disassembly.
Now that we have a GRM magnet, we're sure to get in the mag!
Now for the test drive.. Take note of the wonderfully squeaky water pump and hilariously strong bucking motion.
http://s279.photobucket.com/albums/k...ent=Movie1.flv
http://s279.photobucket.com/albums/k...ent=Movie2.flv
YEEHAWW!!!!

Personally I'd figure on tacking that down, or I'd have done it with JB Weld/Epoxy underneath, or I'd have bolted it, because I wouldn't want vibration breaking it loose in the thick of competition... guess you could add a screw or two more each side or pop-rivet it too.
BTW, bushings and mounts ... the no brainer choice is of course Johnny's line of products, polybushings... but since a full set eats 1/4 of your budget, here's what people who don't have PB for their cars do, and the cheapskate way...
Fill the front and passenger side engine mounts with polyurethane windshield adhesive, sets up real stiff. Transmission mount can't be filled it works different. Look in hardware/boating supply stores for "bow blocks" and bumpers for boat trailers, some of them are solid poly chunks that you can carve to shape for $5-$10.
Control arm bushings, the classic circuit racer trick is to replace these with solid bushings, you'd figure on using a stack of washers for the stub strut and sections of metal tube cut to size for the pivot bolt. This will give you a lot of road noise and vibration on the highway, but will stiffen it up real good, that's why PB are a good compromise between streetability and handling.
Swaybar, the one on the minivan is probably bigger.... you could cut bushings out of the boat trailer bumpers for those too.
swaybar bushings from johnny are fairly cheap. The one that is already on the car is fairly large, and i have a 1 1/4 that may or may not work in these control arms.
I can always add more sheetmetal screws to that bracket, probly 15 more if i wanted, lol. The whole box of screws only cost $3. Theres a section on top with 2 more screws that isnt seen that i think takes most of the load, though.
I think our next step will be fixing the driveability issue and piecing together our intercooler plumbing. I want to get the thing running 80-90% of what its gonna run before i start putting suspension together. I dont want a super fast autoX car thats only running 15s. Not gonna win that way! Seems like the top 10 from last year were mostly running 11s-13s 1/4.
Speaking of which, im curious as to the BASIC major parts motor setup on Pat's shadow...Doubt id be willing or able to duplicate it anyway!

http://www.turbo-mopar.com/forums/sh...ad.php?t=35146
See post 17...that will give you an idea of the basic motor set up.
Glad to see the car is up and running! I've been moving along on mine lately fabbing little parts here and there. I'm changing a few things around, but the basics will be the same.
Oh bother! guess that won't be happening for this car. I think we can run 13's on what we've got, though!
Gotta work on breaking 30 mph and getting into 5th gear first though..
Fun project and awesome pics!
1986 Chrysler Lebaron 2 dr. R.I.P. 2.2 T1 log intake, modified to intercool Best 1/8th 9.03@77mph / Best 1/4 14.16@93.55mph Running on E85:nod:[SIGPIC][/SIGPIC] '93 Spirit 2.5 TBI 5 Spd(sold), '85 Ramcharger, 360 4brl, NP435 4 Spd. The new ride; '90 Sundance 2.5 T1/5 spd. FMIC(from Ford Probe) new Mitsu; Best 1/8th 8.96@79.16 / Best 1/4 14.06@101.27
more pics, i cant wait, nice goal
Very quality thread here, good stuff
Mason and I finally got a chance to work on the Aries project once again.
Where last we left off, the car was running with no turbo plumbing and bucking violently.
Today, we showed up and got right to work on the driveability issue. Turns out we had the map vacuum line on the wrong port on the baro solenoid.. that was fast and easy! Car runs great!
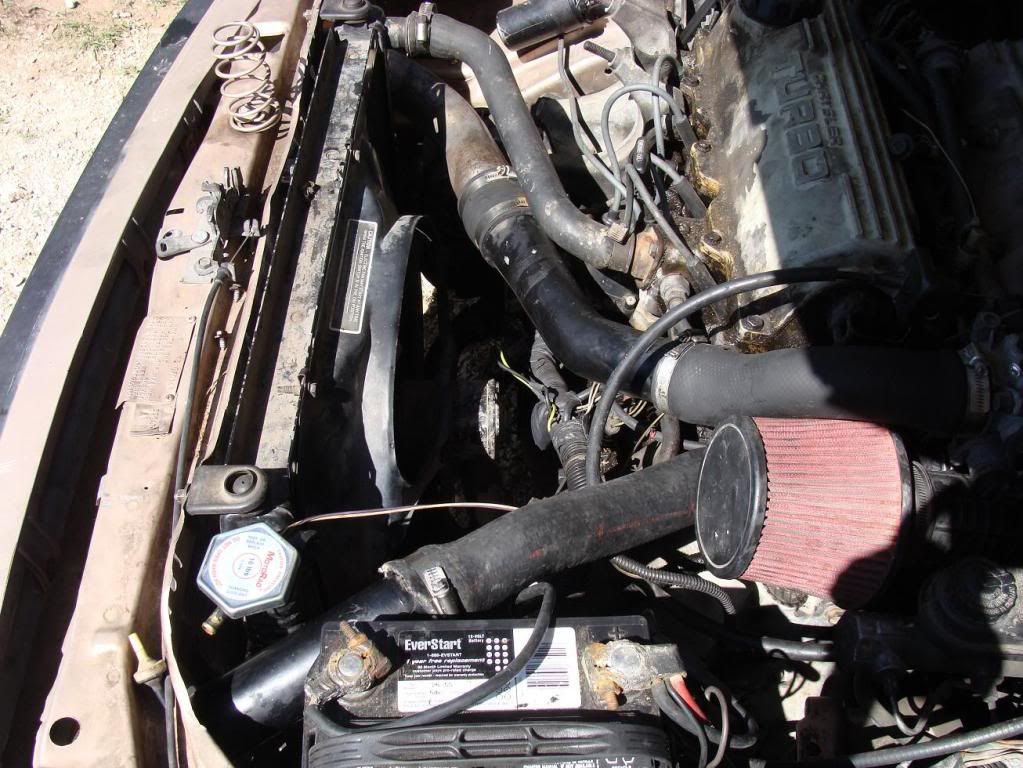
Ok.. dig out all the intercooler plumbing that came off the old turbo van. We start mixing and matching pipes and couplers and with the addition of an old l-body lower intercooler hose, turns out we are only one 90* turn short of a complete intercooler plumbing system!
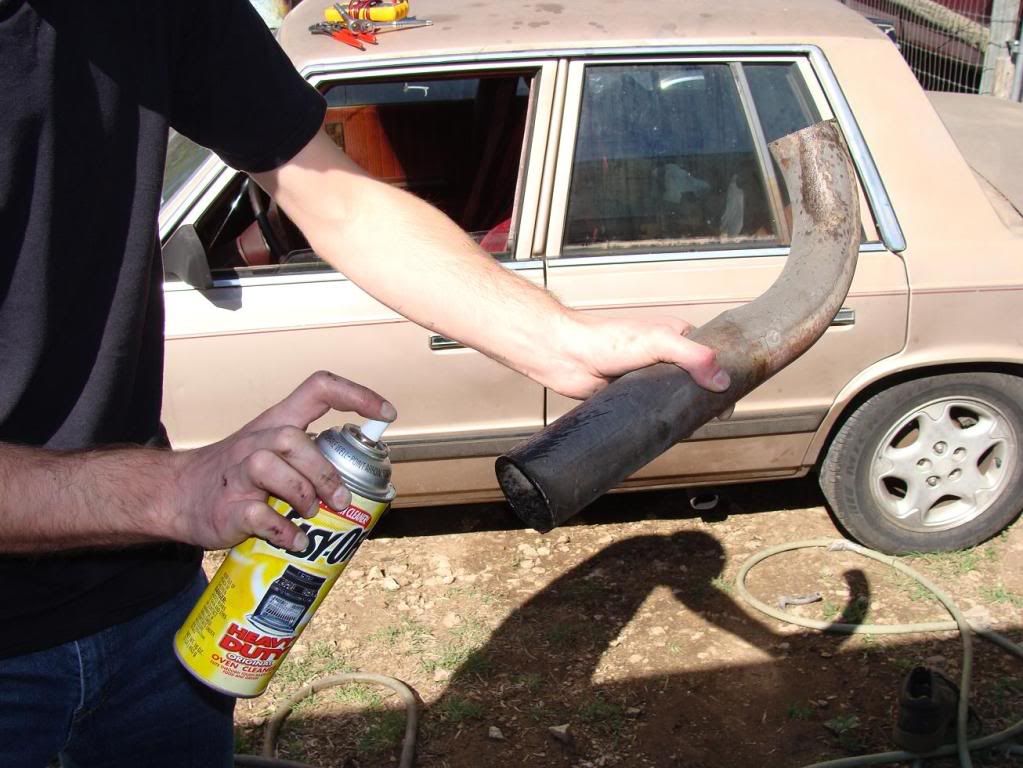
Turns out the tailpipe off the parts dakota is a perfect candidate! One harbor-freight-sawzall cut and it's ready! Of course it was carboned up pretty good, and i didnt have any automotive solvents at all.. Luckily oven cleaner works pretty well! This step cost: 0$
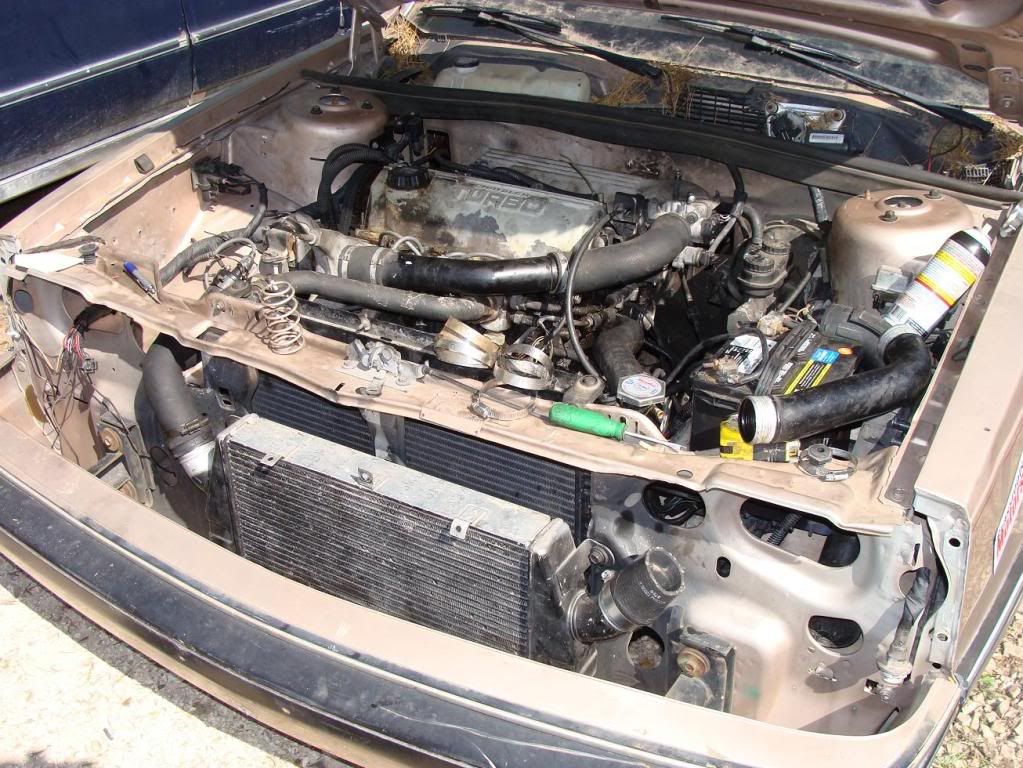
In progress. Turned the battery sideways for clearance. Still 0$.
Finished plumbing. No 1g dsm bov yet as the hard pipe it was on sucked. The cone filter also came from the minivan. 0$
Yay! Now we can boost!
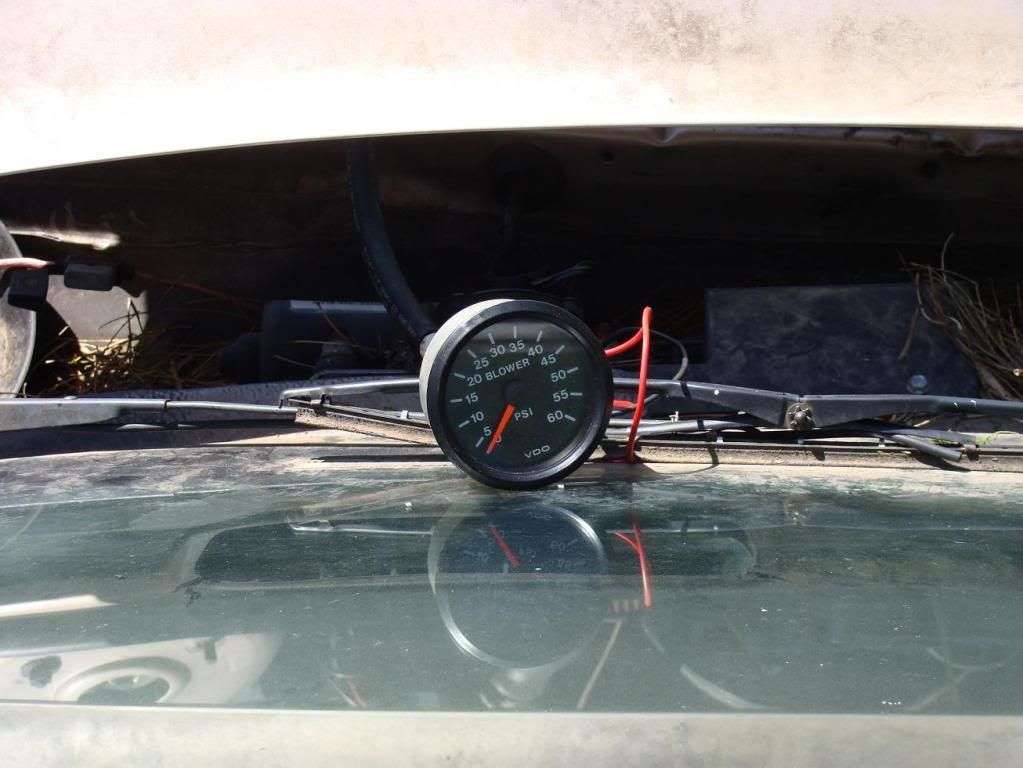
This is an ambitious project, so we used an ambitious boost gauge! 0$
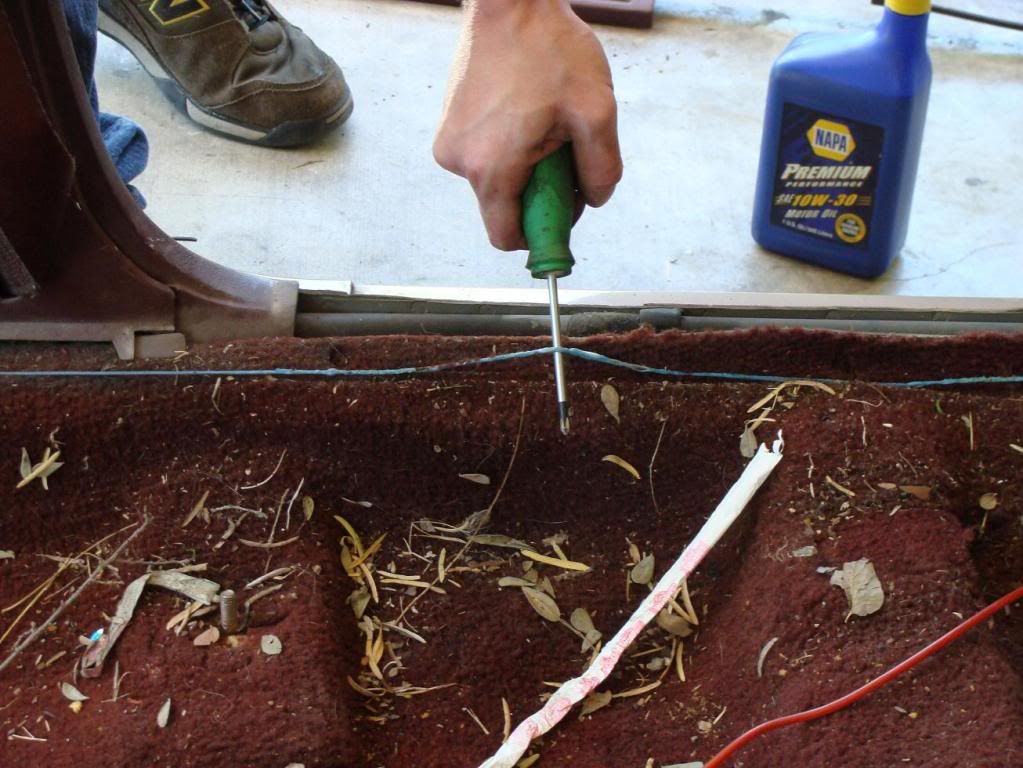
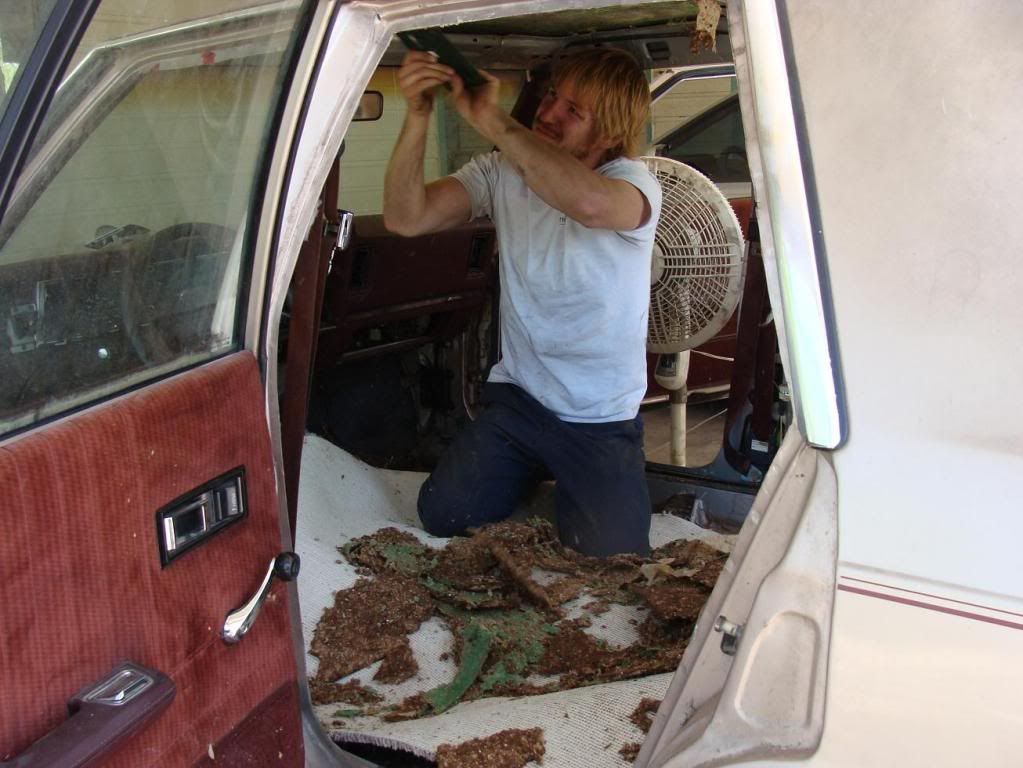
Then we decided to strip out the interior. We removed the carpet, headliner, rear seat upper and lower, rear seat belts, all trim behind the a-pillars, and emptied the trunk. We still have: a-pillar trim, complete dash minus hvac box and radio, front seats and all door panels.
Here's an old amp remote wire that i shorted out many moons ago. It was melted into the carpet and several plastic trim pieces.
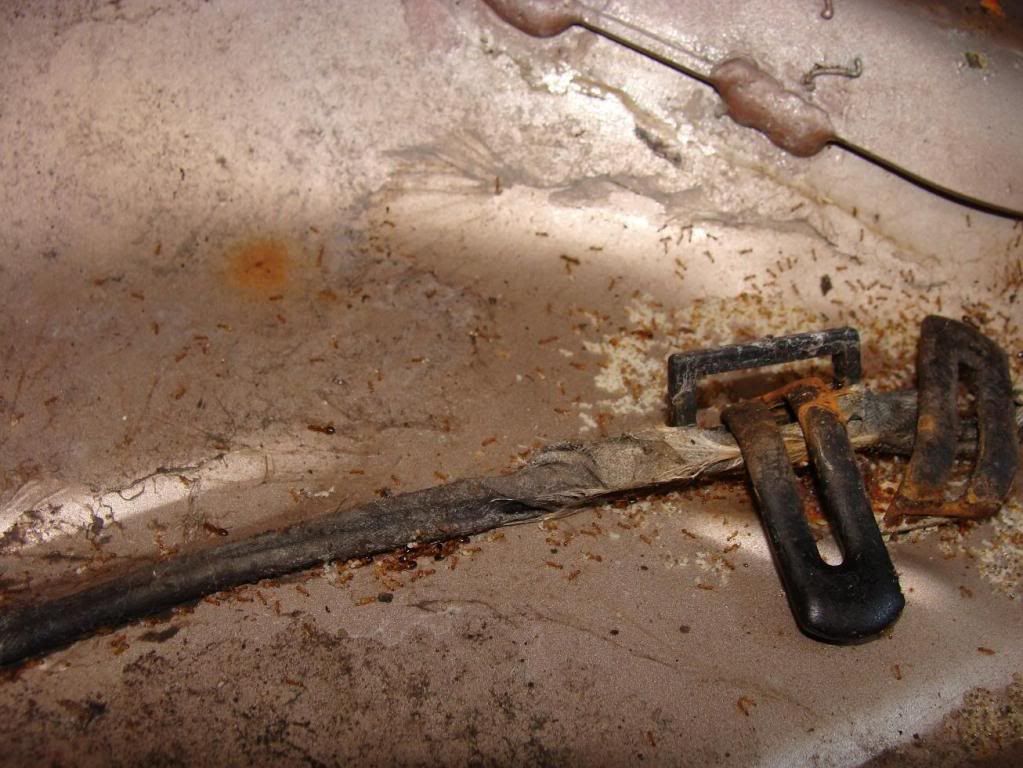
We had wondered what all the many spiders living in the aries were feeding on.. then we found the ant nest under the carpet.
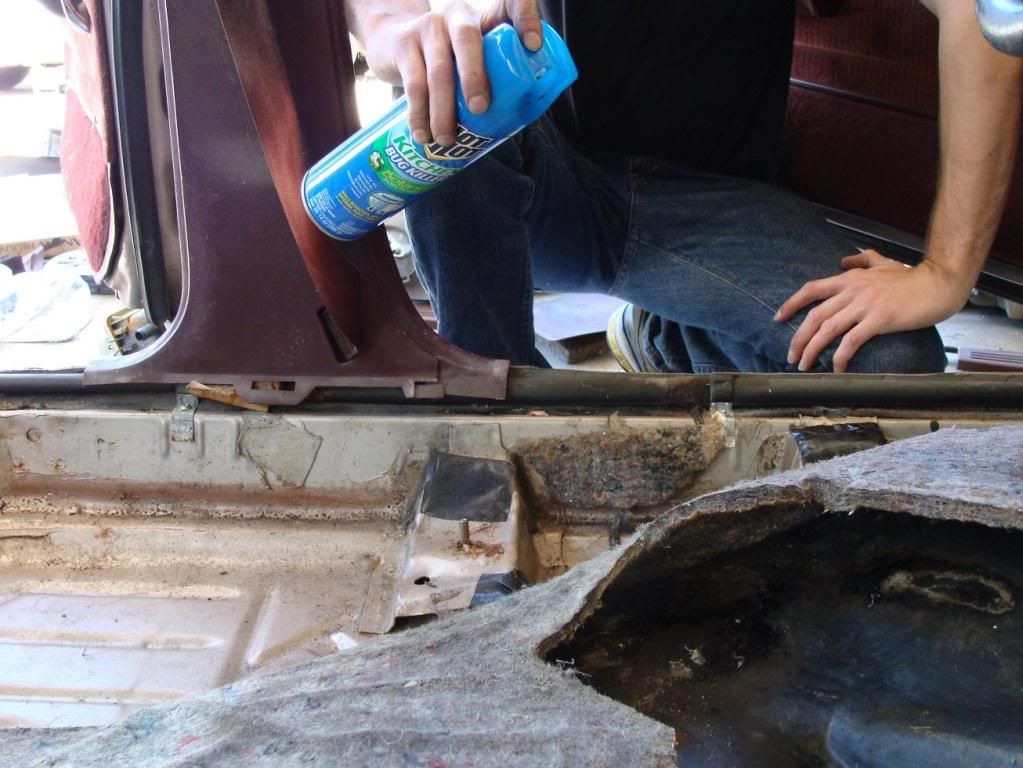
Another 0$ under-sink solution: Ant spray!
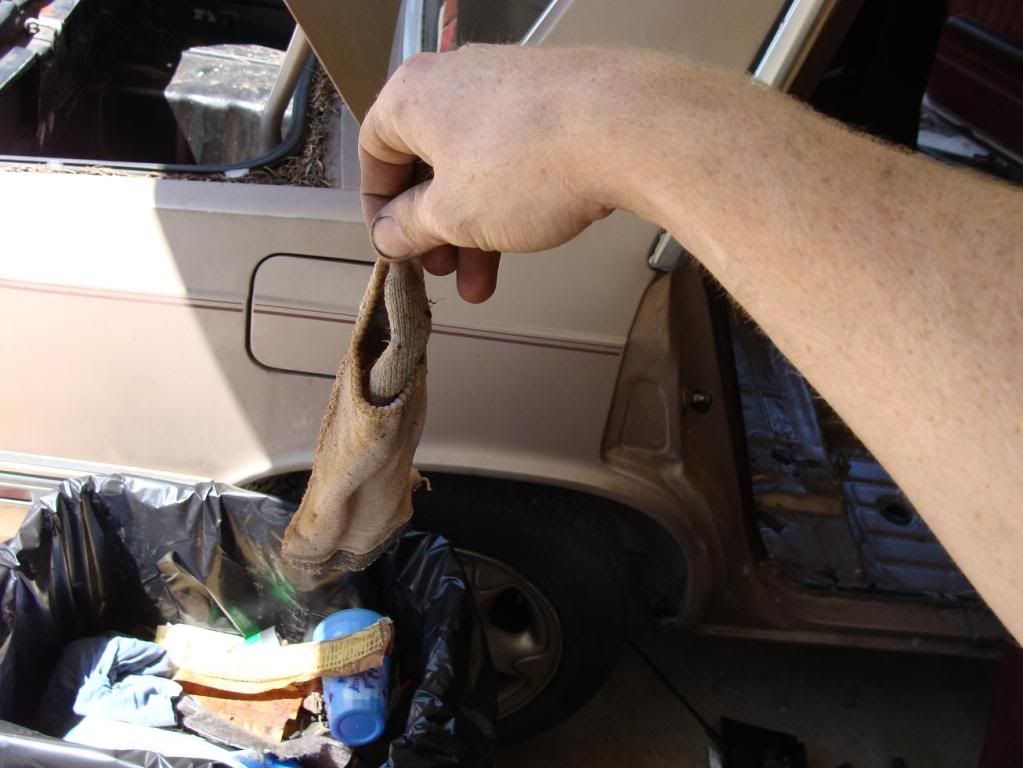
We found many things while tearing this car apart. This soggy article was among the most disgusting.
Scraping all the crumbly glued-on noise insulation off the roof was an unpleasant process.
After stripping the interior and rebolting the seats, we turned the boost up to 13 psi and gave rides to the many people who wandered through the house today. This thing is surprisingly quick! low weight= THE WIN!
http://s279.photobucket.com/albums/k...nt=Movie-2.flv
It's fun! And we still have 45 psi of room to grow into our boost gauge!!
Excellent!
I started on my car today. I pulled the motor out to clean some stuff up on the firewall and do some fixin. I hope she's running again in a week or so.

Looking good
AJ (no More Alan) 84 Rampage RT TIII/568 Quaife 87 GLHS dealer optioned Red 16V Masi/568/Quaife
90 Masi 16V White/Ginger/Black
89 TC Masi 16V Red/Ginger/Black
86 GLHS #110 RoadRace Built 89 CSX-VNT Recaro Car
89 Turbo Mini 'Woody' 85 GLHT 'RedBox'
2014 Explorer DD'r 3.5Twin Turbo Ecoboost AWD and 500HP
My profile page has over 20,000 views, I'm somebody LOL
well, Mason mentioned some possible rules hang-ups with cutting in the doors so we decided to postpone it until we read the rules. We pretty much did exactly as much as we had time for on that one day. Sometimes it can be tricky to dedicate even 6 hours a week to this car, so we try to stay busy and do whatever we know can be done when we have the time.
Id like to keep at least the front doors complete. The back ones can be completely gutted and welded shut from the inside for all i care. The dash has plenty of stuff left to come out of it. As for hole-sawing, etc, itll probably wait until the car is mostly done and do that kinda stuff in our free time once we can keep the car at one of our houses and work on it during the week. Right now he drives 21 miles and i drive 60 to go work on it so that stuff is pretty impractical for now.
Im loving this project!
wow that is some crafty looking plumbing for Freefifty hah
very nice results in one day and the drive vid shows it
 Posting Permissions

 Reply With Quote