


So this is actually part of another project I'm doing. At any rate I thought I'd share this as it might help some people looking to do something similar....This is on a 3.0V6, but the same thing applies...expecially the fuel pump assembly.
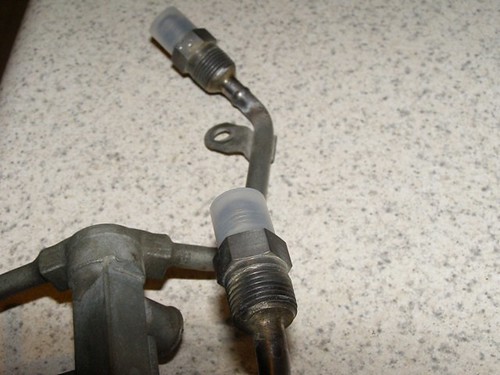
OK, here's the pictures. This is a 1990 fuel rail. All we really did was cut the FPR flange off. The rest was just drilling out the adapters until they fit on the tubes, then brazing them on. Keep in mind that I still have to paint this thing, so it looks pretty ugly right now! I also have to find some sort of protection for the stuff on the fuel pump assembly...
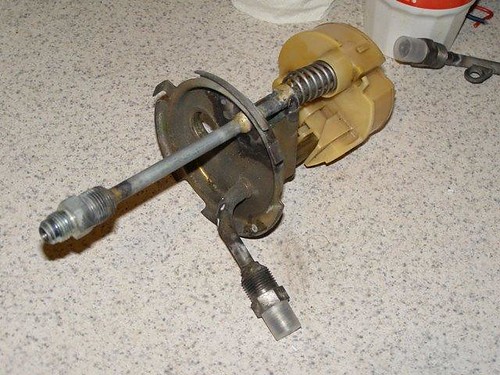
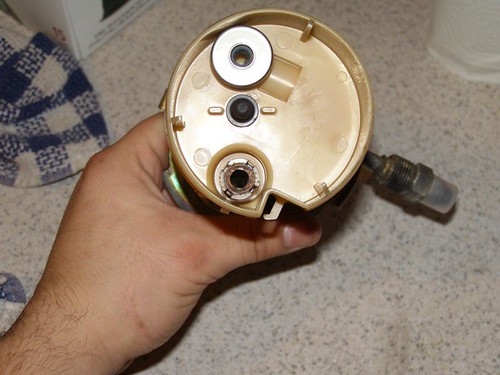
We did the same thing to the supply coming out of the fuel pump assembly. The return was the tricky part because it comes out as 1/4". It would not be smart to try and step all the way up to 3/8". Besides...I'm going to need a good return! So, here's what we did! BTW, make sure to remove the pump wire harness connector from the pump assembly before attampting to braze! You will melt it if you don't. I was fortunate and remembered!
#1: cut off return elbow coming off of pump assembly
#2: drill out tube all the way through the hanger until 5/16" brake line fits through the holes.
#3: swing pump housng down(catch spring!!!) and take what is left of the return line out
#4: take apart return line check valve and remove check valve body from old line
#5: drill check valve body out until it fits snuggly over 5/16" brake line(do not install yet!)
#6: flare one end of 5/16" brake line
#7: slide check valve body over 5/6" brake line until seated against flare
#8: modify spring to fit over 5/16" brake line
#9: install 5/16" brake line through bottom of pump housing, then spring, then hanger, then pump assembly
#10: hold pump housing against spring with slight pressure for pretension while keeping check vale body seated against top of pump housing.
#11: braze return line to hanger while holding step 10(2 people make this easier)
#12: braze underside and topside of return line to pump assembly
#13: braze on modified adapter
#14: bend return line to desired angle.
The results look like this!
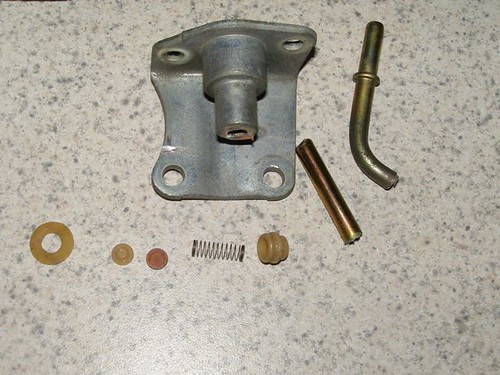
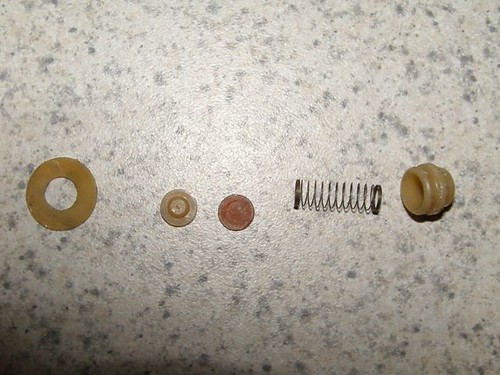
This is a picture of the guts of the return line check valve(minues the body since it is on the new return line) in the order they come out. The washer actually sits on top of the check valve body. I'm really not 100% sure why this is in there, but I didn't see a real need for it...the older cars I don't think ever had anything like that...
This last picture just shows the leftover parts that can be disgarded.


 Reply With Quote
 Oh well...it's done now. You're looks a bit neater than mine, but I haven't "dressed" it at all either. I'm also running an MSD booster external pump too...I don't want to chance anything with the amount of nitros this thing huffs!
